
Lawn
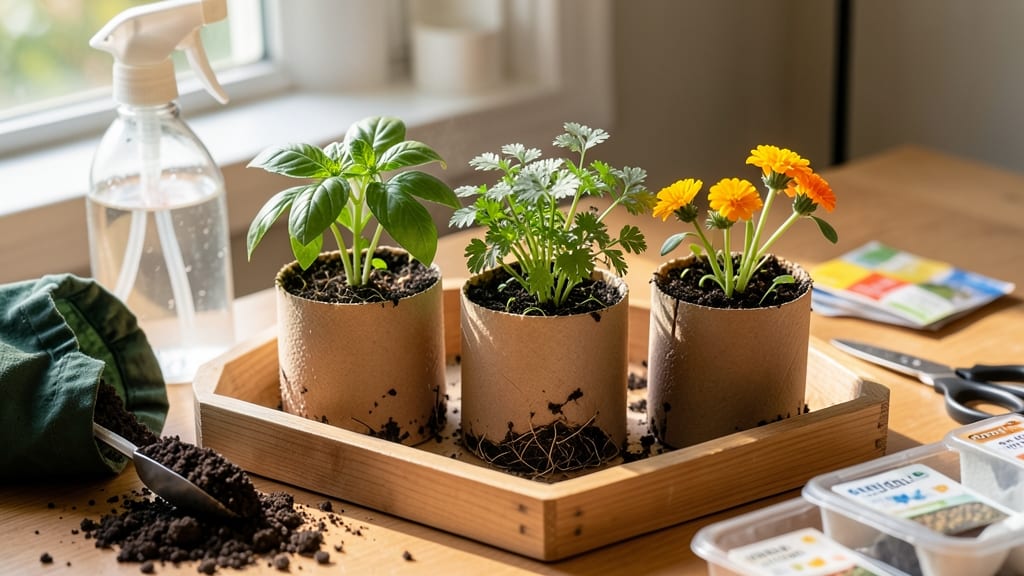
Transforming empty toilet paper rolls into thriving seed starters is the simplest way to grow seedlings without waste. 🌱 I started this method after realizing how much paper waste I tossed every month—and now my seedlings get a head start while keeping my garden eco-friendly.
All you need are toilet paper rolls, potting soil, seeds, and a spray bottle for moisture. Cut the rolls into 3-inch sections, fill them with damp soil, and plant 2-3 seeds per roll.
The best part? These starters cost almost nothing and take up minimal space until it's time to transplant.
In just 7 days, you'll see tiny sprouts peeking through the paper—ready to move into pots or straight into the garden. The roots grow strong in the roll, so transplanting causes less shock than bare-root seedlings.
Works for almost any small seed: herbs, flowers, or even veggies like lettuce and radishes. Perfect for beginners or anyone looking to cut garden waste. Here’s how to do it right the first time.
📚 In This Guide
- What you need
- Instructions
- Tips and common mistakes
- Wrapping up and next steps
What you need
- ● Toilet paper rolls – 5-10 clean, empty rolls (unbleached or recycled preferred).
- ● Seeds – Fast-growing varieties like basil, lettuce, radishes, or sunflowers (check seed packet for sprouting time).
- ● Potting soil – 1-2 cups of lightweight, seed-starting mix (or compost + perlite for DIY).
- ● Water spray bottle – For gentle hydration (or a small cup with a spout).
- ● Scissors or knife – To cut toilet paper rolls if needed.
- ● Tray or shallow container – To catch excess water (a baking sheet or plastic tub works!).
- ○ Plastic wrap or damp paper towel – To create a mini greenhouse effect (optional but helpful).
- ● Plant markers – Popsicle sticks or toothpicks to label seedlings.
- ● Grow lights or sunny windowsill – For 6+ hours of light daily.
- ● Fertilizer (diluted) – A splash of compost tea or fish emulsion after 3-4 days.
- ● Twine or rubber bands – To secure plastic wrap if using.
Step-by-Step instructions for toilet paper seed starters
Here’s how to turn empty toilet paper rolls into a zero-waste seed starter system that works in just a week.
🌱 Step 1: Prepare the Toilet Paper Rolls
Start by flattening the empty toilet paper rolls lengthwise and cutting them into 2-inch-wide strips. This creates a perfect seedling pot shape that’s easy to handle. I like to roll them up again loosely—just enough to hold their form—so they fit neatly in an egg carton or seed tray.
If the rolls are still damp, let them dry completely first. Wet cardboard can mold or slow germination. Once dry, fold the bottom edge inward slightly to create a small base that won’t let soil spill out when you water. This tiny detail saves you from messy cleanup later.
💧 Step 2: Moisten and Fill With Soil
Fill each roll with the seed-starting mix (about ½ cup per roll). Press it gently so the soil stays in place but doesn’t compact too tightly. You’ll want the mix to hold moisture without becoming soggy—think of it like a damp sponge, not a dripping washcloth.
Before planting, mist the soil lightly with water using a spray bottle. This pre-moistening helps seeds make contact with the soil more easily. If you skip this, some seeds might dry out before they even sprout. I like to work in batches of 4 rolls at a time so I don’t forget to water them all evenly.
🌿 Step 3: Plant the Seeds
Place 1-2 seeds near the top of each roll, about ¼ inch deep. Press them gently into the soil so they make good contact but don’t bury them too deep—most seeds need light to germinate. I use my finger to tap the soil around them lightly, ensuring they stay in place when I water.
Label each roll with the seed type and planting date using a toothpick and a marker. Trust me, after a week of identical green sprouts, you’ll forget which is which. This simple labeling system keeps your starter setup organized and stress-free.
☀️ Step 4: Provide Warmth and Light
Place the rolls in a seedling tray or egg carton and cover them loosely with a clear plastic bag or humidity dome. This traps warmth and moisture, which speeds up germination. Keep them in a spot with warmth (70-75°F)—a sunny windowsill or under a grow light works perfectly.
Check the soil daily but resist the urge to water again until the surface feels dry to the touch. Overwatering at this stage can cause the rolls to rot before seeds even sprout. You’ll see tiny green shoots in 5-7 days, signaling it’s time to remove the plastic and give them more light.
⏰ Step 5: Transplant When Ready
Once seedlings have 2-3 true leaves (not just the initial cotyledons), they’re ready to move to individual pots. Gently squeeze the sides of the toilet paper roll to loosen it, then slide the seedling out with the root ball intact. This method minimizes root disturbance, which helps them establish faster.
Plant them in their final containers, being careful not to bury the stem too deep. Water lightly after transplanting to help the roots settle. The toilet paper will break down naturally in the soil, leaving no waste behind—just happy, healthy plants.
Tips & tricks for perfect toilet paper seed starters
Here's what I learned after testing this method with dozens of different seeds—these tricks will help you avoid common pitfalls and get better results every time.
Roll Consistency Matters: When flattening your toilet paper rolls in Step 1, aim for strips that are consistently 2 inches wide—this ensures even soil distribution and prevents uneven watering. I've found that using scissors to trim the edges gives you a cleaner, more uniform shape. This consistency helps seedlings grow straight and strong rather than leaning or growing unevenly.
Soil Moisture Balance: In Step 2, when filling your rolls with the seed-starting mix, focus on achieving that "damp sponge" texture. Too much water can cause the rolls to become soggy and rot, while too little will prevent seeds from germinating. I like to squeeze a handful of soil—if it holds together but crumbles easily, you've got the right moisture level. This balance is especially important when using recycled materials like toilet paper rolls.
Labeling System: The toothpick labeling trick in Step 3 is a game-changer for anyone growing multiple types of seeds. I've seen people forget which seed is which after just 3 days! Write clearly and include both the seed type and planting date. This simple system prevents mix-ups when it's time to transplant, especially if you're growing herbs, flowers, and vegetables all at once. Trust me, you'll thank yourself later.
Transplanting Technique: When transplanting in Step 5, the key is to gently squeeze the sides of the toilet paper roll to loosen it before sliding out the seedling. This minimizes root disturbance and helps the plant establish faster. I've noticed that seedlings transplanted this way often have better survival rates compared to those pulled out by their stems. The toilet paper will break down naturally in the soil, leaving no waste behind.
Pro Tips for Toilet Paper Seed Starters
- Here's what I learned after testing this method with dozens of different seeds—these tricks will help you avoid common pitfalls and get better results every time.
- Roll Consistency Matters: When flattening your toilet paper rolls in Step 1, aim for strips that are consistently 2 inches wide—this ensures even soil distribution and prevents uneven watering.
- Soil Moisture Balance: In Step 2, when filling your rolls with the seed-starting mix, focus on achieving that "damp sponge" texture.
Frequently asked questions
Can I use any type of toilet paper for seed starters?
Not all toilet paper works equally well! Opt for 100% recycled, unbleached, and seed-free brands to avoid chemicals or contaminants. Brands like Seventh Generation or Who Gives A Crap are great choices. Avoid scented or dyed varieties—they may harm seedlings.
How long do toilet paper seed starters take to sprout?
Most seeds sprout within 7–14 days, depending on the plant type. Fast growers like radishes or basil may appear in just 5–7 days, while slower ones (like tomatoes) take closer to 2 weeks. Keep them moist and in a warm, sunny spot to speed up germination!
What if my toilet paper seed starter molds or smells bad?
Mold or a funky smell means too much moisture or poor airflow. Let the starter dry slightly between waterings and poke a few small holes in the bottom of the roll for drainage. If mold appears, discard it—don’t risk transferring spores to healthy plants.
Can I reuse toilet paper rolls for seed starters?
Clean and dry used rolls thoroughly to remove any residue, then reuse them. For extra sterility, rinse with a 1:10 vinegar-water solution before repurposing. This zero-waste hack saves money and reduces waste—win-win!
What’s the best way to transition starters to soil?
Once seedlings have 2–3 true leaves, gently remove them from the toilet paper (it’ll dissolve in water). Plant them in soil, ensuring the roots aren’t tangled. Water lightly and keep soil moist until they’re established—avoid transplant shock!
Wrapping up and next steps
Transforming toilet paper rolls into thriving seed starters is more than just a clever hack—it’s a zero-waste, budget-friendly way to kickstart your garden while reducing plastic waste. 🌱 With just a few supplies and a week of patience, you’ll have lush seedlings ready to plant, proving that sustainability and simplicity go hand in hand.
Ready to grow? Start with one roll today and watch your green thumb flourish! Next, experiment with different seeds or share this trick with fellow eco-conscious gardeners to spread the love—and the sprouts!