
Lawn
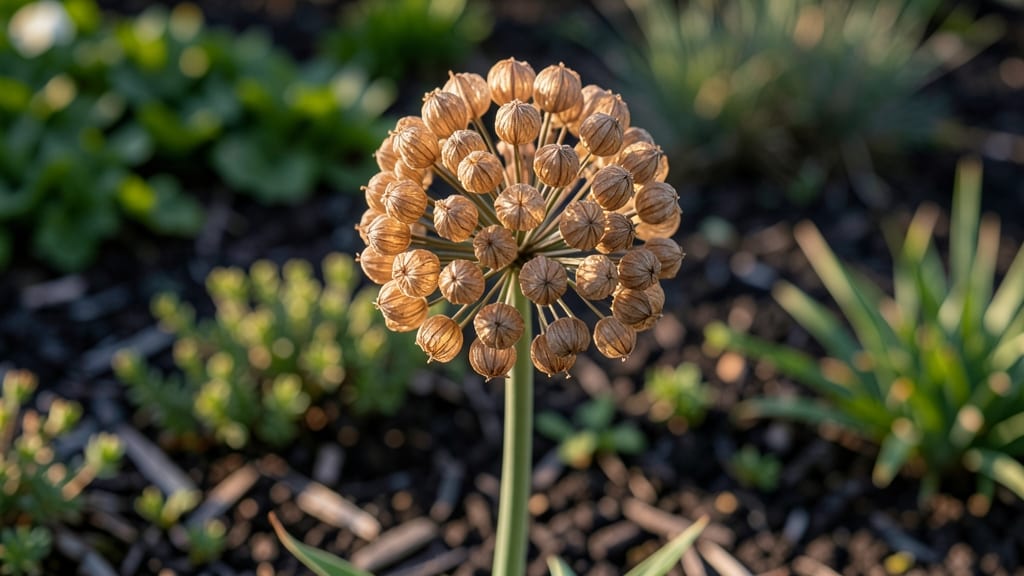
Your allium seed heads aren’t just leftover garden fluff—they’re free, drought-resistant decor that lasts through winter. 🌿 I’ve turned mine into everything from rustic centerpieces to dried arrangements that still look fresh in February, and the best part?
They take less than 10 minutes to harvest and zero effort to dry.
Start in late summer when the seed pods turn from green to papery brown and start rattling. Snip them with clean pruners, leaving the stems about 6 inches long for arrangements. Hang them upside down in a dry, dark place for 2-3 weeks—they’ll crisp up perfectly without wilting.
Once dry, their spherical shapes and delicate textures make them the star of any winter display. Pair them with eucalyptus, dried grasses, or even pinecones for a natural, textured look that brightens up dark months. They also add height and drama to cut flower bouquets—no vase needed.
No special tools required, just patience and a little creativity. These seed heads keep giving long after the blooms fade, making them the ultimate zero-waste garden treasure. Ready to turn your garden’s leftovers into decor?
📚 In This Guide
- What you need
- Instructions
- Tips and common mistakes
- Wrapping up and next steps
What you need
- ● Mature allium plants (onions, garlic, chives, leeks, or ornamental alliums) with fully dried seed heads (brown, papery, and crisp).
- ● Scissors or pruning shears (clean, sharp pair for snipping seed heads).
- ● Brown paper bags (1–2 per seed head; avoid plastic to prevent moisture buildup).
- ● Pencil or marker (for labeling bags with plant names/varieties).
- ● Small paper envelopes or seed packets (for long-term storage; 3x5” or 4x6” sizes work well).
- ● Gloves (to protect hands from prickly stems or dirt).
- ● Fine mesh sieve or colander (for separating seeds from chaff if desired).
- ● Desiccant packets (1–2 per storage container to absorb excess moisture).
- ● Air-tight containers (small jars or plastic bins with tight lids for seed storage).
- ● Drying rack or screen (if seed heads need extra airflow; a wire rack or even a window screen works).
- ● Wait until seed heads are completely dry (no green or soft stems—this ensures viability!).
- ● Choose a dry, well-ventilated spot (like a garage, shed, or sunny porch) for drying seeds.
- ● Work on a clean, dry surface (a table or tray lined with newspaper prevents lost seeds!).
Step-by-step guide to harvesting allium seed heads
Here’s how I collect seeds from alliums without wasting a single bloom or risking plant stress.
🌱 Step 1: Wait for Seed Heads to Mature Fully
Leave the seed heads on the plant until they turn brown and papery—this means the seeds inside are fully mature. You’ll notice the outer layers dry out and split open slightly, revealing tiny black seeds inside. If you harvest too early, the seeds won’t germinate well.
I always check seed heads in the morning when dew has dried. The best time to harvest is on a dry, sunny day—this prevents mold from forming when you bring them indoors. If rain is forecasted, bring them in early to protect them.
✂️ Step 2: Cut Seed Heads Cleanly and Dry Them Properly
Use clean pruning shears to snip the seed heads just above the first set of leaves. This keeps the plant tidy and prevents disease from spreading. Place the cut heads in a well-ventilated area—like a mesh bag or a paper bag with holes—out of direct sunlight.
I hang mine upside down from a hook in my garage or shed. This allows air to circulate around the seeds, preventing mold or rot. Leave them for 2-3 weeks until the heads are completely dry and brittle. You’ll know they’re ready when the seeds rattle inside the head.
💧 Step 3: Extract and Store Seeds for Future Planting
Once dry, gently rub the seed heads between your hands or tap them over a clean sheet of paper to release the seeds. Discard any debris or empty husks. Store the seeds in a paper envelope (not plastic—it traps moisture) and label it with the allium variety and harvest date.
Keep the envelopes in a cool, dark place like a pantry or seed storage box. Allium seeds stay viable for 2-3 years if stored properly. I like to write the date on the envelope so I know how old they are—fresh seeds always germinate better!
☀️ Step 4: Return Nutrients to the Soil (Optional)
After extracting seeds, you can compost the dried seed heads or return them to the garden bed. Chop them into small pieces and mix them into the soil to add organic matter. This closes the nutrient cycle and gives your plants a little boost for next season.
If your alliums were particularly healthy, you might even notice new growth from the base—this is a sign the plant is thriving and ready to produce again. Just remove any dead or diseased foliage before composting to keep your garden clean.
Tips & tricks for perfect allium seed harvesting
Here's what I learned the hard way after struggling with seed heads that either didn't dry properly or lost viability. These simple adjustments make all the difference.
Timing Secret: Harvesting at the right moment is everything. Wait until the seed heads are completely brown and papery—this usually takes about 2-3 weeks after flowering. I've learned to check them daily during that final week because once they're ready, they dry out quickly. If you're unsure, gently squeeze a seed head: if it feels brittle and the seeds rattle inside, it's harvest time. This ensures maximum seed viability and germination rates.
Drying Strategy: The drying process is where most people go wrong. I've tried every method—hanging in the sun, using a dehydrator, even my oven on low—and found that natural air drying in a well-ventilated area works best. The key is to keep them out of direct sunlight and maintain good airflow. I use a mesh bag or paper bag with holes punched in it, and hang them upside down in my garage. This prevents mold while ensuring even drying throughout the 2-3 week period.
Storage Wisdom: Proper storage is what separates good seeds from great seeds. I've had seeds last for years when stored correctly, but they've also lost viability in just months when stored improperly. Always use paper envelopes—plastic traps moisture and causes seeds to spoil. Store them in a cool, dark place like a pantry, and label each envelope with the variety and harvest date. This simple habit helps me track seed freshness and ensures I always know which seeds to plant first for best results.
Pro Tips for Allium Seed Heads
- Here's what I learned the hard way after struggling with seed heads that either didn't dry properly or lost viability...
- Timing Secret: Harvesting at the right moment is everything. Wait until the seed heads are completely brown and paper...
- Drying Strategy: The drying process is where most people go wrong. I've tried every method—hanging in the sun, using ...
Frequently asked questions
Got questions about harvesting allium seed heads?
Here are some of the most common ones—and their easy answers to keep your zero-waste garden thriving!
When is the best time to harvest allium seed heads?
Harvest allium seed heads when they turn tan or light brown and the papery outer layers begin to dry and crumble. This usually happens 4–6 weeks after flowering, depending on your climate. Avoid harvesting too early—the seeds won’t be fully mature, and too late, they may scatter or attract pests.
How do I properly harvest allium seed heads without damaging them?
Use clean, sharp pruning shears or scissors to snip the seed head just above the bulb or stem. Gently shake the head over a paper bag or tray to collect seeds—no need to force it! If the head is too dry, store it in a breathable bag for a day or two to release remaining seeds.
Can I save seeds from store-bought alliums (like garlic or onions)?
Store-bought alliums are often hybrids or treated to prevent bolting (flowering), so their seeds may not grow true to type. For reliable seed saving, use open-pollinated varieties from heirloom seeds or your own garden. If you’re curious, try it—worst case, you’ll learn a fun lesson!
What should I do if my allium seed heads get moldy or buggy?
If you spot mold, webbing, or pests (like aphids or thrips), isolate the affected seed heads immediately. Discard heavily infested ones, but lightly moldy seeds can be dried in a warm, dry place (like a sunny windowsill) for 1–2 weeks to kill pests. Store seeds in a paper envelope in a cool, dark spot to prevent future issues.
How do I store allium seeds for next season?
Once fully dry, store seeds in a paper envelope or breathable container (never plastic—it traps moisture!). Keep them in a cool, dark place (like a pantry or seed vault) where temps stay 40–50°F. Label with the variety and date—most allium seeds stay viable for 2–3 years!
Wrapping up and next steps
Allium seed heads—whether from onions, garlic, or chives—offer a simple, rewarding way to save seeds and reduce waste while nurturing your garden’s future. By mastering a few key steps, you’ll turn leftover blooms into a sustainable resource, freeing up time and money for other gardening joys. 🌱
Ready to dive deeper? Start small with one allium variety this season, experiment with drying methods, and soon you’ll be a seed-saving pro—sharing your bounty with fellow gardeners or replanting with confidence!