
Lawn
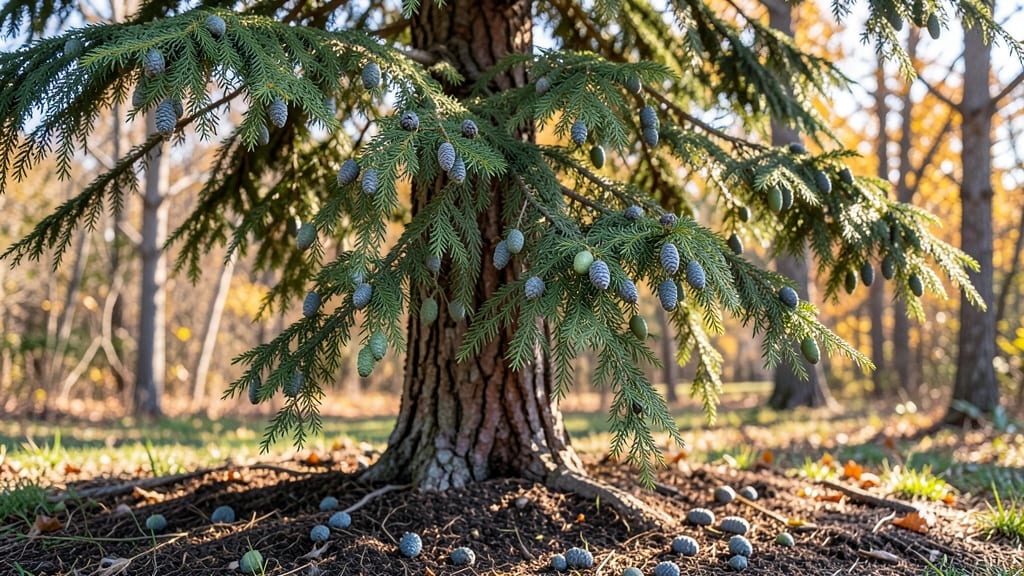
Harvesting cedar seed pods turns your yard into a zero-waste goldmine. 🌿 These tiny, berry-like pods from Eastern Red Cedar or Juniper aren’t just bird feed—they’re the secret to next year’s lush, fragrant trees.
The best time to collect them is late fall, when they’re ripe but haven’t yet burst open. You’ll need a ladder, pruning shears, and a bucket to gather them safely. Look for pods that are deep purple or blue, firm to the touch, and still clinging to the branches.
A single mature tree can yield hundreds of pods, enough to feed birds all winter or even start new cedars in your landscape. Once collected, store them in a cool, dry place until planting season. The seeds inside germinate best when sown fresh, so don’t wait too long.
Sprinkle them on well-drained soil, press lightly, and water—nature does the rest. Within a few weeks, you’ll see tiny green shoots popping up, ready to grow into your own cedar trees. This method works for both ornamental and wildlife-friendly gardens.
Plus, it’s a great project for kids to help with—just remind them to wear gloves, as the berries can stain hands temporarily.
📚 In This Guide
- What you need
- Instructions
- Tips and common mistakes
- Wrapping up and next steps
What you need
- ● Mature cedar trees: Choose healthy Juniperus species (e.g., Eastern Red Cedar, Western Red Cedar) with ripe seed pods (typically 1–2 years old, turning brown/dry). Aim for 3–5 trees for a reliable harvest.
- ● Pruning shears or loppers: Sharp, bypass-pruning shears (for small branches) or loppers (for thicker stems). Disinfect blades with 70% isopropyl alcohol before use.
- ● Large collection bags: Mesh laundry bags (to prevent seed loss) or paper grocery bags (for easy composting later). Use 2–3 bags per tree.
- ● Labeling tags & permanent marker: Waterproof tags to mark seed sources (e.g., tree variety, harvest date). 10–15 tags recommended.
- ● Gloves: Nitrile or leather gardening gloves (cedar needles can irritate skin).
- ● Bucket or wheelbarrow: For transporting harvested pods. A 5-gallon bucket works well.
- ● Seed pod drying tray: A wire mesh screen or old window screen to spread pods for even drying (avoids mold).
- ● Fan or dehumidifier: Speeds up drying in humid climates. Place pods 2–3 inches from airflow.
- ● Magnifying glass: Helps spot viable seeds inside pods (look for plump, dark seeds).
- ● Storage containers: Air-tight glass jars or paper envelopes with silica gel packets to prevent moisture.
- ● Camera or sketchbook: Document pod colors/shapes to track maturity patterns year-over-year.
Step-by-Step guide to harvesting cedar seed pods
Turn those fallen cedar pods into next year’s garden treasure with this simple, eco-friendly method.
🌿 Step 1: Identify and Collect Mature Seed Pods
Look for brown, dry cedar seed pods that have naturally fallen from the tree or are still clinging to branches. These pods should feel lightweight and papery, not green or plump. I collect them in late summer or early fall when they’re fully mature but before winter rains make them soggy.
Gently shake branches over a large tray or sheet to catch falling pods without damaging the tree. Avoid collecting pods from the ground—they may already be compromised by pests or mold. A small mesh bag works well for transporting them home.
🪴 Step 2: Dry and Clean the Seed Pods
Spread the collected pods in a single layer on a dry, well-ventilated surface, like a screen tray or clean cardboard box. Place them in a warm, dry spot (around 70-75°F) for 3-5 days to ensure they’re completely dry. This prevents mold growth during storage.
Once dry, gently rub the pods between your hands or use a soft brush to release the tiny seeds inside. Discard any pods that crumble or show signs of insects. Store the clean seeds in a paper envelope or breathable cloth bag—plastic traps moisture and can spoil seeds.
☀️ Step 3: Stratify Seeds for Better Germination
Cedar seeds benefit from a cold stratification process to mimic winter conditions. Place the seeds in a ziplock bag with a damp paper towel (not soaking wet) and seal it. Store the bag in your refrigerator’s crisper drawer for 4-6 weeks.
Check the seeds weekly—they should remain moist but not soggy. After stratification, remove them from the fridge and let them sit at room temperature for 2-3 days before planting. This final step helps break dormancy and encourages stronger germination.
🌱 Step 4: Plant Stratified Seeds Indoors
Fill small pots (around 2-3 inches deep) with light, well-draining potting mix. Plant the seeds ¼ inch deep, spacing them 1 inch apart to avoid overcrowding. Water gently with a spray bottle until the soil is evenly moist but not waterlogged.
Place the pots in a warm, sunny spot (or under a grow light) where temperatures stay around 65-70°F. Keep the soil consistently moist—cedar seedlings are delicate and dry out quickly. Germination typically takes 2-4 weeks, so be patient.
⏰ Step 5: Transplant Seedlings Outdoors
Once seedlings have 2-3 sets of true leaves (not just the initial cotyledons), they’re ready for transplanting. Harden them off by placing them outdoors in a shaded, sheltered spot for 1-2 hours daily over 5-7 days before moving them permanently.
Choose a sunny location with well-draining soil—cedars thrive in full sun and hate soggy roots. Space seedlings 3-5 feet apart to allow for growth. Mulch around the base with wood chips to retain moisture and suppress weeds, but keep the mulch 2-3 inches away from the trunk.
Tips & tricks for perfect cedar seed pod harvesting
Here's what nobody tells you about turning those fallen cedar pods into thriving new trees.
Timing Secret: Late summer is your best window for collecting cedar seed pods—aim for when they've turned completely brown but before the first hard frost. I've learned this the hard way after collecting green pods that never produced viable seeds. The pods should easily crumble between your fingers when mature, signaling they're ready for harvest.
Drying Strategy: That 3-5 day drying period in Step 2 is critical for preventing mold, but don't rush it! Place your drying tray in a spot with good airflow—like near an open window or under a fan on low. I've seen pods develop mold when dried too quickly in humid conditions. The goal is completely dry pods that feel brittle to the touch before handling.
Stratification Insight: When checking your seeds during the 4-6 week cold stratification, look for them to plump up slightly—this indicates they're absorbing moisture properly. If they stay completely dry, give them a light mist with water (just enough to dampen the paper towel) and reseal the bag. The 2-3 days at room temperature afterward is when seeds truly wake up from dormancy.
Planting Precision: Those ¼-inch deep planting measurements in Step 4 might seem shallow, but cedar seeds need this minimal coverage to avoid rotting. Use a toothpick to create the tiny holes—it gives you better control than your finger. And space those 1-inch apart! Crowded seedlings compete for nutrients and often produce weak, leggy plants.
Pro Tips for Cedar Seed Pods
- Here's what nobody tells you about turning those fallen cedar pods into thriving new trees.
- Timing Secret: Late summer is your best window for collecting cedar seed pods—aim for when they've turned completely ...
- Drying Strategy: That 3-5 day drying period in Step 2 is critical for preventing mold, but don't rush it! Place your ...
Frequently asked questions
Got questions about growing and harvesting cedar seed pods? You’re not alone! Here are some of the most common queries—and their answers—to help you master the process like a pro.
When is the best time to harvest cedar seed pods?
Harvest cedar seed pods in late fall to early winter (November–January) when they’ve turned a deep brown and feel dry to the touch. Avoid harvesting too early—the seeds won’t be fully mature, or too late, as they may scatter on the ground. Look for pods that open slightly when gently squeezed!
How do I know if the seed pods are ready for planting?
Ready-to-plant cedar seeds should pop out easily when you crack open a pod. Test a few pods by gently pressing them—if the seeds inside are dark brown and plump, they’re viable. Store them in a cool, dry place (like a paper envelope) until spring planting. Pro tip: Avoid refrigerating them for long periods, as moisture can cause mold.
Can I grow cedar trees from seed pods I find on the ground?
Yes, but with caution! Ground-collected pods may already be partially scattered or contaminated with debris. Sift through them to remove empty or damaged pods, then soak the viable ones in water for 24 hours to soften the outer shell. For best results, source pods directly from healthy trees to ensure genetic purity.
What should I do if my cedar seed pods aren’t opening naturally?
If pods stay closed, they may need a little help! Place them in a paper bag and store them in a warm, dry spot (like a sunny windowsill) for 1–2 weeks. The heat and movement will encourage them to open. Avoid microwaving or forcing them—this can damage the seeds. If they still resist, check for pests or rot and discard affected pods.
Are there alternatives if I can’t find cedar seed pods?
No cedar seed pods in your area? Try these zero-waste alternatives:
- Buy certified organic cedar seeds from nurseries or online retailers.
- Propagate from cuttings of healthy cedar branches (root them in water or soil).
- Visit local arboretums or botanical gardens—they often share seeds or saplings.
Just ensure your source is disease-free to avoid introducing pests to your lawn.
Wrapping up and next steps
Cedar seed pods are a treasure trove of sustainability—packed with potential for next year’s lush blooms while minimizing waste. Whether you’re a seasoned gardener or just starting out, mastering their harvest and storage ensures your cedar trees thrive for years to come. 🌱
Now that you’re armed with the know-how, why not take the next step? Share your cedar seed pod adventures with fellow gardeners, experiment with creative upcycling ideas, or even plant a few pods to watch nature’s cycle unfold. Every small action helps grow a greener tomorrow!