
Lawn
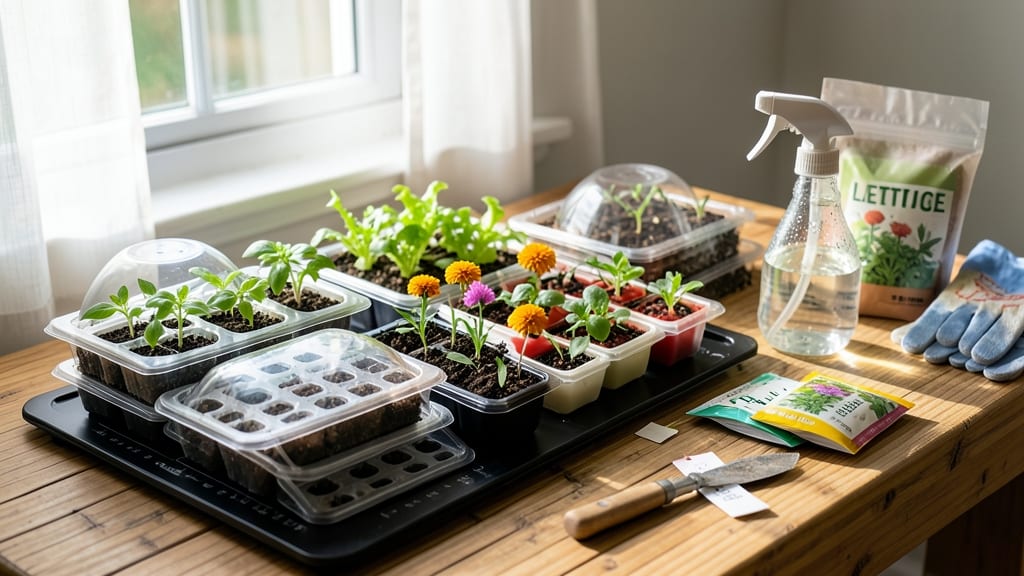
Fast germination starts with the right seed starter kit—no more waiting weeks for stubborn seeds to wake up. 🌱 I’ve used these kits for everything from tiny basil seeds to delicate petunias, and the difference in speed is night-and-day compared to regular potting mix.
The secret? A carefully balanced soil blend that holds moisture without drowning roots, plus the perfect air-to-moisture ratio for quick sprouting.
Most kits include everything you need: biodegradable pots, pre-mixed soil, and even a humidity dome to keep seeds cozy. You’ll see tiny green shoots in as little as 3-5 days for fast germinators like radishes or lettuce, and 7-10 days for slower starters like tomatoes.
The best part? No guesswork—just follow the instructions, and you’ll avoid the heartbreak of moldy soil or seeds that never surface.
Once your seedlings hit 2-3 inches tall, they’re ready to graduate to their forever homes—whether that’s bigger pots or your garden bed. The transition is smoother because the starter kit’s soil mimics real garden conditions.
You’ll end up with stocky, vibrant plants that outperform anything from a nursery, and the whole process takes just 4-6 weeks from seed to transplant.
For eco-conscious gardeners, look for kits with 100% compostable pots or DIY options using egg cartons and homemade soil blends. Even a simple mix of coconut coir, perlite, and composted manure works wonders.
The key is consistency—keep the soil moist but not soggy, and give them 12-16 hours of light daily (a basic grow light works if your windowsill is dim).
📚 In This Guide
- What you need
- Instructions
- Tips and common mistakes
- Wrapping up and next steps
What you need
- ○ Seed starter kit: A pre-packaged kit (like those with biodegradable pots or trays) or DIY supplies (see optional below).
- ● Fast-germination soil mix: 1–2 gallons of high-quality, sterile seed-starting mix (look for "organic" or "peat-free" options).
- ● Seeds: Your chosen variety (check seed packets for depth and spacing guidelines).
- ● Watering can or spray bottle: With a fine mist nozzle (avoid over-saturating seeds!).
- ● Grow lights or sunny windowsill: 6–12 hours of light daily (LED grow lights are ideal for indoor setups).
- ○ Humidity dome or plastic wrap: To retain moisture (optional but highly recommended for delicate seeds).
- ● Small hand trowel or spoon: For gentle soil scooping.
- ● Labeling tags & marker: To track seed types and planting dates.
- ○ Heat mat (optional): For warm-season seeds (e.g., peppers, tomatoes) to speed germination.
- ○ Fertilizer (optional): A diluted, seed-safe fertilizer (like fish emulsion) after sprouts emerge.
- ● Tray or shallow container: If not using the kit’s trays (e.g., egg cartons or recycled containers).
- ● 🌡️ Temperature matters: Most seeds germinate best between 65–75°F (18–24°C). Use a thermometer if needed!
- ● ✨ Sterilize tools: Rinse containers and tools with a 1:9 bleach-water solution to prevent mold.
- ● 💧 Bottom watering: Place trays on a shallow water bed to avoid disturbing seeds.
How to use seed starter kits for reliable germination
Fast germination starts with the right mix—here's how to maximize your kit's potential.
🌱 Step 1: Prepare Your Growing Trays and Mix
Unpack your seed starter kit and remove the growing trays and fast-germination soil mix. Most kits include biodegradable pots or trays designed to minimize root disturbance during transplanting—this is key for preventing transplant shock. Fill each cell or pot with the provided mix, leaving about ½ inch below the rim for watering.
Tap the tray gently on the counter to settle the soil without compacting it. You want the mix to feel like a damp sponge—not rock-hard or crumbly. If your kit includes a humidity dome, set it aside for now. The mix is pre-moistened, but you'll want to check moisture levels before planting.
💧 Step 2: Plant Seeds at the Correct Depth
Refer to the seed packet instructions for depth—most fast-germination mixes recommend planting seeds at a depth of ¼ to ½ inch, depending on the seed size. I like to use a toothpick to create small holes for precision, especially with tiny seeds like lettuce or petunias. Place 1-2 seeds per cell (two gives you a backup if one fails to germinate).
Cover the seeds lightly with additional mix, then gently press the surface to ensure good seed-to-soil contact. This prevents seeds from drying out or being dislodged during watering. Mist the surface with water until it's evenly moist but not soggy—you should see moisture beads form without pooling.
☀️ Step 3: Provide Warmth and Consistent Moisture
Place the trays in a warm location with a temperature between 65-75°F. A seedling heat mat set to 70°F can cut germination time in half for slow starters like tomatoes or peppers. Cover the trays with the included humidity dome or plastic wrap to create a greenhouse effect—this keeps moisture levels high and speeds up germination.
Check the soil daily but resist the urge to water. The dome traps enough moisture that the soil should stay consistently damp. You'll know it's time to water when the surface feels dry to the touch. Remove the dome as soon as 50% of seeds have sprouted—leaving it on too long encourages damping-off, a fungal disease that collapses seedlings overnight.
⏰ Step 4: Optimize Light for Strong Seedlings
Once seedlings emerge, move them to a location with 12-16 hours of bright light daily. A south-facing window rarely provides enough intensity, so I use a full-spectrum LED grow light positioned 2-4 inches above the plants. Raise the light as seedlings grow to maintain that distance—this prevents leggy, weak stems.
You'll see strong seedlings develop thick stems and dark green leaves spaced closely together. If stems grow tall and spindly with large gaps between leaves, your light is too far away. Weak seedlings often struggle to support themselves and may fall over when transplanted. Rotate trays a quarter turn daily to ensure even growth toward the light source.
🌿 Step 5: Harden Off Before Transplanting
Two weeks before your last frost date, begin hardening off seedlings by placing them outside in a sheltered, shaded spot for 1-2 hours the first day. Gradually increase outdoor time by 1 hour daily over 10-14 days, introducing more sun and wind exposure. This process strengthens cell walls and prepares plants for outdoor conditions.
Watch for signs of stress like wilting or yellowing leaves—these indicate the process is moving too fast. Once seedlings tolerate a full day outside without wilting, they're ready for the garden. Transplant on an overcast afternoon to reduce transplant shock, and water deeply at the base to settle the soil around roots.
Tips & tricks for perfect seed starter kits
Common pitfalls—and how to sidestep every one—when working with fast-germination soil mixes.
Soil Mix Consistency: The pre-moistened mix in your kit should feel like a damp sponge—not bone-dry or muddy. If it's too dry, add a light spray of water until it holds together when gently squeezed. Too wet? Mix in a little extra soil from the kit to restore the right texture. The ½-inch headspace below the rim is crucial—it prevents overflow when watering and allows roots room to establish without crowding.
Seed Placement Precision: For tiny seeds like lettuce or petunias, use a toothpick to create precise planting holes at the recommended ¼ to ½ inch depth. Pressing the seeds lightly into the soil ensures better contact, which is especially important for seeds that need moisture to trigger germination. The two-seed-per-cell strategy gives you a backup if one fails to sprout—just thin to the strongest seedling once they emerge.
Heat Mat Strategy: A seedling heat mat set to 70°F is a game-changer for slow starters like tomatoes or peppers. Place the mat under the trays during the germination phase (before seedlings emerge) to cut waiting time in half. If you don't have a heat mat, position trays on top of your refrigerator or near a warm (but not hot) vent for similar results. Just avoid placing them directly on heat sources that exceed 75°F—this can cause uneven germination.
Light Distance Dynamics: Those 12-16 hours of bright light are non-negotiable for strong seedlings. Position your full-spectrum LED grow light 2-4 inches above the plants, then raise it as they grow. A good rule of thumb: if you can see shadows of the leaves on the tray below, the light is too far away. Rotate trays daily to prevent leaning—uneven growth is a dead giveaway that your seedlings are stretching toward the light source.
Pro Tips for Seed Starter Kits
- Common pitfalls—and how to sidestep every one—when working with fast-germination soil mixes.
- Soil Mix Consistency: The pre-moistened mix in your kit should feel like a damp sponge—not bone-dry or muddy. If it's...
- Seed Placement Precision: For tiny seeds like lettuce or petunias, use a toothpick to create precise planting holes a...
Frequently asked questions
Got questions about seed starter kits?
You’re not alone! Here are answers to the most common ones to help you grow with confidence.
What’s the best time of year to use a seed starter kit?
Most seed starter kits work year-round, but timing depends on your climate and the plants you’re growing. For cool-season crops like lettuce or grass, start indoors 6–8 weeks before the last frost. Warm-season plants (tomatoes, peppers) can begin indoors 8–12 weeks before warm soil arrives. Always check the kit’s instructions for specifics!
How long does it take for seeds to germinate in a starter kit?
Germination time varies by seed type—some sprout in 3–7 days (like radishes or beans), while others (like tomatoes) may take 1–3 weeks. Keep the soil moist, maintain warmth (70–85°F), and place the kit in bright, indirect light. If nothing sprouts after 2–3 weeks, the seeds may be old or damaged.
Are seed starter kits worth it compared to DIY setups?
Kits save time and guesswork with pre-mixed soil, trays, and often built-in drainage. DIY setups (like repurposed containers) work too, but kits ensure optimal moisture and aeration. For beginners, kits reduce failure risk. Pro tip: Reuse kits by sterilizing trays with bleach water (1 part bleach to 9 parts water) for cost savings!
What do I do if my seeds rot or mold in the starter kit?
Overwatering or poor drainage causes rot. If you spot mold or mushy seeds, stop watering immediately and let the soil dry slightly. Improve airflow by spacing trays apart and ensure the kit has drainage holes. For future batches, use sterilized soil (bake at 200°F for 30 mins) and avoid overcrowding seeds.
Can I use a seed starter kit for vegetables, flowers, or just grass?
Seed starter kits work for almost any seed—veggies, herbs, flowers, and even grass! Just match the kit to your needs: Grass kits often include fertilizer blends, while flower/veggie kits prioritize lightweight, airy soil. Check the label for seed type recommendations, or use a general-purpose kit for versatility.
Wrapping up and next steps
Starting your gardening journey with a seed starter kit is a fantastic way to ensure fast germination and vibrant blooms! 🌱 Whether you’re a beginner or a seasoned green thumb, these kits simplify the process while giving your plants the best possible start.
With the right soil mix, moisture control, and a little patience, you’ll be well on your way to a thriving garden.
Now that you’re armed with knowledge, take the next step—grab your kit, follow the steps, and watch your seeds transform into lush, healthy plants. Happy gardening! 🌿