
Propagation
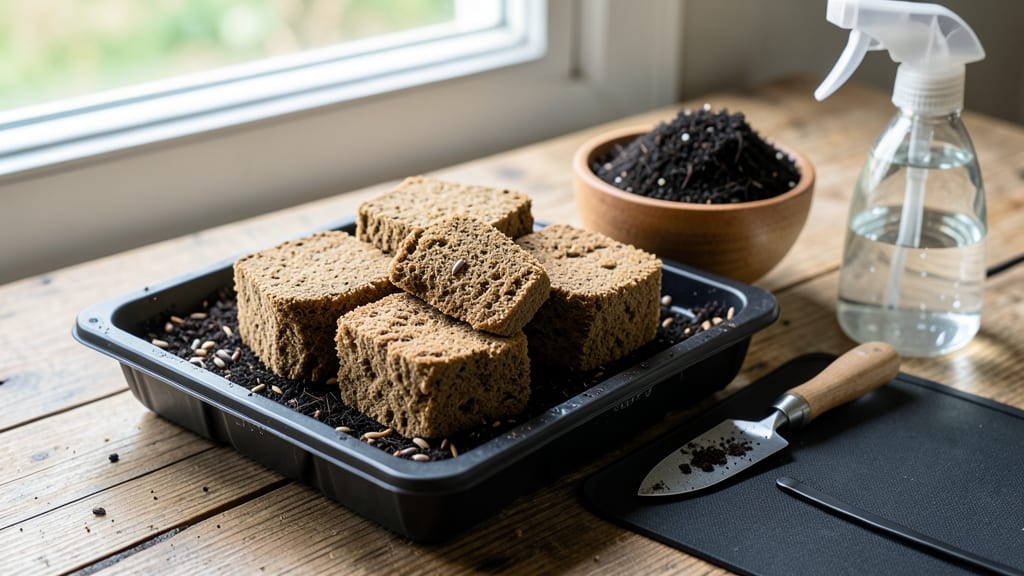
This seed starting mix for soil blocks starts with coconut coir, perlite, and compost—the perfect trio for seedlings that root in half the time of traditional seedling trays. 🌱 The blocks themselves are simple to make, require no pots, and eliminate transplant shock by letting roots grow outward naturally.
After my first batch, I never went back to plastic trays again. The magic happens in the ratio: 60% coir for moisture and structure, 30% perlite for aeration, and 10% compost for nutrients.
Mix it damp (like a wrung-out sponge), roll into 1-inch cubes, and let them firm up for 24 hours. You’ll see stronger stems and deeper root systems than anything from a nursery starter pack.
By the time seedlings are ready to move, they’ll have thicker stems and a head start on growth. The blocks break down in soil, so there’s no waste—just healthy plants. Perfect for tomatoes, peppers, and herbs that hate being transplanted. Works in any climate, from cool basements to sunny windowsills.
Here’s how to mix it right the first time!
📚 In This Guide
- What you need
- Instructions
- Tips and common mistakes
- Wrapping up and next steps
What you need
- ● Coco coir (coconut fiber): 60-70% of the mix (e.g., 3 cups for a 5-quart batch). Opt for pearl or brick coco coir for better aeration.
- ● Perlite or vermiculite: 20-30% of the mix (e.g., 1 cup). Perlite adds air pockets, while vermiculite retains moisture.
- ● Compost or worm castings: 10-20% of the mix (e.g., ½ cup). Boosts nutrients and microbial activity.
- ○ Lime (optional but recommended): 1 tsp per 5 quarts. Balances pH (aim for 6.0-7.0).
- ● Water: Enough to moisten the mix to squeeze-and-hold consistency (not dripping).
- ● Mixing container: A clean, large bucket or wheelbarrow (5+ quarts capacity).
- ● Hand trowel or small shovel: For blending ingredients evenly.
- ● Soil block maker: A wooden or plastic mold (e.g., 1.5–2.5" diameter for most seedlings).
- ● Spray bottle: For misting dry ingredients during mixing.
- ○ pH test kit (optional): Ensures your mix is seedling-friendly.
- ● Gloves & dust mask: Perlite and coco coir can be dusty!
- ● Mycorrhizal inoculant: 1 tsp per 5 quarts. Enhances root growth.
- ● Seaweed extract: 1 tbsp per gallon of water. Adds trace minerals.
- ● Biochar: 5% of the mix. Improves water retention and microbial life.
- ● Slow-release fertilizer: 1 tsp (e.g., fish emulsion or compost tea).
Step-by-step guide to making zero-waste soil blocks
Here's how I create lightweight, nutrient-rich blocks that speed germination and eliminate transplant shock.
🌱 Step 1: Gather and Mix the Base Components
Start with 2 parts coconut coir (the fibrous husk) and 1 part peat moss—this ratio creates the perfect air-to-moisture balance. I like to pre-moisten the coir in a bucket overnight so it absorbs water evenly. Add 1 part perlite for drainage and structure, then mix everything thoroughly by hand until it looks uniformly crumbly.
This blend ensures water drains while retaining enough moisture for germination. The perlite prevents compaction, which is critical for root development. If your mix feels too dense, add a little more perlite—you want it to hold its shape when squeezed but still crumble easily.
💧 Step 2: Adjust Moisture for Perfect Block Formation
Gradually add warm water to your mix while stirring until it reaches the consistency of damp sand—it should hold together when pressed but not be sticky. Overwatering creates muddy blocks that fall apart, while too little moisture means they won’t compress properly. I test by rolling a handful into a ball: if it crumbles when dropped, add a splash more water.
This moisture level is key for block integrity. If your mix feels dry, sprinkle water and remix. If it’s too wet, spread it on a tray to dry slightly. The goal is a texture that holds when compressed but still allows air circulation—critical for preventing damping-off disease.
🪴 Step 3: Shape Blocks Using the Soil Block Maker
Fill the block maker’s hopper with your moistened mix, then press down firmly on the plunger. The block should form cleanly with a slight indentation in the center—this is where you’ll plant your seeds. I use a 1.5-inch block maker for most seeds, but larger seeds like beans need 2-inch blocks for proper root space.
Tap the block maker gently on the table to release the block. If it crumbles, your mix is too dry—add a little more water and remix. If it sticks, your mix is too wet. Once formed, let blocks dry slightly for 30-60 minutes until they’re firm but not hard. This drying step prevents them from collapsing when you add seeds.
☀️ Step 4: Plant Seeds and Maintain Ideal Conditions
Gently press a seed into the indentation of each block—no need to bury it deeply. For tiny seeds like lettuce, I use a toothpick to create a shallow dimple. Place the block on a seed tray and cover with a clear dome to retain humidity. Keep the tray in a warm spot (70-75°F) until germination, which typically occurs in 5-10 days depending on the seed.
Once sprouts appear, remove the dome and move the tray to bright, indirect light. Avoid direct sun at this stage—it can overheat the blocks. Water from the bottom by placing the tray in ½ inch of water for 10-15 minutes—this encourages roots to grow downward while keeping the top moist. You’ll see roots emerging from the bottom of the blocks within 7-10 days, signaling they’re ready for transplant.
⏰ Step 5: Transplant with Minimal Root Disturbance
When seedlings show 2-3 true leaves, they’re ready for the garden. Hold the block by its edges and gently lower it into the soil, keeping the block intact. The roots will naturally extend into the surrounding soil. I space blocks 6-12 inches apart depending on the plant’s mature size—this prevents overcrowding and disease.
Water lightly after transplanting to settle the soil around the block. The block will break down naturally over 2-4 weeks, enriching the soil as roots spread. This method eliminates transplant shock because the root system remains undisturbed. You’ll notice faster establishment and stronger growth compared to traditional seedling pots.
Tips & tricks for perfect zero-waste soil blocks
These game-changing insights will help you create blocks that promote faster root development and healthier seedlings.
Ingredient Ratio Precision: The 2:1:1 ratio of coconut coir to peat moss to perlite is non-negotiable for optimal results. I've found that pre-moistening the coconut coir overnight eliminates any dry spots in the mix—this ensures even moisture distribution throughout the entire batch. The perlite acts like tiny water channels, preventing compaction that can suffocate young roots.
Moisture Test Technique: That damp sand consistency in Step 2 is your golden ticket. Here's the pro move: roll a small handful into a ball, then drop it from about 12 inches. If it holds together but crumbles when gently squeezed, you're perfect. If it stays intact, it's too wet—spread it on a tray to dry slightly. Too dry? Just add a splash of warm water and remix. This test takes seconds but prevents all the common block formation failures.
Block Drying Strategy: The 30-60 minute drying period after shaping isn't just about firmness—it's about creating structural integrity. I place my blocks on a wire rack to allow air circulation on all sides. This prevents surface drying while maintaining internal moisture, which is crucial for preventing the blocks from crumbling when you add seeds. Pro tip: if your kitchen is humid, reduce drying time to 20-30 minutes to avoid over-drying.
Germination Environment: Maintaining that 70-75°F range during germination is critical, but don't overlook the humidity factor. The clear dome creates a greenhouse effect, but check daily for condensation on the inside. If you see water droplets, remove the dome for 10-15 minutes to prevent fungal growth. This balance is what gives you those 5-10 day germination windows—any cooler and growth slows dramatically, any hotter and you risk seedling stress.
Pro Tips for Seed Starting Mix For Soil Blocks
- These game-changing insights will help you create blocks that promote faster root development and healthier seedlings.
- Ingredient Ratio Precision: The 2:1:1 ratio of coconut coir to peat moss to perlite is non-negotiable for optimal results.
- Moisture Test Technique: That damp sand consistency in Step 2 is your golden ticket.
Frequently asked questions
Got questions about seed starting with soil blocks?
You’re not alone! Here are answers to the most common queries to help you get started confidently—no guesswork required.
What’s the best ratio of coco coir to perlite for soil blocks?
The classic 70% coco coir to 30% perlite ratio works wonders for soil blocks. Coco coir retains moisture while perlite ensures airflow—perfect for preventing mold and encouraging strong root growth. Adjust slightly (e.g., 60/40) if your climate is extra humid or dry.
How long do soil blocks take to dry before planting seeds?
Soil blocks should be dry to the touch but not bone-dry—think of a wrung-out sponge. This usually takes 1–3 days indoors, depending on humidity. Test by squeezing: if it holds shape but crumbles slightly, it’s ready! Plant seeds immediately after drying to avoid rehydration delays.
Can I reuse soil blocks after harvesting seedlings?
Reuse blocks 2–3 times
by breaking them apart, adding fresh compost or worm castings, and remixing with coco coir/perlite. Just avoid reuse if blocks harbored pests or diseases. Pro tip: Sterilize with a 10-minute bake at 200°F (93°C) if needed.
What if my soil blocks crack or crumble when drying?
Cracking often means too much perlite or uneven moisture. Fix it by:
- Adding 10% more coco coir to the mix for cohesion.
- Using a spray bottle to mist blocks evenly while drying.
- Pressing blocks gently but firmly during formation (not too tight!).
Are soil blocks better than peat pots for seed starting?
Yes! Soil blocks eliminate transplant shock—no root circling or pot-bound stress. They’re also 100% compostable (unlike peat pots) and promote faster root growth due to their air-prone structure. Plus, they’re zero-waste—just pop them into the ground or compost pile after use!
Wrapping up and next steps
Creating your own seed starting mix for soil blocks is a game-changer for gardeners who love efficiency, sustainability, and faster-growing plants! 🌱 With just a few simple ingredients—like coco coir, perlite, and compost—you can craft nutrient-rich blocks that encourage strong root development and reduce waste.
Whether you're a seasoned grower or just starting out, this method is easy, cost-effective, and eco-friendly.
Ready to take the next step? Start small! Try making a batch of soil blocks for your favorite fast-growing seeds—like herbs or greens—and watch your garden thrive. Happy planting! 🌿