
Propagation
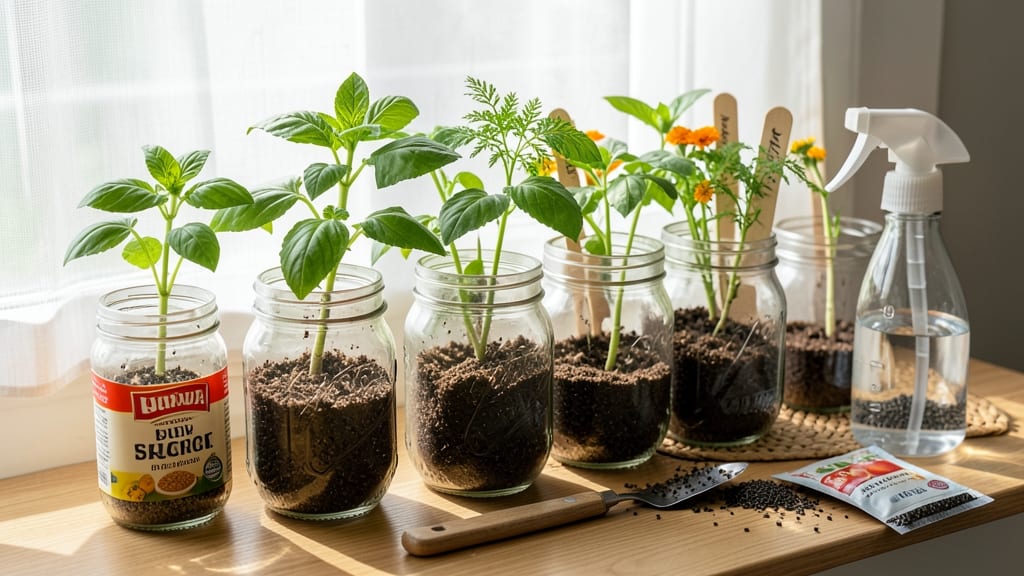
My seed starting old jars system turned my kitchen counter into a zero-waste greenhouse—no fancy equipment, just jars you already have. 🌱 The beauty of this method is how it transforms everyday glass jars into perfect little seedling homes, complete with built-in humidity control and easy monitoring.
You'll need jars with lids (like pasta sauce or baby food containers), seed-starting mix, and a sunny spot. The key is keeping the soil moist but not soggy—just enough to keep the lids slightly fogged up.
I've started everything from tomatoes to herbs this way, and the seedlings always come out sturdy and ready for transplanting. What you end up with is a collection of thriving seedlings that outpace store-bought plants.
The jars create the ideal microclimate, and you can watch roots grow through the glass—it's like having a tiny greenhouse without the cost. This method works for any jar size, from small spice jars for tiny seeds to large pasta sauce containers for tomatoes.
Here's how to set it up right the first time!
📚 In This Guide
- What you need
- Instructions
- Tips and common mistakes
- Wrapping up and next steps
What you need
- ● Old jars: 4–12 clean, food-grade jars (mason jars, pasta sauce jars, or baby food jars work great). Choose sizes based on seedling needs—smaller jars (8–12 oz) for tiny seeds like lettuce, larger (16–32 oz) for bigger plants like tomatoes.
- ● Seed starting mix: 1–2 bags of sterile, well-draining potting soil (avoid garden soil—it’s too dense!). Aim for lightweight mixes labeled for seedlings.
- ● Seeds: Your favorite varieties! Check seed packets for planting depth and spacing tips.
- ● Watering can or spray bottle: A fine-mist sprayer keeps seeds moist without disturbing them.
- ● Scissors or knife: For cutting jars or lids if needed (e.g., trimming rims for better airflow).
- ● Permanent marker: To label jars with seed types and planting dates.
- ○ Tray or shallow container: (Optional but helpful) To collect condensation or catch spills during germination.
- ● Jars with lids: If your jars have screw-on lids, they create a mini greenhouse effect—just crack them open daily for airflow.
- ● Heat mat: Speeds up germination for slow starters like peppers or basil.
- ● Grow lights or sunny windowsill: Seedlings need 12–16 hours of light daily. A simple LED bulb works in a pinch!
- ● Twine or rubber bands: To secure labels or tie jars together for easy transport.
- ● Perforated lid or mesh: DIY with coffee filters or cheesecloth to improve ventilation if lids are airtight.
Step-by-Step instructions for creating a zero-waste seed starting greenhouse
Here's how to turn everyday jars into a thriving seed-starting greenhouse—no waste, all growth.
🪴 Step 1: Select and Prepare Your Jars
Grab clean, empty jars with wide mouths—think pasta sauce jars, jam jars, or even old salsa containers. The wider the opening, the easier it is to access seedlings later. Remove labels completely and wash jars thoroughly with hot, soapy water. I like to soak them in a 1:10 bleach-water solution for 10 minutes to sterilize, then rinse well and let dry completely. This prevents mold from creeping in later.
For the lids, keep only the ones with ventilation holes or crack the plastic lids slightly with a screwdriver to allow airflow. If using metal lids, drill 2-3 small holes with a nail—just enough to let air circulate but keep humidity trapped. You'll need 4 jars total for this project, so gather them now. The key is finding jars that are at least 6 inches tall to give roots room to develop before transplanting.
🌱 Step 2: Layer Moistened Paper Towels at the Bottom
Cut 4 paper towels to fit snugly along the bottom of each jar. Soak them in warm water until thoroughly damp but not dripping. Squeeze out excess water gently—you want them moist, not soggy. This layer serves as a natural wicking system to keep the soil consistently hydrated without overwatering. I like to fold the edges slightly to create a raised center, which helps prevent the soil from touching the paper towel directly.
Place one layer in each jar and let it sit for 5 minutes while you prepare the next step. The paper towel should feel damp like a wrung-out sponge. If it's still dripping, let it sit another minute to avoid waterlogging the soil later. This step is crucial—it mimics the natural moisture retention of a greenhouse while preventing root rot.
💧 Step 3: Fill Jars With Seed Starting Mix
Fill each jar with 4 cups of seed starting mix, leaving about 1 inch of space from the top. Press the soil down lightly with your fingers to remove air pockets, but don't compact it too tightly. The mix should feel like a damp sponge—if it crumbles easily when squeezed, it's ready. I like to add a pinch of slow-release fertilizer to each jar now, mixing it into the top inch of soil to give seedlings a nutrient boost right from the start.
Smooth the soil surface with the back of a spoon, creating a flat platform for planting. Avoid piling soil against the jar walls—this can create air gaps that slow root growth. Tap the jar gently on the table to settle the soil evenly. The goal is a firm but loose surface that holds seeds in place while allowing roots to push through easily.
☀️ Step 4: Plant Seeds and Create a Mini Greenhouse
Follow the seed packet instructions for depth—most seeds need to be planted at a depth of about twice their diameter. For example, tiny lettuce seeds go in ¼ inch deep, while larger tomato seeds might need ½ inch. I use a toothpick to poke small holes in the soil, drop in 2-3 seeds per jar (just in case not all germinate), then cover lightly with additional soil. Label each jar with the seed type and planting date using a permanent marker on masking tape wrapped around the outside.
Place the lids on the jars and position them in a warm, bright spot. A south-facing windowsill gets the most natural light, but if that's not available, a grow light placed 4 inches above the jars works just as well. The lids create a humid microclimate that speeds up germination. You'll see condensation on the inside of the lids within a day or two—that's a good sign! Check for sprouts in 5-14 days, depending on the seed type.
⏰ Step 5: Monitor and Maintain Humidity
Open the jars for 5-10 minutes daily to let fresh air circulate and prevent mold. You'll know it's time when you see tiny white fungal threads on the soil surface—this is called damping-off, and it can kill seedlings overnight. If you spot it, remove the affected seedlings immediately and sprinkle the soil with a mix of 1 part cinnamon to 10 parts soil to prevent further spread. Most seeds germinate within 7-10 days, so keep a close eye on the jars during this time.
Once seedlings emerge, remove the lids completely and move them to a spot with 12-16 hours of light daily. If using a windowsill, rotate the jars a quarter turn every few days to prevent seedlings from leaning toward the light. Water gently from the bottom by adding water to the paper towel layer—this keeps the soil evenly moist without disturbing the delicate seedlings. You'll know they're thriving when they develop their first set of true leaves, about 2-3 weeks after germination.
Tips & tricks for perfect seed starting greenhouses
Here's what nobody tells you about making these upcycled seed starters work like a charm—trust me, these little details make all the difference.
The Sterilization Secret: That 10-minute bleach soak in Step 1 isn't just about clean jars—it's your first line of defense against damping-off disease. I've seen mold creep in when people skip this, even with brand-new jars. For extra peace of mind, let your jars dry completely in the sun afterward. UV light adds another layer of sterilization while you're at it. The goal is to create a sterile environment where your seeds can focus on growing, not fighting fungi.
Paper Towel Placement: When you fold those edges slightly in Step 2 to create a raised center, you're doing more than just preventing soil contact. This tiny technique creates a natural drainage channel that keeps water from pooling at the bottom. I learned this the hard way after watching seedlings rot from sitting in soggy paper towels. The 5-minute wait time is crucial too—it lets excess water evaporate just enough to prevent waterlogging while keeping the towels properly hydrated.
Lighting Hack: That 4-inch distance for grow lights in Step 4 is a starting point, but here's the real trick: seedlings grow toward light, so if they're stretching too tall (a condition called legginess), you're either not giving them enough light or they're too far away. Move the light closer to 2-3 inches above the jars for the first week, then gradually increase the distance as they grow. A simple timer for 12-16 hours of light daily makes all the difference—most power outages or forgotten lights happen between 10 PM and 6 AM.
Transplanting Prep: About 2-3 weeks before you plan to transplant (when those true leaves appear), start hardening off your seedlings by removing the lids completely for progressively longer periods. Begin with just 10 minutes a day, then work up to several hours. This toughens their cell walls so they can handle outdoor conditions. I also like to mist the seedlings with water before transplanting—it helps them recover from the shock of moving to their new home.
Pro Tips for Seed Starting Old Jars
- Here's what nobody tells you about making these upcycled seed starters work like a charm—trust me, these little detai...
- The Sterilization Secret: That 10-minute bleach soak in Step 1 isn't just about clean jars—it's your first line of de...
- Paper Towel Placement: When you fold those edges slightly in Step 2 to create a raised center, you're doing more than...
Frequently asked questions
about using old jars for seed starting—because every gardener deserves a little clarity! Here are answers to the most common queries to help you grow confidently.Can I reuse any type of jar, or are there specific ones to avoid?
Most clean, food-grade jars work—think pasta sauce, jam, or peanut butter jars. Avoid thick glass (like mason jars with wide mouths) or jars with metal lids, as they can trap too much heat or block light. Pro tip: Check for cracks or cloudy residue, which can hinder seedling growth.
How long do seedlings need to stay in jars before transplanting?
Seedlings typically stay in jars for 4–8 weeks, depending on the plant. Leafy greens (like lettuce) may be ready in 4–6 weeks, while herbs (basil, cilantro) or flowering plants (petunias) need closer to 6–8 weeks. Watch for 2–3 true leaves and sturdy stems before transplanting.
Why are my seedlings wilting or turning yellow in the jars?
Yellowing or wilting often signals overwatering (root rot) or underwatering. Ensure jars have drainage holes (poke them with a nail if needed) and use well-draining soil. Fix it: Let soil dry slightly between waterings and avoid soggy bottoms. If mold appears, increase airflow or reduce moisture.
Do I need a heat source, or will jars work fine on a sunny windowsill?
A sunny windowsill (south-facing is ideal) provides enough warmth for most seeds. However, cool-season crops (like broccoli) may need a heat mat (70–75°F) for germination. If your home is chilly, group jars together—they’ll retain warmth collectively. Bonus: A clear plastic bag over jars creates a mini greenhouse effect!
What’s the best way to repurpose jars after seed starting?
After seedlings outgrow their jars, rinse and reuse them for compost bins, herb planters, or even DIY terrariums. For stubborn labels, soak in warm, soapy water. Zero-waste hack: Save lids to store small tools or organize garden supplies!
Wrapping up and next steps
Starting seeds in old jars is a brilliant way to cut waste while giving your seedlings a head start! 🌱 With just a few household items, you’ve got a zero-waste greenhouse that’s easy on the wallet and kind to the planet.
Whether you’re a seasoned gardener or just beginning, this method proves that sustainability and success go hand in hand.
Now that you’re ready to roll, grab those jars and get planting! Next, experiment with different seeds or even share your newfound technique with fellow green thumbs. Happy growing—your future garden (and the Earth) will thank you! 🌿✨