
Lawn
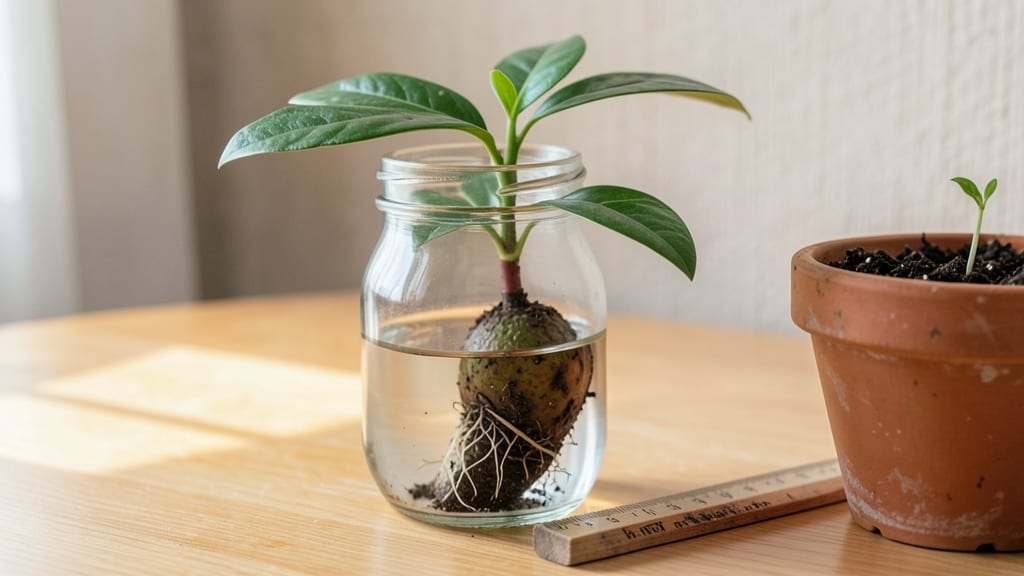
Starting avocado seeds in water is the simplest way to grow your own tree from a grocery store pit—no fancy equipment needed. 🌱 I’ve tried this trick with three different seeds, and the one with the thickest seed coat always sprouts first.
The key is patience and keeping the water fresh, which prevents mold and stagnation. You’ll need just three things: a large avocado pit, toothpicks, and a glass of water. The toothpicks hold the seed at the perfect angle so roots can grow downward while the top stays above water.
Within 2-6 weeks, you’ll see roots emerge—sometimes even faster if you soak the pit first. Once roots reach 3-4 inches, it’s time to transplant into soil. The seedling thrives in bright, indirect light and stays hydrated with a light misting.
By summer, you’ll have a small tree that’s ready to move outside—if you can resist the urge to keep it indoors forever. This method works year-round, but spring gives the fastest results. Avoid overwatering (the water should stay clear, not murky) and watch your tiny tree grow into something real.
Here’s how to do it right!
📚 In This Guide
- What you need
- Instructions
- Tips and common mistakes
- Wrapping up and next steps
What you need
- ● 1 ripe avocado (pick one with a firm pit—no mushy centers!)
- ● 1 sharp knife (or a spoon for scooping out the seed)
- ● 1 toothpick or matchstick (3–4 inches long)
- ● 1 glass or jar (wide-mouth, at least 12 oz, to fit the seed)
- ● Water (room temperature, enough to cover ½–⅔ of the seed)
- ● Clear tape or rubber band (to secure the toothpicks)
- ● Patience! 😉 (Germination can take 2–6 weeks)
- ● Food coloring or dye (to track water levels—fun for kids!)
- ● Small pebbles or marbles (to weigh down toothpicks if needed)
- ● Grow light or sunny windowsill (once roots/sprouts appear)
- ● Notebook or camera (to document progress—so satisfying!)
Step-by-Step instructions for germinating avocado seeds in water
Here's the simple method I use to grow avocado seedlings indoors—no special tools, just patience and a sunny spot.
🌱 Step 1: Extract and Clean the Seed
Start with a fresh avocado pit—save one from your grocery store fruit. Rinse it gently under running water to remove any remaining flesh. You'll notice three main parts: the pointed end (root), the flat side, and the top (where the stem would grow). The key is to expose the root side—this is where your seedling will emerge.
Use a butter knife or spoon to carefully scrape away the dark brown outer layer until you see the white root area. Don't go too deep—just enough to reveal the root. This process takes about 5 minutes and is easier if you work slowly. The cleaner you get the seed, the faster germination will begin.
💧 Step 2: Set Up the Water Germination Station
Fill a glass or jar with about 2-3 inches of room-temperature water. The container should be wide enough to support the seed without tipping. I like using a mason jar because it's stable and lets me monitor water levels easily. Place the avocado seed in the water so about half of it is submerged, with the pointed root end facing down.
Change the water every 2-3 days to prevent bacterial growth. You'll notice tiny white roots emerging from the bottom within 2-4 weeks. This is your first sign of success—don't let the roots dry out, but don't keep them submerged constantly either. The seed needs air exposure to prevent rot.
☀️ Step 3: Encourage Root Growth and Prepare for Transplant
Once you see 1-2 inches of healthy white roots, move the jar to a spot with bright, indirect light. Direct sunlight can overheat the water and stress the seed. I place mine near an east-facing window where it gets morning sun but stays cool in the afternoon. You'll see the roots grow faster when they have good light.
After 4-6 weeks, when the roots reach about 3-4 inches, it's time to prepare for transplanting. Stop changing the water and let the roots grow thicker. This makes them stronger for the next step. You'll know they're ready when they look dense and woody rather than just stringy.
🪴 Step 4: Transplant to Soil
Fill a small pot (about 6-8 inches wide) with well-draining potting mix. Make a hole in the center deep enough to bury about half of the seed, leaving the top exposed. Gently place the seed in the hole and cover the roots with soil, pressing lightly to secure it. Water gently until moisture reaches the bottom of the pot.
Keep the soil consistently moist but not soggy. Place the pot in bright, indirect light for the first week, then gradually introduce more sunlight. You'll see a sprout emerge from the top of the seed within 2-4 weeks. This is your first true leaf, signaling the seedling is establishing itself in the soil.
Tips & tricks for starting avocado seeds in water
Here's what I learned after watching my first batch of seeds fail—don't make these same mistakes!
Seed Prep Matters: In Step 1, when you're cleaning the seed, focus on exposing the root area without damaging it. I used to rush this step and end up with seeds that wouldn't germinate. Take your 5 minutes carefully—gentle scraping with a butter knife works best. The cleaner you get the seed, the faster those first roots will appear.
Water Level Wisdom: For Step 2, keep that water level at 2-3 inches—just enough to cover half the seed. Too much water creates anaerobic conditions that can rot your seed, while too little prevents proper hydration. I like to use a mason jar because it lets me easily monitor and adjust the water level without spills.
Light Timing Trick: When you move your seed to bright, indirect light in Step 3, don't rush this part. The 1-2 inch root stage is when your seedling builds energy for the transplant. I've seen seeds with tiny roots grow woody and strong in just 4-6 weeks when given consistent light. A simple grow light works great if natural light is limited.
Transplant Transition: In Step 4, when transplanting, bury only half the seed—this prevents rot while keeping the top exposed for sprouting. I've found that using a pot with drainage holes prevents soggy soil, which is critical for the first 2-4 weeks after transplant. Keep the soil moist but never soggy during this adjustment period.
Pro Tips for Starting Avocado Seed In Water
- Here's what I learned after watching my first batch of seeds fail—don't make these same mistakes!
- Seed Prep Matters: In Step 1, when you're cleaning the seed, focus on exposing the root area without damaging it. I u...
- Water Level Wisdom: For Step 2, keep that water level at 2-3 inches—just enough to cover half the seed. Too much wate...
Frequently asked questions
Got questions about sprouting avocado seeds? You’re not alone—this process can feel tricky at first! Below, we’ve rounded up the most common queries to help you grow your seedling like a pro.
How long does it take for an avocado seed to sprout in water?
Patience is key! Most avocado seeds sprout roots in 2–6 weeks, depending on warmth (70–85°F) and moisture. Keep the seed half-submerged in water, and change it every 2–3 days to prevent mold. A tiny root (1–2 inches) signals success—now it’s time to prep for soil!
Why is my avocado seed rotting in water?
Rotting usually means too much water or bacteria buildup. To fix it:
- Drain excess water immediately.
- Rinse the seed with clean water.
- Use a fresh jar or change water daily.
- Add a cinnamon pinch (natural antifungal) to the water.
Can I plant the avocado seed directly in soil without water?
Technically yes, but it’s riskier—seeds need moisture to activate. For better odds:
- Soak the seed in water for 3–5 days first to kickstart roots.
- Plant it upside down halfway in moist soil (roots facing down).
- Keep soil damp (not soggy) and use a clear container to monitor progress.
How do I know when to move the avocado seedling to soil?
Wait until you see:
- A 2–3 inch root system (or a tiny sprout poking out).
- Roots growing densely around the seed (like a “root ball”).
Will my avocado tree grow fruit if started from a seed?
Yes, but it’ll take 5–13 years (or longer!) to bear fruit—if it ever does. Seed-grown avocados are not true to the parent tree’s variety (e.g., Hass seeds may grow a different type). For faster, predictable fruit, consider grafting or buying a nursery tree. Patience pays off, though—your homegrown avocado will be a unique heirloom!
Wrapping up and next steps
Starting an avocado seed in water is a fun, rewarding project that brings a touch of greenery into your home—without needing a garden! 🌱 With patience and the right care, you’ll soon watch roots sprout and a tiny plant emerge.
Once your seedling is strong enough, the next logical step is transplanting it into soil and nurturing it into a thriving avocado tree.
So grab that seed, follow the steps, and enjoy the journey! Your future avocado tree is just a few weeks away. 🌟