
Propagation
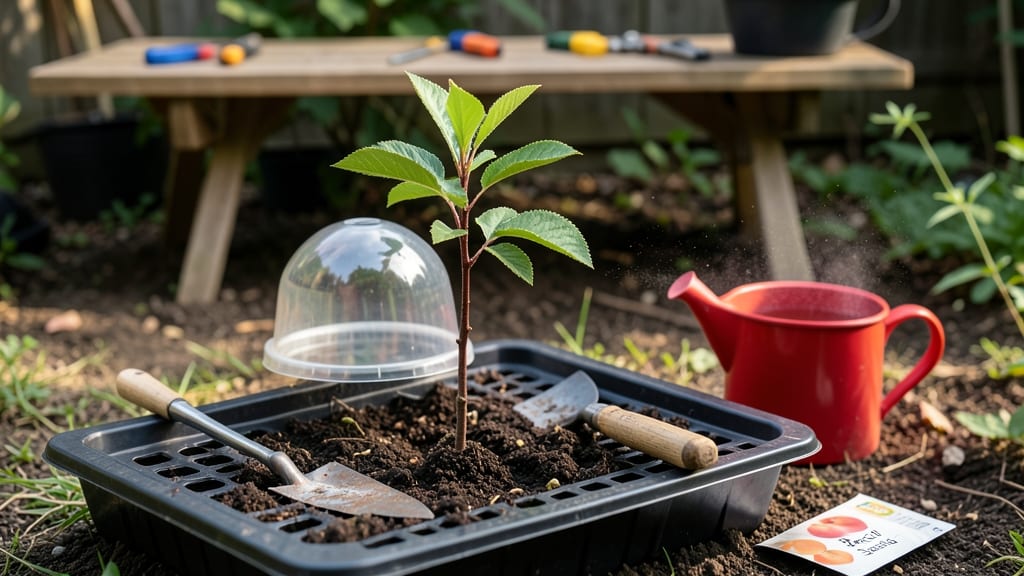
Growing a peach tree from seed germination feels like unlocking a secret garden. 🌱 The process starts with a simple soak and chill—no fancy equipment needed—just patience and the right conditions to coax life from a tiny stone.
I’ve struggled with germination before, but this method works reliably when you follow the temperature and moisture cues nature demands.
The key is mimicking winter’s natural cycle: soak the seed for 24 hours, then refrigerate it for 30 days to break dormancy. Plant it just below the soil surface in well-draining mix, and keep it warm (around 70°F) once you move it indoors.
Most seeds sprout within 30-60 days, but some stubborn ones take twice as long—don’t give up too soon!
What you’ll end up with is a scrappy young tree, though it may not bear fruit like its parent. The real reward? Watching those first true leaves unfurl, knowing you grew it from a seed.
Early care is simple: keep the soil moist (not soggy) and protect it from drafts until it’s strong enough for a permanent spot.
This method works for any peach pit, whether from store-bought fruit or your neighbor’s tree. Just remember: genetics are unpredictable, so treat it like an experiment. The payoff? A tree with character all its own—and the satisfaction of growing something from scratch.
📚 In This Guide
- What you need
- Instructions
- Tips and common mistakes
- Wrapping up and next steps
What you need
- ● Peach pits (seeds): 3–5 fresh, intact pits from ripe peaches (avoid store-bought peaches treated with fungicides).
- ● Paper towels or coffee filters: 2–3 sheets (for soaking).
- ● Plastic bag or airtight container: 1 (to hold soaked pits during stratification).
- ● Refrigerator: A standard fridge with a crisper drawer (for cold stratification).
- ● Small pots or seed trays: 3–5 (4–6 inches deep, with drainage holes). Tip: Biodegradable pots work great!
- ● Potting mix: 1–2 bags of well-draining, seed-starting mix (sterilized and peat-free if possible).
- ● Spray bottle: 1 (for gentle watering).
- ○ Heat mat (optional but helpful): 1 (to maintain warmth post-stratification).
- ● Grow lights or sunny windowsill: Access to 6–8 hours of indirect light daily.
- ● Fungicide: A mild solution (like hydrogen peroxide 3%) to prevent mold during germination.
- ● Humidity dome: 1 (to retain moisture while seeds sprout).
- ● Thermometer: 1 (to monitor soil temp—ideal range: 70–75°F).
- ● Label markers: 3–5 (to track germination dates).
- ● Garden twine or labels: For staking young seedlings (once they’re 6+ inches tall).
Step-by-step instructions for germinating peach tree seeds
Here's how to break the dormancy cycle and get those peach pits sprouting reliably.
🌱 Step 1: Extract and Soak the Seeds for 24 Hours
Start by carefully removing the pit from a ripe peach—don't crush it, just clean off any fruit residue. The pit contains two seeds; you'll need both for this process. Place them in a small bowl and cover with lukewarm water for 24 hours. This initial soak softens the hard outer shell and kickstarts hydration before the cold treatment.
I like to use a bowl with a lid or plastic wrap to keep the water temperature stable. After 24 hours, you'll notice the seed coat starts to loosen slightly—this is your signal the soaking worked. Drain the water completely before moving to the next step. Never let the seeds sit in water longer than 24 hours, or they'll rot before germination.
❄️ Step 2: Stratify for 6-8 Weeks in the Fridge
This is the critical cold treatment that mimics winter conditions. Place the soaked seeds in a sealed plastic bag with a small amount of damp paper towels—just enough to keep them moist but not soggy. I fold the towels around the seeds and seal them in a zip-top bag, then place it in the refrigerator crisper drawer where temperatures stay 35-40°F.
Check the seeds every 2 weeks—they shouldn't feel dry or shriveled. If you see mold, toss them immediately. After 6-8 weeks, the seeds will have absorbed moisture and softened enough to break dormancy. You'll know it's working when the seed coat starts to crack slightly or you see a tiny white root emerging.
☀️ Step 3: Plant in Germination Medium
Fill a small 3-4 inch deep pot with a mix of 50% sterile potting soil and 50% perlite for drainage. Plant the stratified seeds 1 inch deep, spacing them about 2 inches apart in the pot. Water gently until the soil feels evenly moist but not waterlogged—you should see moisture bead up on the surface but not pool.
Cover the pot with a clear plastic dome or wrap it in plastic wrap to create a humid microclimate. Place it in a warm spot with indirect light (like a bright windowsill with no direct sun). Germination should begin in 2-4 weeks, though some seeds take longer. Be patient—this is where most beginners give up, but consistency pays off.
🌿 Step 4: Provide Warmth and Light for Sprouting
Once the first sprouts appear, remove the plastic cover immediately to prevent fungal growth. Move the pot to a location with bright, indirect light—a south-facing window works best. If your home is cool, place a seedling heat mat underneath to keep soil temperatures at 70-75°F during the day.
Water the seedlings when the top ½ inch of soil feels dry, using room-temperature water. You'll see the first true leaves emerge in 4-6 weeks after planting. At this stage, the seedlings are fragile—avoid disturbing them unless necessary. If leaves yellow or wilt, you're either overwatering or the light isn't sufficient.
⏰ Step 5: Transplant and Harden Off After 3 Months
After 90 days, your seedlings should have 3-4 sets of true leaves and be ready for their first transplant. Choose a 6-inch pot with drainage holes and use a mix of 60% potting soil and 40% compost. Gently remove the seedling, keeping the root ball intact, and plant it at the same depth it was growing before.
Begin hardening off by placing the pot outside in a sheltered spot for 2 hours the first day, gradually increasing to full sun over 10-14 days. Watch for signs of stress like curled leaves or wilting—these indicate the plant needs more time to adjust. Once hardened off, you can plant outdoors in a permanent location, but be prepared for slow growth in the first year.
Tips & tricks for perfect peach tree seed germination
Here's what nobody tells you about getting those peach pits to actually sprout reliably.
Water Temperature Matters: That lukewarm water in Step 1 should feel like a warm bath—not scalding, not cold. I use water around 80°F (test with your wrist). Too hot can cook the seeds, too cold won't soften the hard shell. Change the water after 12 hours to prevent bacterial growth while keeping the seeds hydrated. This extra step makes all the difference when you're ready to stratify.
Stratification Secrets: The 6-8 weeks in the fridge is non-negotiable, but here's the trick: place a small piece of paper towel between the seeds and the bag's inner surface. This creates a tiny air pocket that prevents mold while keeping moisture even. I also label my bags with the date—some seeds need the full 8 weeks, others crack open at 6 weeks. Watch for that first white root tip as your signal to move to planting.
Lighting Hacks: For Step 3, if you don't have a south-facing window, try a grow light on a timer (12-14 hours/day). I use a simple LED bulb about 6 inches above the pot. Too much direct light too soon will scorch those delicate sprouts. The key is gradual acclimation—start with just a few hours of indirect light when you first plant them, then increase slowly over 7-10 days.
Transplant Timing: The 90-day mark is a guideline, not a rule. Check for 3-4 sets of true leaves (not the first tiny seed leaves) before transplanting. I've seen some seedlings ready at 85 days and others needing 95 days. The root system should also be visibly dense. If your seedlings look leggy (tall and weak), they need more light—not more time.
Pro Tips for Peach Tree Seed Germination
- Here's what nobody tells you about getting those peach pits to actually sprout reliably.
- Water Temperature Matters: That lukewarm water in Step 1 should feel like a warm bath—not scalding, not cold.
- Stratification Secrets: The 6-8 weeks in the fridge is non-negotiable, but here's the trick: place a small piece of paper towel between the seeds and the bag's inner surface.
Frequently asked questions
Got questions about germinating peach tree seeds? You’re not alone—this process can be tricky! Here are answers to the most common queries to help you succeed:
How long does peach seed germination take?
Germination typically takes 30–90 days, depending on temperature and moisture. After soaking and chilling (stratification), seeds may sprout within 2–4 weeks if conditions are ideal. Patience is key—some stubborn seeds take longer!
Can I skip the cold stratification step?
No—stratification (60–90 days in the fridge) mimics winter and breaks seed dormancy. Skipping it often results in low or no germination. If short on time, try a warm/cold cycle (alternate fridge and room temp weekly) for faster results.
Will my peach tree grow true to the parent?
Probably not! Seed-grown trees may produce different varieties (e.g., sour vs. sweet fruit) due to genetic variation. For consistent results, graft cultivated peach tree scions onto rootstock. If you love surprises, seeds are a fun experiment!
My seeds rotted—what went wrong?
Over-soaking or poor drainage causes rot. Fix it:
- Use fresh, clean water (change daily).
- Ensure pots have drainage holes.
- Plant seeds 1–2 inches deep in well-draining soil.
- Avoid plastic bags—use paper towels or a breathable container.
How big will my seedling grow in one year?
Seedlings grow 1–3 feet tall in their first year if given full sun (6+ hours/day) and regular watering. Expect slow growth—peach trees mature over 3–5 years. Prune lightly to encourage a sturdy trunk!
Pro Tip:
Label your seeds with the variety and date to track progress. Use a seedling heat mat ($10–$20) to speed up germination in cool climates!
Wrapping up and next steps
Germinating a peach tree from seed is a rewarding journey—full of patience, care, and the joy of nurturing life from something as small as a pit! 🌱 With the right techniques like soaking, cold stratification, and consistent warmth, you can watch your seedling sprout into a thriving tree in just 90 days.
Whether you’re a beginner or a seasoned gardener, this process is a fantastic way to connect with nature and grow something truly special.
Now that you’re armed with the know-how, take the next step: gather your materials, follow the steps, and keep a growth journal to track your seedling’s progress. Before you know it, you’ll be harvesting your own peaches—or even sharing saplings with fellow plant lovers! Happy growing! 🌿