
Propagation
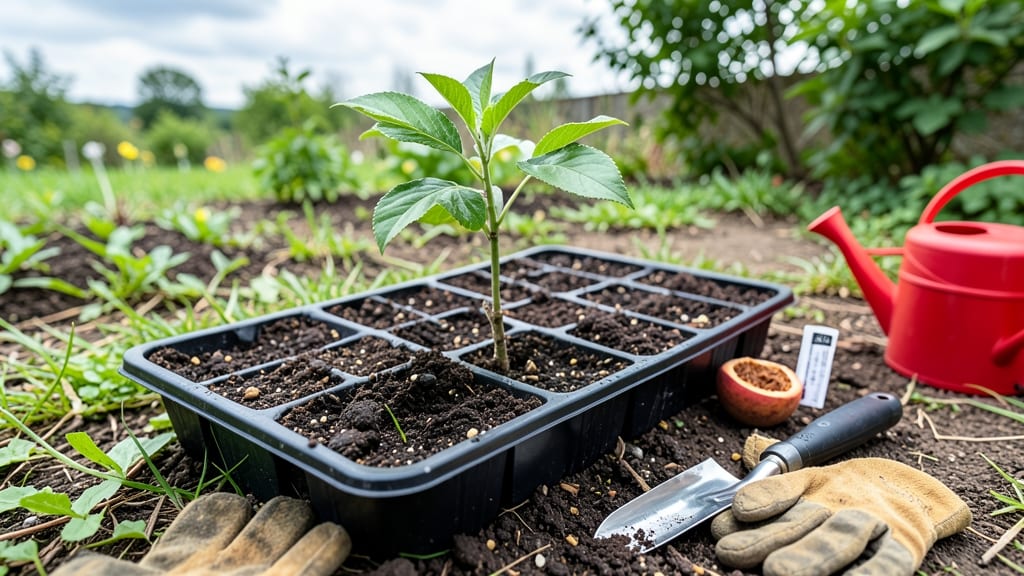
Growing a peach tree from a seed pit is the ultimate patience test—one that rewards you with a tree that might just bear fruit someday. 🌱 I’ve tried this three times, and while the first two failed, the third one sprouted a stubborn little shoot that’s now thriving in a pot.
The key isn’t forcing speed—it’s understanding the natural rhythm of the seed. The process starts with stratification, a fancy term for mimicking winter’s chill. After cleaning and drying the pit, you’ll let it spend 6-8 weeks in the fridge before planting.
This tricks the seed into thinking it’s experienced a cold season, breaking dormancy just like it would in nature. Most gardeners skip this step and wonder why nothing happens—don’t be one of them. By spring, you’ll have a tiny seedling that grows 2-3 inches in its first month.
It won’t look like much, but with proper care—well-draining soil, partial sun, and consistent moisture—it’ll develop into a sturdy sapling. Just remember: this tree won’t bear fruit like its parent, but the journey is half the fun.
This method works best in USDA zones 5-9, where peach trees thrive. If you’re in a colder climate, start your seedling indoors and transplant after the last frost. Patience is the real secret weapon here—your tree might take 3-5 years to bloom, but the process is oddly satisfying.
📚 In This Guide
- What you need
- Instructions
- Tips and common mistakes
- Wrapping up and next steps
What you need
- ● Peach pit: A fresh, organic peach pit (1) – avoid pits from store-bought peaches treated with fungicides.
- ● Container: Small pot (3–4 inches in diameter) with drainage holes (1) OR
- ● Paper towel or damp paper napkin (1) for initial germination.
- ● Potting soil: Well-draining, sterile seed-starting mix (1–2 cups).
- ● Plastic wrap or clear lid: To create a humidity dome (1).
- ● Spray bottle: For gentle watering (1).
- ● Scissors or knife: For cutting pits or containers (1).
- ● Grow light or sunny windowsill: Bright, indirect light for early stages.
- ○ Seedling heat mat (optional) – speeds up germination in cooler climates.
- ● Fertilizer (balanced, diluted, 10-10-10) – for transplanting after sprouting.
- ● Humidity tray or greenhouse kit – maintains ideal moisture levels.
- ● Label and marker – to track your seedling’s progress!
Step-by-step instructions for germinating a peach tree from seed
Here's how to coax life from a peach pit and grow a tree that could bear fruit in 5-7 years.
🌱 Step 1: Extract and Prepare the Seed
Start with a fresh, plump peach pit—avoid dried or shriveled ones. Cut the pit open lengthwise with a sharp knife, then carefully scoop out the seed inside. The seed has a hard, protective shell that needs to be softened before planting. Place the seed between two paper towels and wrap it snugly. Soak the wrapped seed in warm water for 24 hours—this kickstarts the germination process.
Here's the thing—peach seeds need a period of cold stratification to break dormancy. After soaking, place the wrapped seed in a sealed plastic bag with a little extra water (just enough to keep it moist). Store it in your refrigerator for 6-8 weeks. Check it weekly to ensure the paper towel stays damp but not soggy. This cold treatment mimics winter conditions and signals the seed it's time to grow.
🌱 Step 2: Plant the Stratified Seed
After the cold treatment, remove the seed from the refrigerator and let it warm up to room temperature for a few hours. Fill a small pot (about 4-6 inches deep) with a mix of 50% potting soil and 50% perlite—this ensures good drainage while retaining moisture. Plant the seed 1 inch deep, pressing the soil gently around it to remove air pockets but not compacting it too tightly.
Water the soil lightly until it's evenly moist, but avoid oversaturating it. Place the pot in a warm, bright spot with indirect light—direct sunlight can dry out the soil too quickly. Cover the pot loosely with plastic wrap to retain humidity, but leave a small gap for airflow. This creates a mini greenhouse effect that encourages germination.
💧 Step 3: Wait for and Care for the Sprout
Germination can take 2-6 weeks, depending on the seed and conditions. You'll know it's working when you see a tiny shoot break through the soil. Once the sprout appears, remove the plastic wrap immediately—too much humidity now can cause rot. Keep the soil consistently moist, watering only when the top ½ inch feels dry to the touch.
When the seedling reaches about 3-4 inches tall, it's time to transplant it into a slightly larger pot (around 6-8 inches deep) with fresh potting mix. Use your finger to loosen the soil around the roots before transferring to avoid damaging the delicate root system. Place the new pot in a spot with bright, indirect light for another few weeks to help the young tree establish itself.
☀️ Step 4: Transition to Outdoor Conditions
After the last frost date in your area, it's time to acclimate your peach tree to outdoor conditions. Start by placing the pot outside in a sheltered spot for a few hours each day, gradually increasing the time over 1-2 weeks. This process, called hardening off, helps the tree adjust to wind, sunlight, and temperature fluctuations without shock.
Once the tree has spent full days outside, choose a sunny location in your yard with well-draining soil. Dig a hole twice as wide as the pot but no deeper, then carefully remove the tree and place it in the hole, ensuring the top of the root ball sits level with the ground. Backfill with soil, water deeply, and add a 2-3 inch layer of mulch around the base to retain moisture and regulate soil temperature. Your peach tree is now ready to grow into a fruit-bearing beauty!
Tips & tricks for germinating your peach tree from seed
These little-known tricks will help you avoid the most common pitfalls when growing a peach tree from a pit.
Seed Selection: Always choose a pit from a ripe, fresh peach—avoid those that feel dry or shriveled. The seed inside needs to be plump and firm. I've tried using pits from canned peaches, but they never germinate—always go for fresh fruit. If you're unsure about the pit's freshness, cut it open and check for a healthy seed with no dark spots or mold.
The 24-Hour Soak Secret: Don't skip this step! The 24-hour warm water soak is crucial for breaking down the seed's hard outer shell. I've found that using filtered or room-temperature water works best—hot water can actually damage the delicate seed. After soaking, gently squeeze out excess water from the paper towels before sealing the bag. Too much moisture during stratification can lead to mold.
Stratification Check: During the 6-8 week cold treatment, check your seed weekly by gently pressing the paper towel—it should feel damp like a wrung-out sponge, not soggy. If it's too wet, unwrap it and let it dry slightly before resealing. I've learned the hard way that soggy conditions can cause rot before germination even begins. Place the bag in the crisper drawer of your fridge where temperatures stay most consistent.
Transplant Timing: When your seedling reaches 3-4 inches tall, it's ready for its first transplant. I recommend using a small hand trowel to carefully loosen the soil around the roots before transferring to avoid damaging them. After transplanting, give the new pot a gentle shake to help the roots settle into their new space. This is also a good time to add a slow-release fertilizer to give your young tree a nutrient boost for its next growth phase.
Pro Tips for Peach Tree From Seed Pit
- These little-known tricks will help you avoid the most common pitfalls when growing a peach tree from a pit.
- Seed Selection: Always choose a pit from a ripe, fresh peach—avoid those that feel dry or shriveled. The seed inside ...
- The 24-Hour Soak Secret: Don't skip this step! The 24-hour warm water soak is crucial for breaking down the seed's ha...
Frequently asked questions
Got questions about growing a peach tree from a seed pit? You’re not alone—this method takes patience and know-how! Here are answers to the most common queries to help you succeed.
How long does it take for a peach seed to germinate?
A peach seed can take anywhere from 3 weeks to 6 months to germinate, depending on temperature and moisture. Cold stratification (chilling) is key—most seeds need 8–12 weeks in the fridge before sprouting. Be patient, and keep the soil consistently moist but not soggy!
Do I really need to cold-stratify the seed?
Yes! Peach seeds require cold stratification to break dormancy. Skip this step, and germination rates drop dramatically. Place the seed in a damp paper towel or potting mix, then refrigerate for 2–3 months before planting. Think of it as a "winter nap" for your seed!
What if my seed doesn’t sprout?
Don’t give up! Try these fixes:
- Check moisture: Overwatering can rot the seed; underwatering stalls growth.
- Verify stratification: Ensure the seed spent enough time cold (minimum 8 weeks).
- Test viability: Cut open the seed—if it’s brown and mushy inside, it’s likely dead.
- Try a new seed: Some pits may not sprout, even with perfect care.
Will my seedling grow into a fruit-bearing tree?
Probably not the same variety as the parent tree! Peach seeds often produce wild-type trees with smaller, less sweet fruit. For consistent peaches, graft a known cultivar onto your seedling later. But hey—experimenting is half the fun!
When should I transplant my seedling outdoors?
Wait until after the last frost and when nighttime temps stay above 50°F (10°C). Harden off your seedling by gradually exposing it to outdoor conditions over 1–2 weeks. Choose a sunny spot with well-draining soil—peach trees hate soggy roots!
Bonus Tip: Speed Up Germination!
For faster results, soak the pit in lukewarm water for 24 hours before cold stratification. Some gardeners also use a seed germination mat to maintain warmth during the process. Just remember: patience is key—great things grow with time!
Wrapping up and next steps
Growing a peach tree from seed pit is a rewarding journey that connects you to nature’s sweetest surprises! While patience is key—especially with the two-year wait for blooms—your effort will yield a unique, heirloom tree with the potential for delicious fruit. 🌱✨
Ready to turn your seedling into a thriving tree? Start by transplanting it into a larger pot or garden bed this fall, then nurture it with care. Next spring, watch as your tiny seedling reaches for the sky—and maybe even a few blossoms!