
Lawn
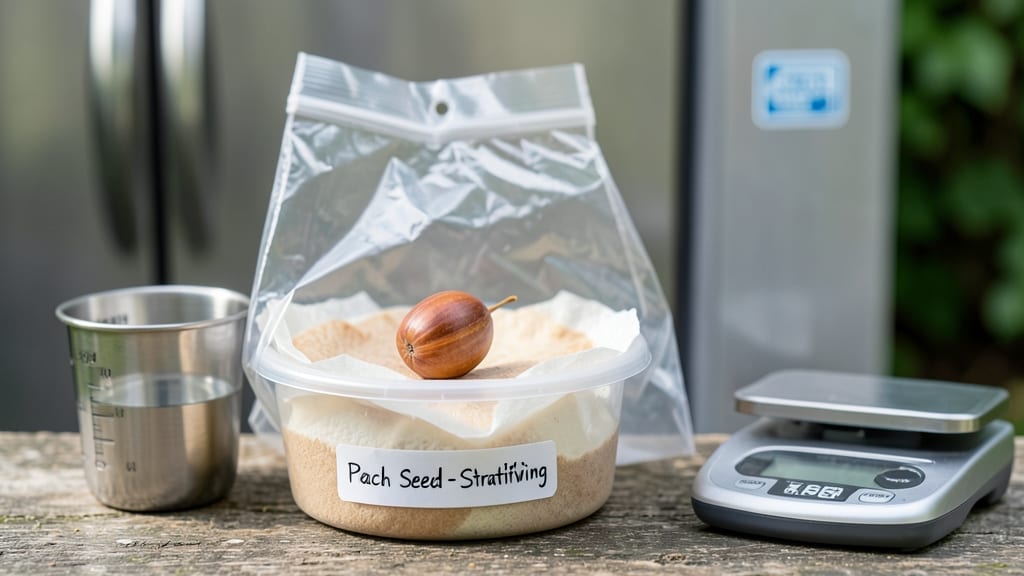
Peach seed stratification in cold, moist sand breaks their dormancy—the cold-moist trick that turns stubborn seeds into reliable spring saplings. 🌱 I’ve struggled with peach pits that refused to sprout until I learned this method, which mimics winter’s natural process. The key? Patience and consistent moisture without letting the mix dry out or rot.
You’ll need just three things: clean peach pits, damp sand (or a 50/50 sand/perlite mix), and a sealed container. The process takes 60–90 days in the fridge, but it’s worth it—skipping stratification means waiting years (or never) for germination.
Even with perfect conditions, only about 30% of seeds will sprout, so plant extras if you’re eager for trees.
After stratification, plant the seeds ½-inch deep in well-draining soil and keep them warm. Within 2–4 weeks, you’ll see tiny green shoots—proof the cold treatment worked.
These seedlings will grow into peach trees, though they may take 3–5 years to bear fruit (if they’re true to the parent variety at all).
Here’s the secret to success: Don’t rush it. Overwatering or warm temperatures during stratification kills seeds faster than dormancy does. If you’re in a mild climate, try burying the seed-sand mix outside in a shaded spot instead of using the fridge. Either way, spring blooms are worth the wait!
📚 In This Guide
- What you need
- Instructions
- Tips and common mistakes
- Wrapping up and next steps
What you need
- ● Peach seeds – Fresh, clean, and untreated (10–20 seeds per batch).
- ● Well-draining potting mix – A sterile blend of peat moss, perlite, and vermiculite (or coconut coir for eco-friendliness). Quantity: Enough to fill a small container (e.g., 6-inch pot or seed tray).
- ● Small containers – Drainage holes required! Options: Plastic seed trays (with lids for humidity)
- ● Yogurt cups or paper towels (for quick-start moisture checks)
- ● Ziplock bags (with breathable paper towels inside)
- ● Water – Room-temperature, chlorine-free (use filtered or rainwater if possible).
- ● Refrigerator – A cold but not freezing space (34–40°F / 1–4°C).
- ● Spray bottle – For gentle moisture control (avoid soaking!).
- ● Hydrogen peroxide (3%) – To sterilize seeds (soak for 10 mins if seeds look funky).
- ● Labeling tags – To track stratification dates (trust us, you’ll forget!).
- ● Humidity dome – Keeps moisture consistent (great for seed trays).
- ● Growth light – For post-stratification sprouting (if natural light is weak).
- ● Fungicide – Like mycorrhizal powder to prevent mold during stratification.
Step-by-Step guide to stratifying peach seeds for spring success
This cold-moist process mimics nature’s timing—breaking dormancy so your seeds burst into life when temperatures rise.
🌱 Step 1: Extract and Clean the Seeds
Remove the pit from a ripe peach and crack it open with a nutcracker or hammer—wear gloves, as the flesh can stain. Inside, you’ll find a single large seed with a hard, brown shell. Rinse it under cool water to remove any remaining fruit residue, then pat it dry with a paper towel. The cleaner the seed, the better it’ll respond to stratification.
Here’s the thing—peach seeds have a thick seed coat that naturally resists water absorption. A quick 24-hour soak in lukewarm water softens the outer layer just enough to prime germination. Use a small bowl or jar, cover it loosely with plastic wrap, and let it sit in a dark corner. You’ll know it’s ready when the seed feels slightly softer to the touch.
❄️ Step 2: Prepare the Cold Stratification Medium
Fill a resealable plastic bag with 4 cups of dampened perlite or coarse sand—this lightweight mix drains well while retaining enough moisture to keep seeds hydrated. The medium should feel like a wrung-out sponge: damp but not dripping. I like to mix in 1 tablespoon of horticultural charcoal to prevent mold, which can be a sneaky problem in sealed containers.
Place the bag in the refrigerator (not the freezer) where temperatures hover around 35-40°F. This mimics the natural winter chill peach seeds experience in the wild. Check the moisture level weekly—if the mix feels dry to the touch, mist it lightly with water. Overwatering here leads to rot, so err on the side of dryness.
🌿 Step 3: Stratify the Seeds for 6-8 Weeks
Gently nestle the soaked peach seed into the damp perlite, covering it with ½ inch of the medium. Seal the bag but leave a tiny gap for airflow—peach seeds need oxygen to break dormancy. Place it back in the fridge and mark your calendar: 6-8 weeks of cold treatment is critical. This period tricks the seed into thinking winter has passed, signaling it’s time to grow.
You won’t see any action during this time—that’s normal. The magic happens internally as hormones shift within the seed. After 4-6 weeks, you can gently press the seed to check for softness. If it gives slightly, germination is ready to kick in. If it’s still rock-hard, give it another 2 weeks.
☀️ Step 4: Transition to Warmth for Germination
Once the stratification period ends, remove the seed from the fridge and plant it ½ inch deep in a small pot filled with sterile seed-starting mix. Use a spray bottle to moisten the soil until it’s damp but not soggy. Place the pot in a warm, bright spot—70-75°F is ideal—where it gets 6-8 hours of indirect light daily. A seedling heat mat can speed things up if your home runs cooler.
Patience is key here. Germination can take 2-4 weeks, and some seeds may take longer. Keep the soil consistently moist—never waterlogged—by checking the top inch daily. The first sign of life? A tiny root pushing through the soil or a shoot breaking the surface. Once you see true leaves (not the first cotyledons), you’ve cracked the code.
🌱 Step 5: Nurture the Seedling for Transplanting
When the seedling reaches 3-4 inches tall and has 4-5 true leaves, it’s ready to move into a 4-inch pot with fresh potting mix. Harden it off gradually over 7-10 days by placing it outdoors in a sheltered spot for increasing lengths of time. Watch for wilting or yellowing leaves—these are red flags for shock. If they appear, move it back inside and extend the hardening period by a few days.
Real talk: Peach tree seedlings grow slowly at first, but they’re tough once established. By spring, you’ll have a sturdy young tree ready to plant outdoors in a sunny, sheltered spot. Just remember, peach trees need full sun and well-draining soil to thrive—so pick your location wisely.
Tips & tricks for perfect peach seed stratification
Between us, the secret to reliable peach seed germination lies in those little details that most guides skip. Here's what nobody tells you—
Soak Smart: That 24-hour soak in Step 1 isn't just about softening the seed coat—it's about breaking the seed's natural dormancy barrier. Use lukewarm water (around 75°F) rather than cold water, which slows down the hydration process. I've found that adding 1 teaspoon of hydrogen peroxide (3%) to the soak water helps prevent any potential bacterial growth while the seed sits. The seed should feel noticeably softer after 24 hours, almost like it's yielding slightly when pressed between your fingers. If it still feels rock-hard, extend the soak by another 12 hours—just don't let it dry out.
Medium Matters: While the instructions call for perlite or coarse sand, I've had excellent results using a 50/50 mix of perlite and vermiculite in Step 2. This combination provides better moisture retention while still allowing essential airflow. The key is maintaining that "wrung-out sponge" consistency—if your medium feels like a damp washcloth, you're golden. Pro tip: Use a spray bottle to mist the medium rather than pouring water directly, which can create pockets of excess moisture that lead to rot. And that 1 tablespoon of horticultural charcoal? It's worth every bit—it acts like a natural filter, preventing mold spores from taking hold in your sealed environment.
Temperature Troubleshooting: Your refrigerator might not actually be at the ideal 35-40°F range for stratification. Most home fridges run cooler, around 38-42°F in the crisper drawer. If you're unsure, use an inexpensive refrigerator thermometer to monitor the temperature. For more precise control, consider using a dedicated seed stratification fridge or even a DIY setup with a Styrofoam cooler and a small refrigerator. The goal is to maintain consistent cold temperatures—fluctuations can confuse the seed's internal clock and delay germination.
Germination Watch: In Step 4, those 6-8 hours of indirect light daily are crucial, but don't be tempted to move the seedling to direct sunlight just yet. Start with a south-facing window or use a grow light positioned about 6 inches above the seedling. The first true leaves will appear after the initial cotyledons (those baby leaves) emerge. This is your signal that the seedling is ready for slightly more light—gradually increase exposure over 3-4 days to avoid shocking the young plant. I've seen seedlings that got too much light too soon develop yellowing leaves within days.
Pro Tips for Peach Seed Stratification
- Between us, the secret to reliable peach seed germination lies in those little details that most guides skip. Here's ...
- Soak Smart: That 24-hour soak in Step 1 isn't just about softening the seed coat—it's about breaking the seed's natur...
- Medium Matters: While the instructions call for perlite or coarse sand, I've had excellent results using a 50/50 mix ...
Frequently asked questions
Got questions about peach seed stratification? You’re not alone! Here are some of the most common ones—plus straightforward answers to help you grow those dreamy spring blooms with confidence.
How long does peach seed stratification need to last?
Peach seeds typically require 60–90 days of cold, moist stratification for the best germination rates. Start the process in late fall (around October) to align with natural winter conditions, ensuring seeds break dormancy just as spring arrives. Pro tip: If you’re in a warmer climate, extend the time to 120 days for optimal results!
Can I speed up stratification with a refrigerator?
Yes! A refrigerator mimics winter’s chill perfectly. Place your sealed container of moistened seeds on the vegetable crisper shelf (or the coldest setting) for consistent 34–40°F (1–4°C) temps. Just avoid the freezer—freezing temps can damage seeds. Check moisture levels weekly to prevent mold.
What if my seeds sprout mold during stratification?
Mold is a red flag—it means your seeds are too wet. Drain excess moisture immediately and transfer them to a fresh, slightly damp (not soggy) medium. If mold persists, start over with new seeds. Prevention tip: Use a breathable container (like a paper towel-lined jar) and avoid sealing tightly.
Do I need to stratify peach seeds if I’m planting them outdoors in winter?
Outdoor planting can work, but it’s riskier. Seeds buried in garden beds may not get consistent cold or moisture. If you try it, plant them deeply (2–3 inches) in well-draining soil and mulch heavily to retain moisture. However, container stratification gives you better control over conditions.
What’s the best way to test if stratification worked?
After stratification, place seeds in a warm, moist environment (like a seedling tray with heat mat). Germination should start in 2–4 weeks. If nothing sprouts after 6 weeks, the seeds may have failed—try a new batch! Success tip: Keep soil temps at 70–75°F (21–24°C) for faster results.
Wrapping up and next steps
Peach seed stratification is your secret weapon for unlocking vibrant spring blooms with confidence! 🌱 By mimicking nature’s cold-wet cycle, you’re giving those seeds the best shot at sprouting strong, healthy trees.
Whether you’re a gardening newbie or a green thumb, this method is simple, cost-effective, and rewarding—just imagine the pride of watching your own peach tree flourish!
Ready to take the next step? Start small—collect seeds from a ripe, organic peach (or grab a few from your local nursery) and dive into stratification this fall. Keep experimenting, document your progress, and soon, you’ll be sharing your success with fellow gardeners. Happy growing! 🌿