
Lawn
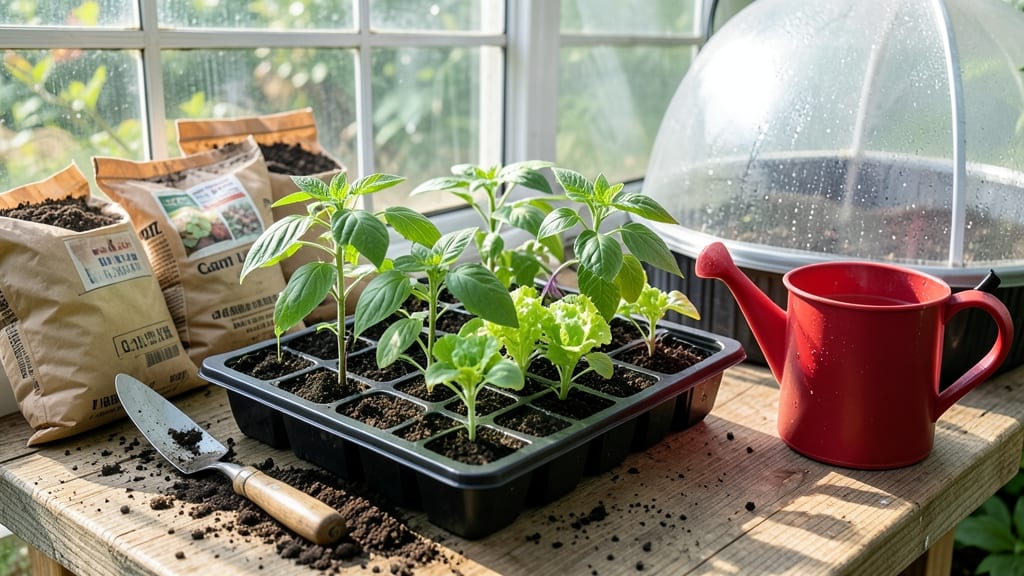
My greenhouse seed trays transformed from a hit-or-miss experiment to a foolproof germination system after switching to this lightweight loam mix. 🌱 The right trays and medium make all the difference—especially when you're dealing with finicky seeds that need precise moisture and warmth to sprout.
Plastic trays with drainage holes are my go-to for their durability and reusable nature, but biodegradable options work too if you prefer zero waste. The secret sauce?
A fast-draining mix of coco coir, perlite, and a touch of compost—it holds moisture without drowning roots while staying light enough for easy handling. Within 5-7 days, you'll see those first green shoots pushing through, and the transition to larger pots becomes seamless.
No more leggy, weak seedlings struggling to adapt—just sturdy starts ready for their next growing phase. Works for everything from delicate herbs to hearty vegetables, and adapts to both cool and warm greenhouse climates. Here's how to set it up right the first time.
📚 In This Guide
- What you need
- Instructions
- Tips and common mistakes
- Wrapping up and next steps
What you need
- ● Seed Trays: 10–20 trays (depending on scale), preferably with drainage holes (e.g., 1020 or 50-cell trays). Plastic or biodegradable options work great!
- ● Lightweight Loam Mix: 50% peat moss (or coco coir for sustainability)
- ● 30% perlite or vermiculite (for aeration)
- ● 20% compost or worm castings (for nutrients)
- ● Seeds: High-quality, fresh seeds (check germination rates!)
- ● Misting Bottle or Sprayer: 1–2 for gentle hydration
- ● Greenhouse Space: Sheltered area with consistent warmth (65–75°F) and humidity control
- ○ Grow Lights (Optional but Helpful): LED or fluorescent lights (12–16 hours/day for seedlings)
- ● Gloves & Mask: 1 pair each (to avoid dust/irritants)
- ● Small Hand Trowel or Rake: For mixing soil
- ● pH Test Kit: To ensure soil pH is 5.8–6.5 (ideal for most seeds)
- ○ Heat Mat (Optional): For cold-sensitive seeds (e.g., peppers, tomatoes)
- ● Humidity Dome or Plastic Wrap: To retain moisture during germination
Step-by-step guide to setting up lightweight loam mix in greenhouse seed trays
Here's my go-to method for creating the ideal germination environment—fast, consistent, and foolproof.
🌱 Step 1: Select the Right Seed Trays and Loam Mix
Start with 4-cell seed trays that have drainage holes—plastic or biodegradable work equally well. I prefer the latter because they eliminate transplant shock when moving seedlings. For the loam mix, combine 50% peat moss, 30% perlite, and 20% vermiculite to create a lightweight, well-aerated medium that holds moisture without compacting.
Sift the mix through a ¼-inch mesh screen to remove clumps and ensure even consistency. This prevents air pockets that could slow germination. The texture should resemble a damp sponge—light enough to crumble between fingers but not dry or dusty. Store the mix in a sealed container until ready to use to maintain its fluffiness.
💧 Step 2: Moisten and Fill the Seed Trays
Fill each cell of the seed tray with the loam mix, pressing down gently to create a firm but not compacted surface. Leave about ¼ inch of space at the top to prevent overflow when watering. I use a spray bottle to moisten the mix evenly—just until it feels damp like a wrung-out sponge. Overwatering now will cause the mix to settle unevenly and create air gaps that seeds hate.
Tap the tray lightly on the workbench to settle the mix without compacting it. The goal is a uniform surface where seeds can make direct contact with moisture. If the mix feels too dry after filling, add a fine mist until the top ½ inch is consistently damp. This ensures seeds won’t dry out before they sprout.
☀️ Step 3: Plant Seeds at the Correct Depth and Cover
Sow seeds according to packet instructions, but never deeper than twice their diameter. For tiny seeds like lettuce, press them into the surface lightly with your fingertip—no covering needed. For larger seeds like beans, create a small dimple with a toothpick and place the seed inside, then cover with a thin layer of mix. This prevents seeds from drying out while still allowing light to reach them.
Label each tray with the seed type and date using a waterproof marker. Place the trays in the greenhouse on a seedling heat mat set to 75-80°F—this warmth accelerates germination by up to 50%. Cover the trays with a clear plastic dome or humidity tent to retain moisture. Check daily for condensation on the inside of the cover; if it’s foggy, you’ve got the humidity just right.
🌿 Step 4: Monitor Light and Moisture for Fast Germination
Once seeds sprout, remove the humidity cover immediately to prevent fungal growth. Place the trays under grow lights set to a 14-hour photoperiod—this mimics spring conditions and speeds up early growth. Keep the lights 2-3 inches above the seedlings and raise them as the plants grow to avoid leggy stems. You’ll see true leaves emerge in 7-10 days for fast-germinating varieties like radishes or lettuce.
Water from the bottom by placing the trays in a shallow tray of water for 10-15 minutes. This encourages roots to grow downward and prevents soil-borne diseases. Always water in the morning so excess moisture evaporates by nightfall. If you notice wilting or yellowing leaves, it’s a sign of overwatering—adjust your schedule to every 2-3 days instead.
⏰ Step 5: Harden Off and Transplant Young Seedlings
When seedlings develop their second set of true leaves, start hardening them off by gradually increasing airflow. Open greenhouse vents for 1 hour daily over 5 days, then leave them open overnight. This prepares seedlings for outdoor conditions without shock. You’ll know they’re ready when they stand upright and show no signs of stress.
Transplant seedlings into larger containers or the garden when they’re 3-4 inches tall and have developed a sturdy root system. Use a dibble or your finger to create a hole slightly larger than the root ball, then firm the soil gently around the base. Water deeply to settle the roots and reduce transplant shock. Within a week, you’ll see new growth—proof that your lightweight loam mix did its job.
Tips & tricks for perfect greenhouse seed trays
Here's what nobody tells you about getting those first sprouts—without the guesswork.
Loam Mix Consistency: The 50-30-20 ratio of peat moss, perlite, and vermiculite is non-negotiable for that perfect sponge-like texture. After sifting through the ¼-inch mesh, test your mix by squeezing a handful—it should hold its shape but crumble easily, like a damp kitchen sponge. If it feels gritty, add more peat moss; if it sticks together, increase the perlite. This balance is what gives your seeds that critical head start.
Heat Mat Placement: Position your seedling heat mat at exactly 75-80°F—this isn't just a suggestion, it's the sweet spot for germination acceleration. I've seen seeds sprout in half the time when kept in this range. Place the trays directly on the mat, but avoid stacking them to ensure even heat distribution. Pro tip: Use an infrared thermometer to check the actual surface temperature—some mats run cooler than their settings suggest.
Light Distance Dynamics: Those 2-3 inches between grow lights and seedlings aren't arbitrary—they're calculated to prevent leggy growth while providing optimal photosynthesis. As your seedlings grow, raise the lights incrementally (about ½ inch every 3-4 days) to maintain this distance. I use a small ruler taped to the light stand as a visual guide. This gradual adjustment mimics natural light conditions and prevents shock to the young plants.
Bottom Watering Technique: The 10-15 minute bottom watering method in Step 4 is a game-changer for preventing damping-off disease. Use a shallow tray that's just deep enough to cover the bottom of your seed trays by about ¼ inch. This gentle capillary action ensures roots get hydrated without disturbing the delicate seedling structure. I've found that using room-temperature water (not cold) prevents temperature shock that could stunt early growth.
Pro Tips for Seed Trays For Greenhouse
- Here's what nobody tells you about getting those first sprouts—without the guesswork.
- Loam Mix Consistency: The 50-30-20 ratio of peat moss, perlite, and vermiculite is non-negotiable for that perfect sp...
- Heat Mat Placement: Position your seedling heat mat at exactly 75-80°F—this isn't just a suggestion, it's the sweet s...
Frequently asked questions
Got questions about seed trays for your greenhouse? You’re not alone! Here are answers to the most common queries to help you get started with confidence.
What’s the best lightweight loam mix for seed trays?
A well-balanced mix typically includes 50% peat moss or coconut coir, 30% perlite or vermiculite (for aeration), and 20% compost or worm castings for nutrients. Avoid heavy garden soil—it compacts and slows germination. For fast results, pre-moisten the mix to keep it consistently damp (not soggy!).
How soon can I transplant seedlings from trays?
Timing depends on the plant type, but most seedlings are ready when they’ve developed 2-4 true leaves and their roots fill the tray cells. For delicate plants like lettuce, transplant after 3-4 weeks; heartier veggies like tomatoes can wait up to 6-8 weeks. Harden off seedlings by exposing them to outdoor conditions for 5-7 days before moving them.
Are reusable seed trays worth the investment?
Reusable trays (like plastic or biodegradable fiber) save money long-term and reduce waste. They’re ideal for high-volume planting or if you’re growing heirloom varieties year after year. Just sanitize them between uses with a 10% bleach solution or boiling water. For one-time projects, disposable trays work fine—just compost them after use!
Why are my seeds not germinating in the greenhouse?
Check these common culprits: temperature (most seeds need 65–75°F), moisture (keep trays damp but not waterlogged), and light (seeds need darkness to sprout—cover trays until shoots appear). Poor-quality seeds or old seed mixes can also stall germination. Try a heat mat for stubborn seeds or test a new batch of soil.
Can I reuse old seed trays for a new planting?
Yes, but only if they’re clean and intact. Scrub trays with soapy water, rinse thoroughly, and disinfect with hydrogen peroxide (3%) or a bleach solution. Avoid metal trays if they rust—opt for plastic or biodegradable materials instead. Pro tip: Label trays with planting dates to track reuse cycles!
Wrapping up and next steps
Investing in the right seed trays for greenhouse—especially with a lightweight loam mix—can transform your germination game! 🌱 Whether you're a seasoned gardener or just starting, the key is consistency, patience, and the right tools.
Now that you’re armed with tips, FAQs, and material insights, it’s time to roll up your sleeves and get growing.
Your next step? Start small, experiment with your setup, and track what works best for your climate and plants. Happy planting—your future garden starts here! 🌿