
Propagation
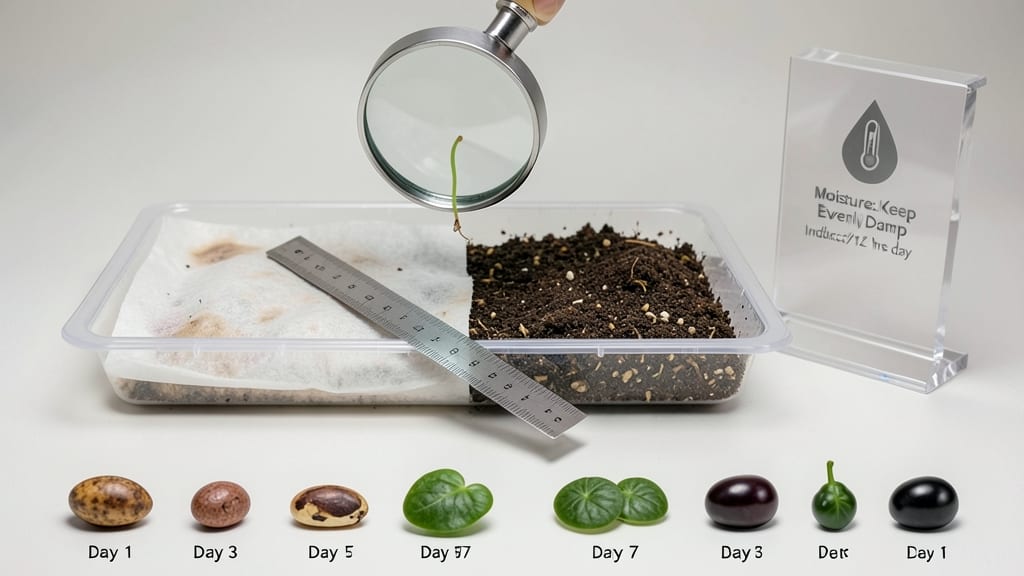
Tracking seed germination times just saved me from throwing away three batches of seeds last spring. 🌱 A simple chart that matches your zone, seed type, and temperature tells you exactly when to expect sprouts—no more guessing whether those seeds are dead or just taking their time.
The secret to reliable germination isn’t complicated: it’s knowing your seed’s ideal temperature range (like 60-75°F for most veggies) and moisture level (keep it damp, not soggy).
My chart includes everything from fast germinators like radishes (3-5 days) to slowpokes like parsley (2-3 weeks), so you can plan your schedule around real expectations instead of frustration.
By the time you’re done, you’ll spot sprouts consistently and troubleshoot delays before they become problems. No more wondering if your basement is too cold or your seeds are expired—just clear, zone-specific timing that works for beginners and seasoned gardeners alike.
Whether you’re starting a windowsill garden or prepping for spring planting, this chart keeps everything organized. Here’s how to use it—and what to do when germination stalls.
📚 In This Guide
- What you need
- Instructions
- Tips and common mistakes
- Wrapping up and next steps
What you need
- ● Seeds: Choose seeds suited to your USDA Hardiness Zone (check your zone here). Start with 5–10 seeds per variety for testing.
- ● Germination trays or containers: 2–4 shallow trays (6–8 inches deep) with drainage holes, or small pots (2–4 inches in diameter). Reusable plastic or biodegradable peat pots work great!
- ● Germination medium: Peat moss or coconut coir (sterilized, 2–3 inches deep).
- ● Seed-starting mix (lightweight, sterile blend). Avoid garden soil—it’s too dense!
- ● Watering can or spray bottle: A fine-mist spray keeps seeds moist without displacing them.
- ○ Heat mat (optional but helpful): For cold-starting seeds (e.g., peppers, tomatoes), use a 70–85°F mat to speed up germination.
- ● Clear plastic dome or plastic wrap: Creates a humidity tent to retain moisture during early stages.
- ● Grow lights or sunny windowsill: A 12–16 hour daylight cycle (LED or fluorescent bulbs work best).
- ● Thermometer and hygrometer: Monitor temperature (60–85°F) and humidity (40–70%) for optimal conditions.
- ● Seedling heaters: For tricky seeds like parsley or carrots, a bottom heat source boosts success.
- ● Humidity tray: A shallow tray with pebbles and water underneath containers adds extra moisture.
- ● Labeling system: Toothpicks + masking tape or a seedling label maker to track varieties and dates.
- ● Fungicide (e.g., hydrogen peroxide 3%): A 1:9 dilution prevents damping-off disease.
- ● Seedling fertilizer: A balanced, water-soluble option (5-5-5 or 10-10-10) at half-strength once true leaves appear.
How to use a seed germination chart for your planting zone
Timing is everything in gardening—get this right, and you'll have strong, healthy starts. Here's how to match germination windows to your climate zone for foolproof results.
📅 Step 1: Identify Your Planting Zone and Last Frost Date
First, locate your USDA hardiness zone on a zone map—this determines when to start seeds indoors or outdoors. I always check the average last frost date for my zone, which you can find through local agricultural extensions or online tools. For example, Zone 5 has a last frost around April 15th, while Zone 9 might see frost as late as January 31st.
Write down your zone and last frost date—this is your baseline. If you're unsure, err on the side of caution and pick the later date. Some germination charts include zone-specific windows, but knowing your frost date lets you calculate backward from when seedlings need to be ready for transplanting. For instance, tomatoes need 6-8 weeks of indoor growth before transplanting, so Zone 5 gardeners should start them by March 1st.
🌱 Step 2: Match Seed Types to Germination Categories
Not all seeds germinate the same way. A seed germination chart categorizes seeds by speed and temperature needs—fast germinators (like radishes, 3-5 days), moderate germinators (like beans, 7-14 days), and slow germinators (like peppers, 14-21 days). I always cross-reference my seed packets with a chart to avoid overwatering or impatience.
Temperature also matters—cool-season crops (like lettuce) thrive at 60-70°F, while warm-season crops (like cucumbers) need 75-85°F. If your indoor temps run cooler, use a seedling heat mat to speed up germination. Watch for first true leaves (not the initial seed leaves) to confirm successful sprouting.
⏱️ Step 3: Calculate Your Indoor Start Window
Use the chart to determine how many weeks before your last frost date to start each seed type indoors. For example, if your last frost is May 1st and basil needs 4-6 weeks indoors, you'll start it by March 15th. I like to mark these dates on a calendar and set reminders—missing a window means weaker transplants or waiting until it's too late in the season.
Don't forget to account for outdoor hardening off time (7-10 days) before transplanting. For instance, if you're starting broccoli (10-12 weeks indoors) in Zone 6 (last frost April 20th), you'd start it by February 1st to give yourself a buffer. Adjust for your zone and seed type—some plants, like onions, can handle cooler soil and may not need as long indoors.
🌡️ Step 4: Adjust for Your Microclimate
A germination chart gives you a starting point, but your microclimate might need tweaks. If your basement runs 55°F, slow germinators like carrots (14-28 days) could take even longer. Move trays to a warmer spot, like near a sunny window or under a grow light, to speed things up. I’ve seen germination times stretch by 50% in cooler conditions—patience is key, but don’t let seeds sit in damp, cold soil for weeks.
Conversely, if your indoor space is too warm (above 85°F), seeds like lettuce may rot before sprouting. Use a fan on low to circulate air and prevent mold. Pay attention to soil moisture—it should stay consistently damp but not soggy. The moment you see green sprouts breaking through, reduce watering slightly to avoid damping-off disease.
📝 Step 5: Track Progress and Troubleshoot Delays
Keep a simple log of germination dates, soil temps, and any adjustments you make. If seeds take longer than the chart predicts, note whether it was due to low light, inconsistent moisture, or temperature fluctuations. For instance, if your tomato seeds (7-14 days) haven’t sprouted in 2 weeks, check for mold or overwatering—sometimes seeds need a 24-hour soak in lukewarm water to soften their outer coating.
Real talk: even with a chart, some seeds just take their time. If you’ve waited 3 weeks past the expected germination window and nothing’s emerged, it’s safe to assume they didn’t survive. Don’t replant too late in the season—wait until next year and try a different batch. The chart is a guide, not a rule, and every garden has its quirks.
Tips & tricks for perfect seed germination timing
Mastering seed germination timing means the difference between thriving seedlings and wasted efforts. Here's how to optimize your approach using zone-specific charts.
Zone-Specific Precision: Your USDA hardiness zone determines everything—don't guess! For example, Zone 5 gardeners should start tomatoes by March 1st (6-8 weeks before April 15th last frost), while Zone 9 can wait until December 1st (6-8 weeks before January 31st). The chart's zone-specific windows account for regional variations in daylight and temperature that affect germination rates.
Temperature Management: The ideal soil temperatures in Step 2 (60-70°F for cool crops, 75-85°F for warm crops) are non-negotiable. I've seen germination times stretch by 50% in cooler conditions—if your basement runs 55°F, move trays to a sunny window or use a seedling heat mat. For warm crops like cucumbers, maintain consistent warmth above 75°F to prevent slow starts.
Microclimate Adjustments: Your indoor environment can dramatically alter germination windows. If you notice seeds taking longer than the chart's 3-5 days for radishes or 14-21 days for peppers, check your soil temperature with a thermometer. Inconsistent moisture or temperatures above 85°F can cause seeds to rot before sprouting—use a fan on low to improve air circulation and prevent mold.
Visual Cues Over Timers: The chart provides timeframes, but actual germination success depends on visual confirmation. In Step 2, watch for the first true leaves (not the initial seed leaves) to confirm sprouting. For slow germinators like carrots (14-28 days), mark your seed packets with the expected germination window and track progress daily—patience is key when dealing with these varieties.
Pro Tips for Seed Germination Chart
- Mastering seed germination timing means the difference between thriving seedlings and wasted efforts. Here's how to o...
- Zone-Specific Precision: Your USDA hardiness zone determines everything—don't guess! For example, Zone 5 gardeners sh...
- Temperature Management: The ideal soil temperatures in Step 2 (60-70°F for cool crops, 75-85°F for warm crops) are no...
Frequently asked questions
Got questions about seed germination timing? You’re not alone—germination can feel like a guessing game! Below are answers to the most common questions, including zone-specific tips and troubleshooting tricks to help you grow with confidence.
How do I adjust germination timing for my USDA hardiness zone?
Use your seed germination chart as a starting point, then tweak based on your zone. For example, Zone 5-6 seeds (like peas or spinach) may need 7–14 days indoors before last frost, while Zone 9-10 (tomatoes, basil) can often be direct-sown 2–4 weeks earlier. Check your average last frost date and count backward!
What’s the fastest way to speed up slow germination?
Most seeds need warmth (70–90°F), moisture, and darkness to sprout. Try these hacks:
- Heat mats (for stubborn seeds like parsley or carrots).
- Soak seeds overnight in warm water (except large seeds like beans).
- Use a clear container to monitor moisture—mist daily but avoid soggy soil.
Can I germinate seeds too early or too late in the season?
Yes! Germinating too early risks damping off (fungal rot) from cold, wet soil, while too late means seedlings bolt or struggle in heat. For cool-season crops (lettuce, kale), start 4–6 weeks before last frost. Warm-season crops (peppers, cucumbers) should wait until 2–3 weeks after last frost—or use a seedling heat mat for earlier starts.
What are good alternatives if my seeds won’t germinate?
Before giving up, try these fixes:
- Test viability: Crush a seed—if it smells musty or looks shriveled, it’s likely dead.
- Scarify hard seeds (like tomatoes or peppers) with sandpaper or soak in hot water (160°F) for 24 hours.
- Switch methods: Some seeds (e.g., heirloom varieties) germinate better in peat pots or paper towels.
Why do my seedlings look healthy but refuse to sprout?
Common culprits:
- Depth issues: Seeds buried too deep (e.g., carrots) may rot; too shallow (e.g., lettuce) can dry out.
- Poor soil contact: Press seeds gently into moist, fine soil (sifted potting mix works best).
- Light exposure: Some seeds (like tomatoes) need darkness to germinate; others (like basil) prefer light.
Wrapping up and next steps
Mastering a seed germination chart tailored to your climate zone unlocks the secret to consistent, thriving sprouts—no guesswork required! 🌱 Whether you’re a seasoned gardener or just starting, understanding the ideal timing and conditions for your region ensures stronger starts and healthier plants.
With the right knowledge, you’ll soon be enjoying a bounty of homegrown goodness.
Ready to put your newfound expertise to work? Start small—pick 1-2 seeds from your chart, test the conditions, and track your progress. Soon, you’ll be confidently expanding your garden with precision and joy!