
Lawn
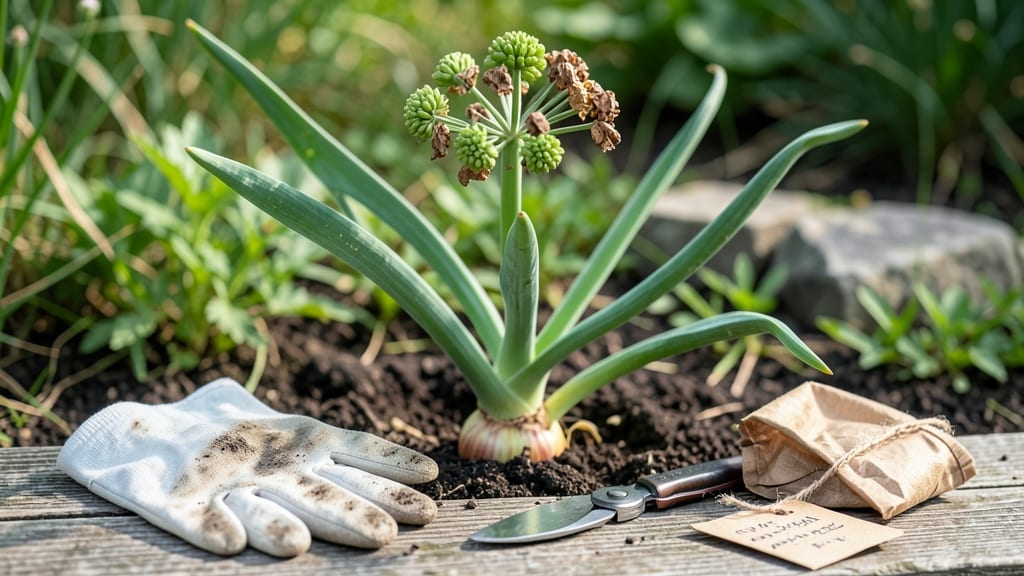
Harvesting onion seed pods turns last year's scraps into next season's harvest. 🌱 The moment those papery pods turn from green to brown is your cue—miss it, and you risk shattering seeds or attracting pests.
I've saved seeds from my own garden for three years now, and the secret lies in timing, gentle handling, and knowing exactly when to pull the pods.
The ideal pods are dry, brown, and rattling with seeds inside—like tiny paper bags filled with potential. You'll need shears or pruners, a clean paper bag for collection, and a warm, dry spot for curing.
Most gardeners overlook the drying stage, but proper curing ensures high germination rates. I once skipped this step and ended up with seeds that sprouted unevenly, wasting months of effort.
Once dried, store the pods in an airtight container in a cool, dark place. Properly stored, they'll stay viable for 2-3 years, giving you a free, organic seed supply.
The first time I tasted onions grown from my own saved seeds, I was shocked by how much better they tasted—sweeter, more complex, and perfectly adapted to my local climate.
This method works for all onion varieties, from sweet shallots to hardneck types. Even if you've never saved seeds before, onions are one of the easiest crops to master. Here's how to do it right from start to finish—no green thumb required.
📚 In This Guide
- What you need
- Instructions
- Tips and common mistakes
- Wrapping up and next steps
What you need
- ● Mature onion seed pods: 1–2 mature plants (ensure pods are fully brown and papery—no green or moist parts!).
- ● Pruning shears or sharp scissors: 1 pair (sterilized with rubbing alcohol for clean cuts).
- ● Paper bags (kraft or brown): 2–4 medium-sized bags (10x12 inches) with breathable sides.
- ● Drying rack or mesh screen: 1 (elevated, well-ventilated surface to prevent mold).
- ● Labeling tags & marker: 1 pack (write onion variety and harvest date).
- ○ Small fan or dehumidifier (optional but helpful): 1 (to speed up drying in humid climates).
- ● Glass jars or airtight containers: 2–3 (for long-term storage after pods are fully dried).
- ● Silica gel packets: 2–3 (to absorb moisture in storage containers).
- ● Humidity monitor: 1 (ideal for tracking drying conditions—aim for <40% humidity).
- ● Gloves (nitrile or cotton): 1 pair (to protect hands from sharp pod edges).
- ● Seed catalog or notebook: 1 (to log onion varieties and germination notes).
Step-by-Step guide to harvesting viable onion seed pods
Here’s how to save seeds from your onions—no fancy equipment needed, just patience and timing.
🌱 Step 1: Grow Onions to Maturity for Seed Production
Start with a few extra onion plants you’ll let flower rather than harvest. Choose varieties like 'Yellow Sweet Spanish' or 'Red Wethersfield'—they’re reliable seed producers. Plant them in well-draining soil and give them full sun for at least 6 hours daily. Water deeply but let the soil dry slightly between waterings to encourage strong stems.
Once onions bolt (send up flower stalks), watch for umbels—those round clusters of tiny white flowers. This happens naturally in their second year or when stressed by heat. Keep the soil moist but not soggy; drought stress can speed up flowering but may reduce seed quality. You’ll know they’re ready for seed pods when the umbels turn from white to green and begin swelling.
☀️ Step 2: Time the Harvest for Peak Viability
Seed pods mature unevenly, so check daily starting when half the umbel turns brown. Gently twist a pod—if it releases seeds easily, it’s ready. If it’s still green and hard, wait 2-3 more days. Harvest on a dry morning to avoid mold. Cut the entire umbel with 2-3 inches of stem attached and hang it upside down in a paper bag in a dry, shaded spot.
Don’t rush—overripe pods scatter seeds everywhere. If left too long on the plant, they’ll shatter and waste your harvest. A good rule: harvest when 70-80% of pods are brown and dry. This usually takes 3-4 weeks after flowering starts, depending on your climate.
🪴 Step 3: Dry and Store Seed Pods Properly
Let the umbels dry completely in the bag for 1-2 weeks. Stir the bag occasionally to prevent mold. Once fully dry, remove the pods and store them in an airtight container (like a glass jar) in a cool, dark place. Label with the variety and harvest date—seeds stay viable for 2-3 years if stored this way.
Here’s the thing—don’t clean the seeds yet. Whole pods protect them from moisture and pests. If you must separate seeds, do it only when completely dry, then store in a sealed container with a silica gel packet to absorb any lingering dampness.
⏰ Step 4: Test Seed Viability Before Planting Next Year
Sow a few seeds indoors in early spring to test viability. Plant them ¼ inch deep in moist potting mix and keep the soil warm (70-75°F). Germination should start in 7-14 days. If fewer than 50% sprout, store the remaining seeds in the freezer for another year—the cold can revive dormant seeds.
If germination is poor, your seeds may be old or stored too damply. In that case, start fresh with new seeds next season. But with proper drying and storage, you’ll have a reliable supply of homegrown onions year after year.
Tips & tricks for perfect onion seed pod harvesting
Let me save you the trial-and-error of learning these the hard way—these are the exact tricks I use to guarantee viable onion seeds every year.
Variety Matters: Not all onions produce good seed pods. Stick with proven varieties like 'Yellow Sweet Spanish' or 'Red Wethersfield'—they're the most reliable seed producers. I've tried others, and they either don't flower well or produce low-quality seeds. For best results, choose varieties specifically bred for seed production if available in your region.
Stress Them Just Right: In Step 1, when you're encouraging flowering, be careful with watering. The instructions mention keeping soil moist but not soggy—this is critical. Too much water stresses the plants in the wrong way, while slight drought stress (letting soil dry slightly between waterings) triggers flowering. Think of it like encouraging your plants to "think" it's summer—just enough stress to prompt reproduction.
Harvest Timing Secret: The 70-80% brown rule in Step 2 is your golden number. Here's what nobody tells you: the pods at the center of the umbel mature first, while the outer ones lag behind. That's why you check daily—when 70-80% are brown, the remaining pods will be ready within 2-3 days. Harvesting too early means underdeveloped seeds; too late means shattering and wasted seeds. I always harvest at mid-morning when dew has dried but humidity is still low.
Storage Wisdom: That 1-2 week drying period in Step 3 is non-negotiable, but here's my pro tip: place your drying bags near a gentle heat source like a sunny window (not direct sun) or even a space heater on low. This speeds up drying without risking mold. Once fully dry, I add a small silica gel packet to my storage jars—it's worth the few dollars to maintain that 2-3 year viability. The pods should feel light and papery when completely dry.
Pro Tips for Onion Seed Pods
- Let me save you the trial-and-error of learning these the hard way—these are the exact tricks I use to guarantee viable onion seeds every year.
- Variety Matters: Not all onions produce good seed pods.
- Stress Them Just Right: In Step 1, when you're encouraging flowering, be careful with watering.
Frequently asked questions
Got questions about harvesting and saving onion seed pods? You’re not alone! Here are some of the most common queries—and their practical answers—to help you master the process like a pro.
How do I know when onion seed pods are ready for harvest?
Onion seed pods are ready when they turn brown and papery and the stems dry out completely. If you tap them, they should rattle like tiny maracas. Harvest too early, and the seeds won’t be viable; wait too long, and they’ll shatter or spoil in the pod. Aim for a sunny, dry day to avoid moisture issues.
Can I harvest onion seeds year-round, or is there a best time?
While you can harvest onion seed pods year-round in warm climates, the best time is late summer to early fall (after flowering). In cooler regions, wait until the first frost has passed to avoid premature pod splitting. Store pods in a cool, dry place (like a paper bag) to extend their viability for up to 2 years.
What if my onion seed pods won’t open or release seeds?
If pods stay stubbornly closed, try these tricks:
- Dry them further: Spread pods on a screen in a warm, dry spot for 1–2 weeks.
- Gently crush: Place pods in a paper bag and shake vigorously to loosen seeds.
- Freeze & thaw: Pop pods in the freezer for 24 hours, then thaw—the moisture shift helps release seeds.
Are there alternatives to saving onion seed pods?
Yes! If seed-saving feels tricky, consider:
- Buy organic seed packets for reliable varieties.
- Grow from store-bought onions (green onions or spring onions) by replanting the root.
- Use onion sets (small bulbs) for quick, hassle-free harvests.
Why are my onion seed pods molding or rotting?
Mold or rot usually means too much moisture during harvest or storage. To fix it:
- Harvest pods only on dry days and let them cure in a well-ventilated area.
- Store pods in a paper bag (not plastic) to prevent condensation.
- Discard any pods with fuzzy mold—it’s a sign of Botrytis or bacterial soft rot.
Wrapping up and next steps
Harvesting onion seed pods is a rewarding way to ensure a steady supply of fresh, homegrown onions—and it’s easier than you think! 🌱 Whether you’re a beginner or a seasoned gardener, these pods offer a stress-free method for year-round saving.
With the right tools and a little patience, you’ll enjoy viable seeds for future crops.
Ready to take the next step? Start small—try growing just a few pods this season and experiment with drying techniques. Before you know it, you’ll be a pro at seed-saving, sharing your bounty with fellow gardeners or even selling extras! 🌟