
Picking
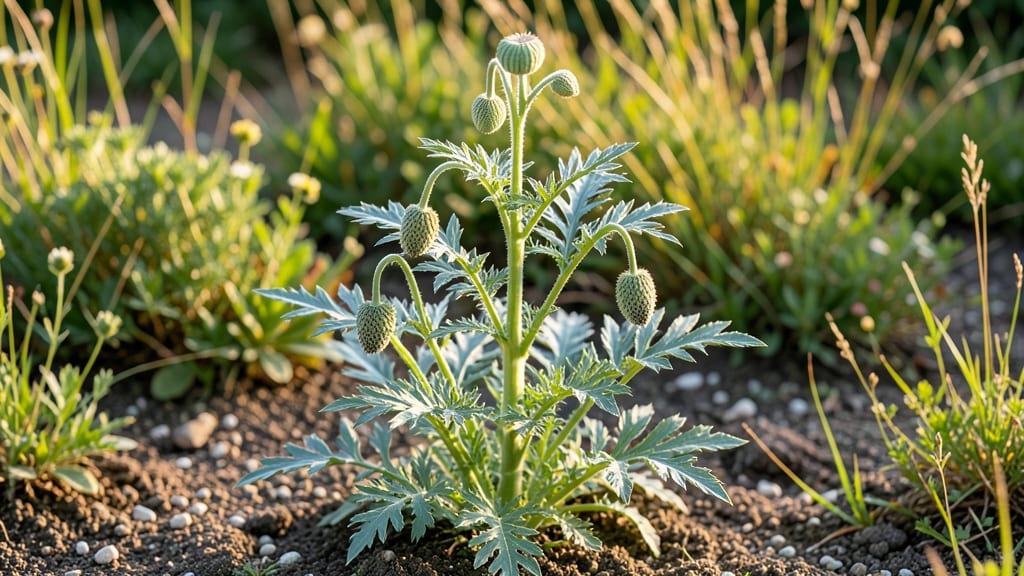
Growing Hungarian breadseed poppy from cold-stratified seeds gives you vibrant, drought-tolerant blooms that double as edible treats. 🌱 I learned the hard way—skipping stratification means waiting months for germination, but with this method, you’ll see sprouts in just 60 days.
The key is patience and the right conditions, which I’ll break down so you skip the guesswork. These poppies thrive in full sun and poor soil, making them perfect for neglected corners of the garden.
Plant seeds ¼-inch deep in well-draining soil, and space them 12 inches apart—they’ll self-seed aggressively if given room. Water lightly after planting, then let nature take over; they’re surprisingly drought-resistant once established.
By mid-summer, you’ll have bright orange blooms that attract pollinators and produce seeds you can bake into bread or sprinkle on salads. The trade-off? Slugs love them, so protect young plants with diatomaceous earth or row covers until they’re sturdy enough to fend for themselves.
This variety is foolproof for beginners but rewarding for experienced gardeners—just don’t overwater. The seeds store well, so you can save extras for next year’s garden. Ready to grow yours?
📚 In This Guide
- What you need
- Instructions
- Tips and common mistakes
- Wrapping up and next steps
What you need
- ● Seeds: 1–2 packets of authentic Hungarian breadseed poppy seeds (look for heirloom or cold-hardy varieties for best results).
- ● Growing containers: 4–6-inch deep pots with drainage holes (or a seed tray with cells).
- ● Potting mix: A well-draining, sterile mix (e.g., 50% peat moss + 30% perlite + 20% vermiculite).
- ● Cold stratification: A zip-top bag or paper towel + plastic wrap (for moisture retention).
- ● Refrigerator: A standard fridge set to 35–45°F (2–7°C) for stratification.
- ● Grow lights or sunny window: A south-facing window or LED grow lights (12–16 hrs/day after germination).
- ● Watering can or spray bottle: With a fine mist nozzle for gentle hydration.
- ○ Seedling heat mat (optional): Helps speed up germination in cooler homes (70–75°F / 21–24°C).
- ○ Humidity dome (optional): Keeps seeds moist during early stages.
- ● Transplanting tweezers: For delicate seedling handling when repotting.
- ○ Fertilizer (optional): A balanced liquid fertilizer (5-5-5) or fish emulsion once seedlings are 2–3 inches tall.
- ● Label markers: To track planting dates and varieties.
Step-by-step instructions for growing Hungarian breadseed poppy
Cold-stratification unlocks these poppies' potential—here's how to coax them from dormancy into thriving plants.
🌱 Step 1: Harvest and Prepare Seeds for Stratification
Collect fully mature poppy seed pods when they turn brown and papery. Split them open to release the black, teardrop-shaped seeds—each pod yields dozens. I store them in a dry, airtight container until stratification, which mimics winter's natural chilling period.
Seeds need 60-90 days of cold stratification to break dormancy. Place them in a sealed plastic bag with a damp paper towel, then refrigerate at 35-40°F. Check monthly—the towel should stay moist but not soggy. This chilling period tricks seeds into thinking winter has passed, triggering germination hormones.
💧 Step 2: Sow Stratified Seeds in Containers
After stratification, fill 4-inch pots with sterile seed-starting mix (never garden soil—it's too dense). Moisten until damp but not dripping, then press seeds ¼ inch deep—any deeper delays germination. I plant 2-3 seeds per pot since they germinate unpredictably.
Cover lightly with additional mix and mist gently with water. Place pots in a clear plastic bag to retain humidity, then set them on a seedling heat mat (65-70°F) for consistent warmth. Expect sprouts in 14-21 days, though some may take longer—patience is key with poppies.
☀️ Step 3: Provide Light and Air Circulation
The moment seedlings emerge, remove the plastic bag immediately to prevent damping-off. Place them under grow lights for 14-16 hours daily, keeping lights 2-3 inches above the tallest seedling. Poppies need bright light to develop strong stems—without it, they'll stretch leggy and weak.
Rotate pots a quarter turn daily so plants grow straight toward the light source. When first true leaves (the second set after cotyledons) appear, thin to the strongest seedling per pot. You'll know it's ready when it's noticeably larger than its siblings.
🪴 Step 4: Harden Off and Transplant Outdoors
Two weeks before your last frost date, begin hardening off by placing seedlings outside in a sheltered spot for 1-2 hours daily. Gradually increase exposure over 10-14 days, ending with full sun. Poppies tolerate cold but need gradual acclimation to avoid transplant shock.
Transplant after 4-6 weeks when seedlings have 4-6 true leaves and nighttime temperatures stay above 40°F. Space plants 12-18 inches apart in well-draining soil—they hate soggy roots. Water deeply at the base immediately after transplanting to settle the soil.
✂️ Step 5: Maintain Through Blooming Season
Poppies thrive with minimal care once established. Water 1 inch per week, letting soil dry between waterings—overwatering causes root rot. Fertilize lightly with 5-10-10 at planting and again when buds form, but avoid heavy feeding—they prefer lean soil.
Deadhead spent blooms to encourage more flowers, but leave some seed heads for next year's crop. By mid-summer, you'll have 4-foot-tall plants bursting with 4-inch-wide blooms—perfect for harvesting seeds or cutting flowers. Just don't disturb the roots once established; poppies resent being moved.
Tips & tricks for growing Hungarian breadseed poppy
These practical strategies will help you navigate the unique challenges of cultivating Hungarian breadseed poppies from seed.
Stratification Success: The 60-90 day cold stratification at 35-40°F is non-negotiable for these seeds. I've learned the hard way that skipping this step results in either no germination or weak, spindly seedlings. Use a refrigerator's crisper drawer for consistent temperature—it's the most stable spot. Place a small thermometer in the bag to monitor temps, as some fridges have hot or cold spots that can affect germination rates.
Seedling Light Requirements: Those 14-16 hours of grow light daily are critical for preventing leggy seedlings. I recommend using full-spectrum LED grow lights—they're energy-efficient and provide the blue light spectrum poppies need for strong stems. Position lights just 2-3 inches above the seedlings and adjust as they grow. If you notice seedlings stretching toward the light, they're not getting enough intensity.
Harden Off Gradually: The 10-14 day hardening off period is where most gardeners fail with poppies. Start with just 1-2 hours of protected outdoor exposure and increase by 30 minutes each day. I've seen poppies go into shock when moved directly to full sun too soon—they'll wilt dramatically but recover with proper care. Use a shade cloth for the first few days if your climate gets intense afternoon sun.
Soil Preparation Insight: While the instructions mention sterile seed-starting mix, I've found that amending garden soil with 30% perlite or vermiculite creates an ideal balance for poppies. Their native habitat has well-draining, slightly rocky soil. If using garden soil, mix in a handful of coarse sand to prevent compaction. Poppies hate soggy roots, so good drainage is more important than fertility at this stage.
Pro Tips for Hungarian Breadseed Poppy
- These practical strategies will help you navigate the unique challenges of cultivating Hungarian breadseed poppies from seed.
- Stratification Success: The 60-90 day cold stratification at 35-40°F is non-negotiable for these seeds.
- Seedling Light Requirements: Those 14-16 hours of grow light daily are critical for preventing leggy seedlings.
Frequently asked questions
Got questions about growing Hungarian breadseed poppy? You’re not alone! Here are answers to the most common queries to help you cultivate these beautiful, edible blooms with confidence.
How do I know if my Hungarian breadseed poppy seeds are properly cold-stratified?
Cold-stratification is key for breaking dormancy. After 6–8 weeks in the fridge (or outdoors in a cold climate), press a seed between your fingers—it should feel slightly softened and easier to crush. If it’s still hard, extend stratification by 1–2 weeks. Pro tip: Plant them in damp paper towels first to check for sprouting before committing to soil!
Can I grow Hungarian breadseed poppy indoors without a greenhouse?
Start seeds indoors 8–10 weeks before your last frost date in well-draining pots (like 4-inch cell trays). Use a sunny windowsill or a grow light (12–14 hours/day). Once seedlings sprout, keep soil moist but not soggy. Transplant outdoors after all frost risk has passed—they thrive in full sun but tolerate partial shade.
What should I do if my poppy seedlings look leggy or weak?
Leggy seedlings often mean they’re stretching for light. If this happens, bury them deeper (up to the first set of leaves) to encourage stronger stems. Use a grow light 6 inches above the plants for 14–16 hours/day, and rotate pots daily for even growth. Avoid overcrowding—thin seedlings to 2–3 inches apart to prevent competition.
Are there alternatives to Hungarian breadseed poppy for edible flowers?
Yes! If you love edible blooms, try these low-maintenance alternatives:
- Calendula – Bright, pest-repellent, and great for salads.
- Nasturtium – Peppery taste, fast-growing, and self-seeding.
- Borage – Star-shaped flowers with a cucumber-like flavor.
- Viola (pansies) – Mild, sweet petals perfect for garnishes.
Why aren’t my Hungarian breadseed poppy flowers opening?
Poppies can be finicky! Common culprits include:
- Too much nitrogen – Use a low-nitrogen fertilizer (5-10-10) or compost tea to encourage blooms.
- Overcrowding – Space plants 12–18 inches apart for better airflow.
- Extreme heat – They prefer cooler temps (60–75°F). Provide afternoon shade in hot climates.
- Lack of sunlight – Poppies need 6+ hours of direct sun daily.
Wrapping up and next steps
Growing Hungarian breadseed poppy is a rewarding journey that connects you to centuries of tradition—whether for culinary, medicinal, or ornamental use. With the right preparation, patience, and a little cold stratification magic, you’ll be harvesting vibrant sprouts in just 60 days! 🌱✨
Ready to dive in? Start by gathering your supplies, then follow the step-by-step guide to kickstart your poppy adventure. Once your sprouts are thriving, explore creative ways to use them—from salads to homemade oils. Happy growing!