
Lawn
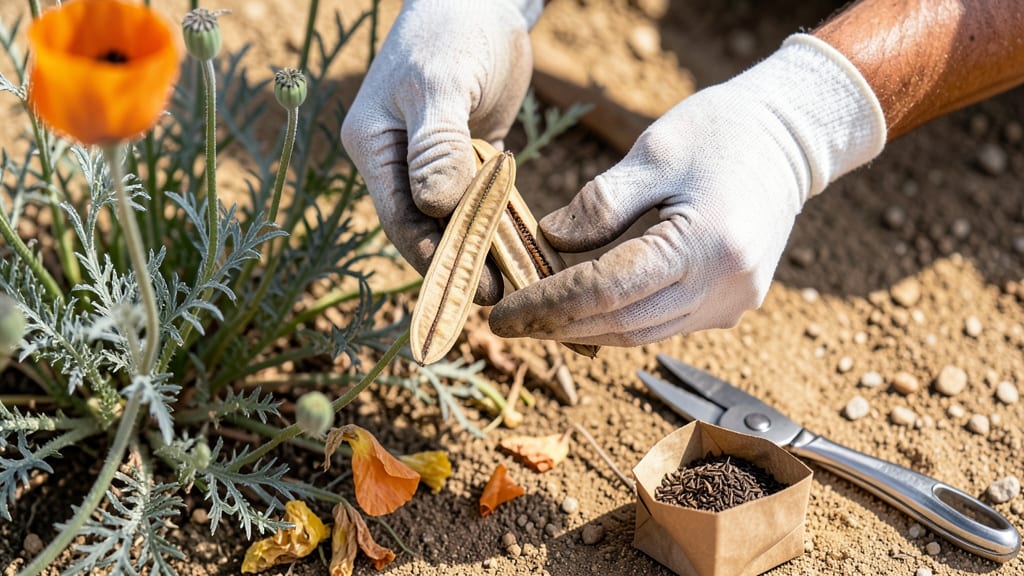
Harvesting California poppy seed pods without twisting them is the secret to saving viable seeds for next year. 🌻 I’ve learned that patience and timing are everything—wait too long, and the pods burst open; harvest too early, and the seeds won’t germinate.
The key is knowing exactly when to collect those delicate pods before they release their seeds into the wind.
You’ll need just a few simple tools: a pair of clean pruning shears, a paper bag for collection, and a dry, shaded spot to finish the job. The pods are ready when they turn from green to a papery brown and start splitting open at the seams.
A gentle twist can help, but the real trick is working quickly once you spot them—California poppies release seeds fast once they’re mature.
Once collected, let the pods dry completely in a breathable container for about a week. The seeds will rattle inside when they’re ready, and you’ll be able to shake them out with just a little pressure.
Store them in a cool, dry place, and you’ll have fresh seeds for planting next spring—no need to buy expensive packets.
Pro tip: Use the dried pods for crafts too! Their unique shape makes them perfect for wreaths or dried arrangements. Just avoid crushing them until you’re ready to extract the seeds. Now, let’s get those pods before they disappear!
📚 In This Guide
- What you need
- Instructions
- Tips and common mistakes
- Wrapping up and next steps
What you need
- ● Mature California poppy plants: Ensure pods are fully dry and brown (typically late summer to early fall).
- ● Pruning shears or sharp scissors: 1 pair (sterilized to prevent disease spread).
- ● Paper grocery bags or breathable seed-saving envelopes: 2–3 bags (labeled with the harvest date).
- ○ Gloves (optional but recommended): 1 pair (nitrile or cotton) to protect hands from prickly stems.
- ● Small paintbrush or soft-bristle brush: 1 (for gently dislodging stubborn seeds).
- ● Newspaper or cardboard: 1–2 sheets (for drying seeds indoors).
- ● Fine-mesh sieve or colander: 1 (to separate seeds from chaff).
- ● Seed storage containers: Airtight jars or resealable bags with silica gel packets for long-term viability.
- ● Labeling tags: Waterproof markers or tags to note variety and harvest year.
- ● Magnifying glass: For inspecting seed pods for pests or damage.
- ● Twist-tie or rubber bands: To secure pod clusters before drying.
Step-by-Step instructions for harvesting California poppy seed pods
Here's how to collect seeds without the frustrating twists that ruin your harvest.
🌿 Step 1: Identify Mature Pods Ready for Harvest
Look for pods that have turned from green to a dry, papery brown color—this means they're fully mature and ready. The pods should feel light in your hand and open slightly when squeezed gently. I always check in late summer or early fall when the plants have finished blooming for the season.
Harvest on a dry morning after the dew has evaporated. Wet pods stick together and make handling messy. If you see any pods still holding their bright orange petals, leave them—they're not ready yet. The goal is to collect seeds when the pods are dry but before they split open naturally and scatter seeds everywhere.
🪴 Step 2: Gently Twist Off the Pods
Hold the base of the pod firmly between your thumb and forefinger. With your other hand, grasp the top and give it a gentle twist. Most pods will separate cleanly from the stem with just a little pressure. If a pod resists, it might not be fully mature yet—leave it for another day.
Don't pull upward or yank—this can damage the plant and leave behind empty stems. A slow, steady twist is all you need. I like to work with a small bowl or paper bag nearby to catch the pods as they come off. This keeps everything organized and prevents lost seeds.
💧 Step 3: Dry the Pods Completely Before Opening
Spread the harvested pods out on a clean, dry surface like a baking sheet or newspaper. Place them in a warm, dry spot away from direct sunlight—too much heat can cause them to dry too quickly and crack open prematurely. I often use a well-ventilated area like a covered porch or a sunny windowsill with indirect light.
Let the pods dry for about 5-7 days, stirring them gently once a day to ensure even drying. You'll know they're ready when they feel completely dry and brittle to the touch. If you press a pod and it crumbles easily, it's time to move to the next step. Humidity can be the enemy here, so avoid drying in damp conditions.
✂️ Step 4: Open the Pods to Extract the Seeds
Once the pods are fully dry, place them on a clean surface and gently squeeze them between your fingers. They should open easily, releasing the small, black seeds inside. I like to use a small bowl or envelope to catch the seeds as they fall out. Be patient—some pods might need a little more pressure, but don't crush them or you'll risk damaging the seeds.
If you notice any empty or shriveled pods, skip them—they won't yield viable seeds. Healthy seeds should look plump and dark. Once you've collected all the seeds, store them in a dry, airtight container like a small jar or envelope. Label it with the date and variety if you're growing multiple types.
🌱 Step 5: Store Seeds for Future Planting
Place the collected seeds in a cool, dry place like a pantry or refrigerator. California poppy seeds can stay viable for 2-3 years if stored properly. I like to keep them in a small paper envelope inside a sealed jar to protect them from moisture and pests.
Before planting the following year, do a quick viability test by placing a few seeds on a damp paper towel. If they sprout within 7-10 days, they're ready to plant. This simple test saves you from wasting time with seeds that might not germinate. With proper storage, you'll have a fresh supply of seeds for years to come.
Tips & tricks for perfect California poppy seed harvesting
These simple strategies will help you avoid common pitfalls and maximize your seed yield every time.
Timing is Everything: The 5-7 day drying period in Step 3 is non-negotiable for viable seeds. I've learned the hard way that rushing this step leads to brittle seeds that won't germinate. Place pods in a well-ventilated area with indirect light—think of it like a slow, gentle bake rather than a quick dry. A small fan on low can help circulate air without creating drafts that might scatter seeds prematurely.
Harvesting Technique: In Step 2, when twisting off pods, focus on the stem's natural separation point rather than brute force. I've found that using a small bowl or paper bag right at hand prevents dropped pods and lost seeds. For larger harvests, consider wearing gloves—they make handling multiple pods easier and protect your fingers from any residual moisture that might make them slippery.
Seed Quality Check: Before storing seeds from Step 4, do a quick float test: place collected seeds in a bowl of water. Viable seeds will sink while empty or non-viable ones will float. This simple test saves time when planting later. I've saved dozens of seed batches this way when some pods didn't open completely.
Pro Tips for California Poppy Seed Pods
- These simple strategies will help you avoid common pitfalls and maximize your seed yield every time.
- Timing is Everything: The 5-7 day drying period in Step 3 is non-negotiable for viable seeds. I've learned the hard w...
- Harvesting Technique: In Step 2, when twisting off pods, focus on the stem's natural separation point rather than bru...
Frequently asked questions
Got questions about harvesting California poppy seed pods? You’re not alone! Here are some of the most common queries—and their straightforward answers—to help you nail the process.
When are California poppy seed pods ready to harvest?
Harvest pods when they’re dry, papery, and brown—usually 6–8 weeks after flowering. If they’re still green or starting to split open, wait a few more days. Overripe pods may release seeds prematurely, so act fast once they look ready!
How long do harvested pods last before seeds lose viability?
Seeds stay viable for 1–2 years if stored properly in a cool, dry place (like a paper bag or envelope). For best results, harvest pods in the morning after dew dries, then let them dry indoors for 1–2 weeks before storing. Pro tip: Label pods with the harvest date to track freshness!
What do I do if my pods are splitting open before I can harvest?
Don’t panic! If pods crack early, gently twist and pull them off the stem (even if partially open) and spread seeds on a tray to dry. Alternatively, cover plants with breathable mesh to delay seed release. Humidity or rain can speed up splitting, so harvest on dry days. →
Can I harvest seeds from California poppies grown in containers?
Container-grown poppies work great—just ensure pots are at least 12 inches deep for healthy root development. Harvest pods the same way as in-ground plants, but be extra careful with small containers to avoid tipping. Bonus: Containers let you control watering, reducing humidity-related issues.
Are there alternatives if my pods aren’t producing seeds?
If pods are empty or deformed, check for these common issues:
- Pests: Aphids or spider mites can damage flowers. Spray with neem oil if needed.
- Poor pollination: Hand-pollinate with a soft brush to transfer pollen between flowers.
- Environmental stress: Ensure full sun (6+ hours/day) and well-draining soil.
Wrapping up and next steps
Harvesting California poppy seed pods doesn’t have to be a twisty, messy challenge—with the right techniques, you can collect viable seeds effortlessly! 🌻 Whether you’re saving seeds for next season, sharing with fellow gardeners, or simply admiring nature’s beauty, patience and gentle handling are key.
Now that you’re equipped with the know-how, grab your tools and give it a try—your future poppy blooms will thank you!
Ready to dive in? Start by monitoring your poppies and follow the steps outlined above. Happy harvesting!