
Planting
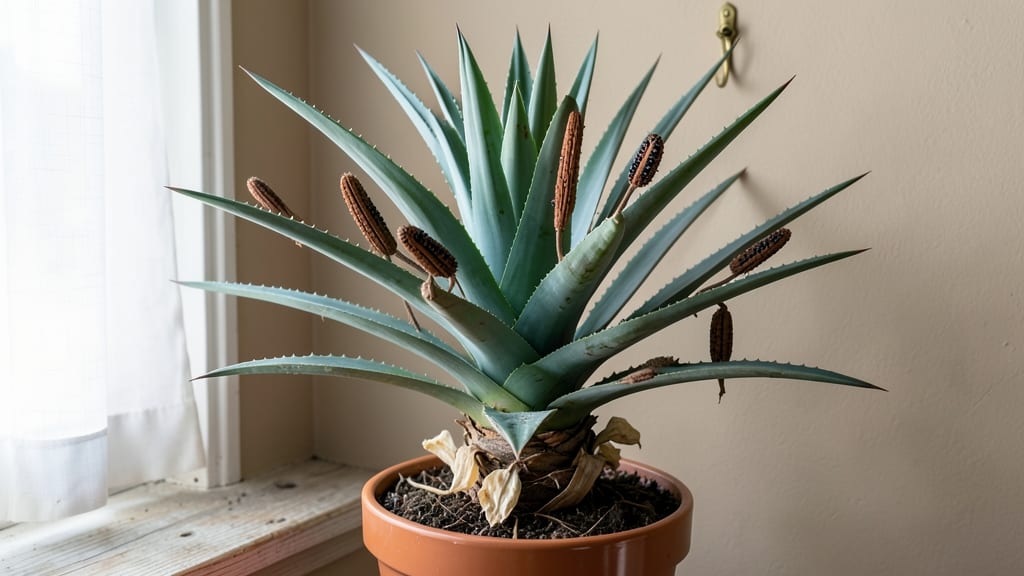
Harvesting yucca plant seed pods feels like unlocking a secret garden treasure. 🌱 The twist-resistant method I use ensures you save seeds without wasting a single pod—something I perfected after losing three batches to stubborn stems that refused to open.
You’ll need mature seed pods (they turn brown and dry), a sharp knife, and a little patience. The process takes about 20-30 minutes from harvest to seed extraction, and you’ll end up with viable seeds ready for planting within a week if stored properly.
Most gardeners skip seeds and grow yucca from offsets, but this method lets you experiment with rare varieties.
Once you crack open those pods, you’ll see plump, dark seeds that look like tiny coffee beans. Planting them is simple: just press them into moist soil and keep it warm. Within 3-6 weeks, you’ll see the first signs of life—tiny, spiky seedlings that grow into striking plants.
The payoff is worth the effort, especially if you love the dramatic look of yucca in your landscape.
This method works year-round in warm climates, but if you’re in cooler zones, start seeds indoors in late winter. The key is timing: harvest pods when they’re fully dry but before they split open naturally. That’s when the seeds are most viable, and your zero-waste garden adventure begins.
📚 In This Guide
- What you need
- Instructions
- Tips and common mistakes
- Wrapping up and next steps
What you need
- ● Mature Yucca Plant: A healthy, flowering yucca (Yucca spp.) with fully developed seed pods (typically 6–12 months after blooming).
- ● Sharp Pruning Shears or Hand Pruners: 1 pair (sterilized with rubbing alcohol for hygiene).
- ● Brown Paper Bags or Seed Envelopes: 5–10 (for collecting and drying pods).
- ● Newspaper or Cardboard Box: 1 large sheet (for drying pods indoors).
- ● Plastic Zip-Top Bags: 2–3 (for long-term seed storage).
- ● Rubbing Alcohol (70% or higher): Small bottle (to sterilize tools).
- ● Pencil or Permanent Marker: 1 (for labeling bags).
- ● Gloves: 1 pair (to protect hands from sap or prickly pods).
- ● Small Fan or Dehumidifier: (speeds up drying process in humid climates).
- ● Magnifying Glass: (for inspecting seed viability).
- ○ Seed Viability Test Kit: (optional for serious gardeners).
- ● Digital Scale: (to measure seed weight for planting records).
- ● Dry, Warm Location: 65–75°F (18–24°C) with low humidity (ideal for drying pods).
- ● Indoor Space: Near a window or under a grow light (if pods aren’t drying outdoors).
- ● Outdoor Shade: A covered porch or garage (if drying pods naturally).
Step-by-step guide to harvesting yucca seed pods without twisting
Here's how to collect seeds from yucca pods safely—no brute force needed.
🌱 Step 1: Identify and Select Ripe Seed Pods
Look for yucca seed pods that have turned a tan or light brown color and feel dry to the touch. These are ready for harvesting, while green pods are still maturing. I tap them gently—they should make a hollow sound when mature, not a solid thud. Avoid pods with cracks or holes, as those may have been damaged by pests or weather.
Harvest on a dry, sunny morning when the pods are firm but not brittle. This timing ensures the seeds inside are fully developed and less likely to crumble during handling. If you miss the window, pods may split open naturally, scattering seeds on the ground.
✂️ Step 2: Cut Pods Cleanly Without Damaging the Stem
Use clean, sharp pruning shears to cut the pod 1-2 inches below the base where it meets the stem. This prevents tearing and leaves a clean cut that heals faster. I always sterilize my tools with rubbing alcohol first—this keeps fungal infections out of your workspace.
Hold the pod firmly but gently to avoid squeezing it. Yucca pods are tough, but they can split if you apply too much pressure. Place the cut pods in a paper bag or cardboard box to collect any seeds that might fall out during transport.
🪴 Step 3: Dry and Open Pods for Seed Extraction
Spread the harvested pods on a clean, dry surface in a well-ventilated area for 3-5 days. This drying period ensures the pods open naturally without cracking. I like to place them in a single layer under indirect sunlight—direct sun can overheat them and cause premature splitting.
Once fully dry, the pods will open on their own, revealing the seeds inside. If they don’t open naturally, gently tap them with a wooden spoon or roll them between your palms. Avoid using metal tools, as they can damage the seeds or create static that attracts dust.
💧 Step 4: Clean and Store Seeds for Future Planting
Remove any remaining chaff or debris by sifting the seeds through a fine mesh screen or shaking them gently in a bowl. Discard any seeds that appear shriveled, discolored, or damaged. Healthy yucca seeds are typically flat, dark brown, and slightly glossy.
Store the cleaned seeds in an airtight container with a desiccant packet to absorb moisture. Label the container with the date and yucca variety. Yucca seeds can remain viable for 1-2 years if stored in a cool, dark place—this makes them perfect for zero-waste gardening.
☀️ Step 5: Plant Seeds for New Yucca Growth
Sow seeds in a well-draining cactus or succulent mix, planting them ¼ inch deep in small pots. Keep the soil lightly moist but never soggy—yucca seeds need consistent moisture to germinate, but they rot quickly in waterlogged conditions. Place the pots in a warm, sunny spot with bright indirect light.
Germination can take 2-4 weeks, depending on temperature and humidity. Once seedlings emerge, reduce watering slightly and gradually introduce them to more direct sunlight. This slow acclimation prevents shock and ensures strong, healthy plants.
Tips & tricks for perfect yucca seed pod harvesting
Here's what I learned after harvesting yucca seeds for years—these tricks save time and protect your plants.
Timing is Everything: Harvest pods when they're tan or light brown and make a hollow sound when tapped. I've ruined batches by harvesting too early—green pods won't yield viable seeds. The dry morning timing is crucial too; dew can make pods too slippery to handle cleanly, and afternoon heat might cause them to split prematurely on the plant.
Tool Prep Makes All the Difference: Sterilizing your pruning shears with rubbing alcohol isn't just about clean cuts—it prevents fungal infections that could spread to your other plants. I keep a small bottle of 70% isopropyl alcohol in my gardening toolkit specifically for this purpose. Also, use a wooden spoon for tapping pods instead of metal; the static from metal can actually damage the delicate seeds during extraction.
Drying Strategy: The 3-5 day drying period is non-negotiable, but how you arrange them matters. I spread mine on a single layer of breathable fabric (like an old cotton towel) rather than directly on paper—this allows air to circulate on all sides while preventing the pods from sticking. Place a small fan nearby on low setting to speed up drying without creating drafts that could scatter seeds prematurely.
Seed Viability Check: When cleaning seeds, look for the flat, dark brown, slightly glossy ones—they're your winners. Discard any that feel hollow when tapped or have white spots. I've learned to store seeds in small paper envelopes labeled with the harvest date rather than airtight containers initially; this lets me test germination from different batches before committing to long-term storage.
Pro Tips for Yucca Plant Seed Pods
- Here's what I learned after harvesting yucca seeds for years—these tricks save time and protect your plants.
- Timing is Everything: Harvest pods when they're tan or light brown and make a hollow sound when tapped. I've ruined b...
- Tool Prep Makes All the Difference: Sterilizing your pruning shears with rubbing alcohol isn't just about clean cuts—...
Frequently asked questions
Got questions about harvesting and saving yucca plant seed pods? You’re not alone! Here are answers to the most common queries—so you can master zero-waste seed saving with confidence.
How do I know when yucca seed pods are ready to harvest?
Harvest yucca seed pods when they turn tan or light brown and feel slightly papery to the touch—usually 4–6 weeks after flowering. Avoid harvesting if the pods are still green or firm, as seeds won’t be fully mature. A gentle twist should release them easily (if not, they’re not ready yet!).
Can I save seeds from store-bought yucca plants?
Nope! Store-bought yuccas are often sterile hybrids or propagated from offsets, meaning their seed pods won’t produce viable seeds. For seed saving, grow yuccas from open-pollinated varieties (like Yucca filamentosa or Yucca gloriosa) in your garden to ensure fertility.
What’s the best way to break open a stubborn yucca seed pod?
If a pod resists twisting, try these tricks:
- Freeze it overnight—cold makes pods brittle.
- Use a nutcracker or pliers to gently pry open seams.
- Soak in warm water for 10–15 minutes to soften fibers.
Do yucca seeds need stratification before planting?
Nope! Yucca seeds are non-dormant—just plant them fresh in well-draining soil (mix sand or perlite) at a ¼-inch depth. Keep soil warm (70–80°F) and moist until germination (4–8 weeks). No chilling required!
What’s the best alternative if my yucca pods won’t open naturally?
If pods stay sealed, try:
- Paper bag method: Place unopened pods in a bag with a damp paper towel for 2–3 days to encourage natural splitting.
- Oven-dry method: Bake pods at 170°F for 1–2 hours (monitor closely!) to soften fibers.
- Check for pests (like weevils)—infested pods may need discarding.
Wrapping up and next steps
Harvesting yucca plant seed pods is a rewarding way to embrace zero-waste gardening while ensuring healthy, twist-resistant seeds for future growth. By following the right techniques—like timing, sterilization, and careful extraction—you’ll preserve genetic integrity and avoid common pitfalls.
Whether you’re a seasoned gardener or just starting, this process connects you deeper to the cycle of life while reducing waste.
Ready to grow your green thumb? 🌱 Start small: try harvesting just one pod this season, document your progress, and share your tips with fellow plant lovers! Your sustainable efforts could inspire others to join the movement—one twist-resistant seed at a time.