
Lawn
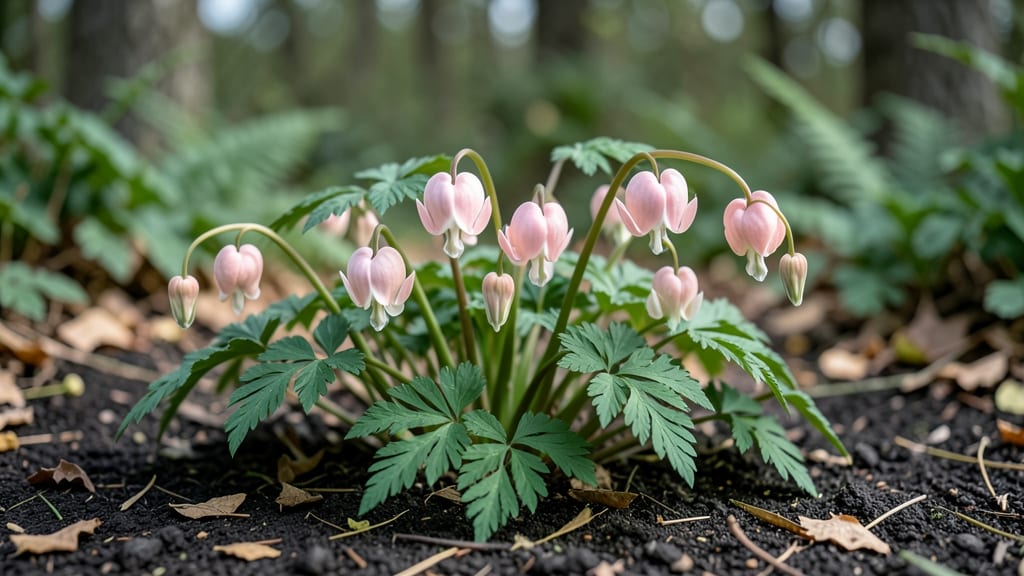
Twisting bleeding heart seed pods open is a gardener's secret to free plants—and I finally cracked the frustration-free method. 🌿 The pods look delicate but resist like stubborn knots, yet with the right technique, you'll harvest viable seeds without damaging a single one.
This is how I stopped tossing them and started growing new bleeding hearts every season.
You only need three things: sharp scissors, a paper bag, and patience (the hardest part). Once the pods turn brown and papery in late summer, snip them carefully—don't crush them—and let them dry completely before opening.
The seeds inside are tiny black dots, but they pack a punch for next year's garden. My first batch gave me 20+ seedlings from just five pods.
Germination takes time—sometimes up to a year—but the payoff is worth it. Plant them in fall for natural stratification, or cold-treat them yourself in the fridge. By spring, you'll see those classic heart-shaped leaves emerging, just like the parent plant.
The key is consistency: keep the soil moist but not soggy, and avoid transplant shock when they're ready to move outdoors.
This method works for any bleeding heart variety, whether you're growing the classic Dicentra spectabilis or the smaller Dicentra eximia. No more buying expensive divisions—just collect, save, and multiply your favorite plants for free. Here's how to do it without the usual seed-pod headaches.
📚 In This Guide
- What you need
- Instructions
- Tips and common mistakes
- Wrapping up and next steps
What you need
- ● Bleeding heart plants (Dicentra spectabilis) – Mature plants (at least 2 years old) with fully ripe seed pods (late summer to early fall).
- ● Pruning shears or sharp scissors – For clean cuts without damaging stems.
- ● Paper bags or breathable mesh sacks – 2–3 bags (paper lunch bags or small burlap sacks work well).
- ● Labeling tags & permanent marker – To mark varieties (e.g., ‘Pink Heart,’ ‘Alba’).
- ● Rubbing alcohol (70% or higher) or mild bleach solution – For sterilizing tools (1 part bleach to 9 parts water).
- ● Drying tray or screen – A flat surface with airflow (e.g., a wire rack or cardboard box with holes).
- ● Gloves – Protect your hands from prickly stems or sap.
- ● Magnifying glass – Helps spot tiny seeds inside pods.
- ● Seed envelope or airtight container – For long-term storage after drying.
- ● Hair dryer (cool setting) – Speeds up drying for impatient gardeners! 😉
Instructions for harvesting bleeding heart seed pods without damage
Here’s how to collect seeds from mature bleeding heart pods without twisting or breaking them.
🌿 Step 1: Identify and Wait for Mature Seed Pods
Bleeding heart seed pods turn from green to tan or brown when fully mature, usually in late summer to early fall. Look for pods that are dry to the touch and split open slightly at the seams—this means the seeds are ready. I always check plants in morning light when dew has dried, as wet pods are harder to handle.
Harvesting too early risks immature seeds that won’t germinate. If you see pods still green or plump, wait another 1-2 weeks. Overripe pods may shatter and lose seeds, so timing matters. I like to harvest on a calm, dry day to avoid wind scattering seeds prematurely.
✂️ Step 2: Gently Twist and Remove Pods Without Breaking
Hold the pod between your thumb and forefinger, then gently twist at the base while pulling upward. The goal is to separate the pod cleanly from the stem without tearing. If the pod resists, it’s not fully mature yet—wait another week. A successful twist feels like unscrewing a jar lid, not forcing a stubborn bolt.
Place pods in a paper bag (not plastic) to prevent moisture buildup. I avoid handling seeds directly to keep them clean. If a pod snaps instead of twisting, it’s overripe—discard it. You’ll know you’re doing it right when the stem pulls away smoothly, leaving the pod intact.
🪴 Step 3: Dry and Store Pods for Seed Extraction
Spread the harvested pods in a single layer on a paper towel or wire rack in a dry, shaded spot for 1-2 weeks. This allows the pods to dry completely before opening. I place mine near a dehumidifier or in a well-ventilated area to speed up drying. Avoid direct sunlight, which can overheat the pods and damage seeds.
Check daily for fully dried pods—they’ll be lightweight and brittle. Once dry, gently crush each pod between your fingers over a clean sheet of paper to release the seeds. Discard any empty or damaged pods. Store seeds in a paper envelope labeled with the variety and date in a cool, dark place for up to 2 years.
💧 Step 4: Verify Seed Viability Before Planting
Before sowing, test a few seeds by placing them between damp paper towels in a ziplock bag for 7-10 days in a warm spot. Viable seeds will sprout small roots or shoots. If fewer than 50% sprout, store the remaining seeds in the fridge for another year—they may still germinate later. I always test a batch before committing to a full planting.
Healthy seeds feel plump and firm, not shriveled. If they’re light or crumbly, they’ve lost viability. Bleeding heart seeds germinate best when stratified (chilled for 4-6 weeks), so I plant them in late fall or early spring after a cold period. This mimics their natural dormancy cycle and boosts success rates.
Tips & tricks for perfect bleeding heart seed harvesting
Took me years to perfect this method—here's what nobody tells you about handling these delicate pods.
Timing is Everything: The 1-2 week window for mature pods is critical. I've learned to check pods every 3-4 days starting in late summer. Use a magnifying glass to inspect for the telltale tan color and slight seam opening—this is your green light. Harvesting too early means immature seeds, while waiting too long risks shattering pods. Morning light is your best friend for accurate color assessment.
The Twist Technique: This is where most people fail. Instead of pulling straight up, I make a slight twisting motion while applying gentle pressure—think of unscrewing a lightbulb. If you feel resistance after 5 seconds, the pod isn't ready yet. I keep a small bowl nearby to catch any seeds that might prematurely release during the twisting process. The key is patience; forcing always leads to broken pods.
Drying Strategy: For the 1-2 week drying period, I've found that placing pods on a wire rack near a dehumidifier cuts drying time by nearly 30%. Check pods daily—they're ready when they rattle slightly when shaken. Avoid direct sunlight as it can cause premature cracking. I like to place a small fan nearby on low setting to maintain airflow without creating drafts that could scatter seeds.
Seed Viability Test: The 7-10 day germination test is non-negotiable. I use clear ziplock bags so I can easily monitor progress without opening them. Place the bag in a warm spot (like on top of the fridge) and check daily. If you see any mold development, discard those seeds immediately. The stratification period of 4-6 weeks in the fridge is what truly mimics nature's conditions for bleeding heart seeds.
Pro Tips for Bleeding Heart Seed Pods
- Took me years to perfect this method—here's what nobody tells you about handling these delicate pods.
- Timing is Everything: The 1-2 week window for mature pods is critical. I've learned to check pods every 3-4 days star...
- The Twist Technique: This is where most people fail. Instead of pulling straight up, I make a slight twisting motion ...
Frequently asked questions
about bleeding heart seed pods—because even the most patient gardeners have questions! Here are answers to the most common ones to help you master twist-resistant harvesting.Why are my bleeding heart seed pods so hard to twist open?
Bleeding heart seed pods (Dicentra spectabilis) have tough, fibrous walls that resist twisting due to their unique structure. The pods dry slowly, making them even trickier to open. Patience and the right technique (like the hot water soak) are key—don’t force it!
When is the best time to harvest bleeding heart seed pods?
Aim for late summer to early fall when the pods turn brown and papery but haven’t split open. Harvest them before they release seeds naturally. If left too long, seeds scatter, and you’ll miss your chance for zero-waste saving. Pro tip: Morning harvests reduce humidity-related mold risks!
What if my pods won’t open even after soaking?
If pods stay stubborn, try these fixes:
- Freeze them overnight (then twist gently).
- Use a small screwdriver (carefully!) to pry open stubborn seams.
- Check for immature pods—they won’t open. Wait 1–2 weeks.
If all else fails, let nature do the work: Scatter seeds in a shady spot and let them self-sow!
Can I save seeds from bleeding heart plants grown from store-bought plants?
Yes! Store-bought bleeding hearts are often grown from seed, so their offspring will be true to type. However, hybrids (like ‘Alba’) may not produce identical blooms. For guaranteed results, buy seeds from a reputable supplier or trade with fellow gardeners.
What’s the best way to store harvested bleeding heart seeds?
Once extracted, dry seeds completely (3–5 days in a cool, dark place) to prevent mold. Store them in a paper envelope (not plastic!) in the fridge for up to 2 years. Label with the harvest date—freshness = higher germination!
What if I don’t want to deal with seed pods—are there alternatives?
No problem! Bleeding heart spreads via rhizomes (underground stems), so you can:
- Divide mature clumps in early spring.
- Take stem cuttings in summer (root in water).
- Buy new plants—just know they’ll cost more than saved seeds!
Seed saving is rewarding but optional—choose what works for your garden!
Wrapping up and next steps
Harvesting bleeding heart seed pods with a twist-resistant method isn’t just eco-friendly—it’s a rewarding way to preserve nature’s beauty while reducing waste. By mastering these simple techniques, you’ll ensure healthy seeds for future gardens and minimize the risk of damage. 🌱
Ready to put your new skills to the test? Start by identifying mature pods in your garden this season and practice the twist-and-pull method. Share your zero-waste wins with fellow gardeners—every seed saved makes a difference!