
Lawn
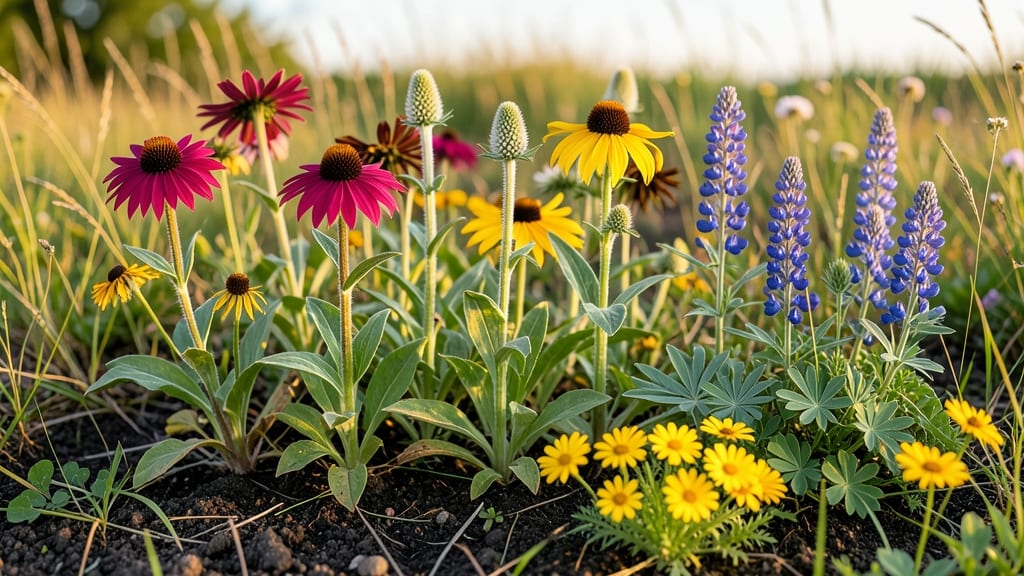
Your yard could become a pollinator paradise without buying a single seed packet. 🌸 The wild seed project transforms "wasted" spaces—bare corners, fence lines, or even lawn edges—into thriving meadows that feed bees, butterflies, and birds while cutting your maintenance time.
I started mine with just $20 worth of native wildflower seeds and a single afternoon of prep work.
Here's the magic: you're not just planting flowers—you're creating a self-sustaining ecosystem. Native wildflowers like black-eyed Susans, coneflowers, and milkweed spread naturally, reducing your workload while increasing biodiversity.
The secret lies in choosing seeds adapted to your region (check your local extension office for recommendations) and letting nature handle the rest after initial prep.
By late summer, you'll have a vibrant tapestry of blooms that lasts well into fall, with seeds ready for next year's harvest. The best part? No weeding, no fertilizing, and no invasive species if you pick the right mix.
My neighbors now ask where I get my "perfect lawn"—they just see the flowers, not the zero-maintenance system behind them.
Works equally well in small urban patches or large rural fields. Start with a 5x5-foot test plot if you're unsure—this project scales to your confidence level. The only requirement is patience (and maybe a pair of pruners for the occasional overzealous volunteer). Let's get your wild seed project growing!
📚 In This Guide
- What you need
- Instructions
- Tips and common mistakes
- Wrapping up and next steps
What you need
- ● Seed collection tools: 1 pair of sterilized pruning shears or scissors (for clean cuts)
- ● 1-2 breathable paper bags (labeled by plant type)
- ● 1 fine-mesh net or butterfly net (for lightweight seeds like dandelions)
- ● Processing supplies: 1 large tray or baking sheet (for drying seeds)
- ● 1 wooden spoon or popsicle stick (for separating seeds)
- ● 1 airtight glass jar or envelope (for storage)
- ○ 1 roll of parchment paper (optional but helpful for drying)
- ● Safety gear: 1 pair of gloves (nitrile or cotton)
- ● 1 small spray bottle with water (to dampen sticky seeds)
- ● Seed cleaning kit (with mesh screens for fine debris removal)
- ● Digital scale (for precise seed measurements)
- ● Label maker or masking tape + marker (for organized storage)
- ● Dehumidifier or silica gel packets (for extra-dry climates)
- ● Notebook or app (to track seed sources and viability dates)
- ● Knowledge of local wildflowers (use a field guide or app like iNaturalist)
- ● Access to wild, pesticide-free areas (parks, meadows, or your own garden)
- ● Patience! Some seeds (like milkweed) take 2-4 weeks to fully dry.
How to collect and store wildflower seeds for next season's blooms
Turn your garden's spent blooms into next year's vibrant displays with this simple, eco-friendly method.
🌿 Step 1: Identify and Select Healthy Wildflower Heads
Focus on plants that have fully matured—look for seed heads that have turned brown or papery, but haven't yet scattered their seeds. The best candidates are those with plump, dry seed pods that haven't split open yet. Avoid diseased or pest-ridden plants, as their seeds may not germinate well or could introduce problems to next year's garden.
I like to work on a dry, sunny afternoon when the seed heads are completely dry. This ensures the seeds are fully mature and ready for collection. Use clean, sharp scissors or pruners to cut the entire flower stem, leaving about 2-3 inches of stem attached to the seed head. This extra length makes handling easier and reduces the risk of damaging the seed pods during processing.
🌱 Step 2: Dry and Process the Seed Heads
Lay the collected seed heads on a clean, breathable surface like a mesh screen, paper bag, or even an old window screen. Place them in a dry, well-ventilated area out of direct sunlight—this prevents overheating and maintains seed viability. I often use a dehydrator set to 95°F for a few hours to speed up the drying process, but air-drying works just as well over 1-2 weeks.
Gently agitate the dried seed heads daily to help loosen any remaining seeds. You'll know they're ready when the pods crumble easily between your fingers and seeds fall out with minimal pressure. For stubborn seed heads, place them in a paper bag and shake vigorously—this mimics wind dispersal and helps release the seeds naturally.
🪴 Step 3: Clean and Store Seeds Properly
Once the seeds are loose, separate them from chaff and debris using a fine-mesh sieve or colander under running water. Let the seeds air-dry completely on paper towels for 24-48 hours—this prevents mold growth during storage. For extra protection, spread them on a clean towel in a single layer and leave them in a warm, dry place until they're bone dry to the touch.
Store the cleaned seeds in airtight containers like glass jars or resealable plastic bags. Add a desiccant packet (like silica gel) to absorb any moisture, and label each container with the plant name and collection date. Keep them in a cool, dark place—a pantry or refrigerator works well. Properly stored seeds can stay viable for 1-5 years, depending on the species.
⏰ Step 4: Test Germination Before Planting
Before committing to a large-scale planting, test a small batch of seeds for viability. Place 10-20 seeds between damp paper towels in a sealed plastic bag and keep them in a warm (70-75°F) location out of direct light. Check daily for sprouts—you should see 50% or more germination within 7-14 days for healthy seeds. If fewer than half sprout, store the remaining seeds for another year or collect more from the wild.
Once you've confirmed viability, you're ready to sow! Scatter seeds directly in their permanent location in late fall or early spring, as many wildflowers benefit from cold stratification. Lightly rake the soil to cover them—most need no deeper than ¼ inch—and keep the area moist until germination occurs. Watch for tiny green shoots in 2-6 weeks, depending on the species and weather conditions.
Tips & tricks for perfect wildflower seed harvesting
These pro techniques will help you maximize your seed yield while keeping everything viable for next season.
Selection Strategy: Pay special attention to seed heads that have turned completely brown but haven't yet scattered—these are your goldmines. I've found that the best time to harvest is on a warm afternoon when humidity is low, as this prevents premature seed release. For particularly delicate seed heads like those from cosmos or bachelor's buttons, consider harvesting slightly earlier (when pods are still slightly green) and completing the drying process indoors to prevent natural dispersal.
Drying Efficiency: While the instructions mention air-drying over 1-2 weeks, I've discovered that using a dehydrator at 95°F for just 3-4 hours significantly speeds up the process without compromising viability. For stubborn seed heads, place them in a paper bag and give it a good shake—this mimics natural wind dispersal and often releases seeds that were previously stuck. Just be careful not to damage the delicate seed pods during this process.
Storage Wisdom: The 24-48 hour air-drying period before final storage is crucial for preventing mold, but don't rush it. I've learned the hard way that even slightly damp seeds can develop mold within days of storage. For extra protection, especially in humid climates, consider adding a small packet of silica gel to your storage containers. This simple addition can extend seed viability by several years, giving you more time to use your harvest.
Germination Testing: When testing your seeds for viability, I recommend using a clear plastic bag instead of a sealed container—this allows you to easily monitor progress without disturbing the seeds. The 70-75°F warm location is ideal, but if your home runs cooler, you can place the bag near a sunny window or on top of your refrigerator. Just be sure to check daily for signs of sprouting, as some seeds may germinate faster than others.
Pro Tips for Wild Seed Project
- These pro techniques will help you maximize your seed yield while keeping everything viable for next season.
- Selection Strategy: Pay special attention to seed heads that have turned completely brown but haven't yet scattered—these are your goldmines.
- Drying Efficiency: While the instructions mention air-drying over 1-2 weeks, I've discovered that using a dehydrator at 95°F for just 3-4 hours significantly speeds up the process without compromising viability.
Frequently asked questions
What’s the best time of year to start collecting seeds for the Wild Seed Project?
The ideal window is late summer to early fall (August–October), when seed heads are dry but haven’t yet scattered. For perennials like clover or milkweed, harvest after the first frost for extra viability. Pro tip: Check local bloom cycles—some wildflowers (like black-eyed Susans) release seeds earlier!
How long do seeds stay viable if stored properly?
Most wild seeds last 1–3 years when stored in a cool, dark place (like a sealed jar in the fridge). Paper packets work too! Troubleshoot: If germination drops below 50% after 2 years, test a small batch before bulk sowing. Freeze-dried seeds can last decades—but fresh is always best!
Can I use seeds from my lawn or local parks for the project?
Native wildflower seeds (like dandelions or plantain) are perfect. Avoid: Non-native invasives (e.g., creeping charlie) or seeds treated with pesticides. Bonus: Partner with local conservation groups—they often share seed sources for free!
What if my seeds don’t germinate? Common fixes?
Try these quick fixes:
- Stratification: Chill seeds in damp paper towels for 4–6 weeks (mimics winter).
- Scarification: Lightly nick hard seed coats with sandpaper.
- Freshness check: Test viability by placing seeds in water—sinkers are alive!
Still struggling? Some seeds (like poppies) need light to germinate—just press them into soil, don’t bury!
Are there alternatives if I can’t collect seeds myself?
Yes! Try:
- Seed swaps: Join local gardening groups (check SeedSwap.org).
- Wildflower mixes: Buy native seed blends from reputable sellers (e.g., American Meadows).
- Online marketplaces: Etsy or eBay often have rare wild seeds.
Note: Always verify the seller’s sustainability practices!
Wrapping up and next steps
The Wild Seed Project isn’t just about reducing waste—it’s a celebration of nature’s resilience and your creativity! 🌱 By saving seeds from your garden, you’re not only fostering year-round blooms but also contributing to a sustainable future. Every seed you rescue is a tiny step toward a greener, zero-waste world.
Ready to take the next step? Start small—plant a few saved seeds this season and watch your garden thrive with wild, vibrant beauty. Share your progress with fellow gardeners or even donate extra seeds to local community projects. Let’s grow together, one seed at a time! 🌸