
Propagation
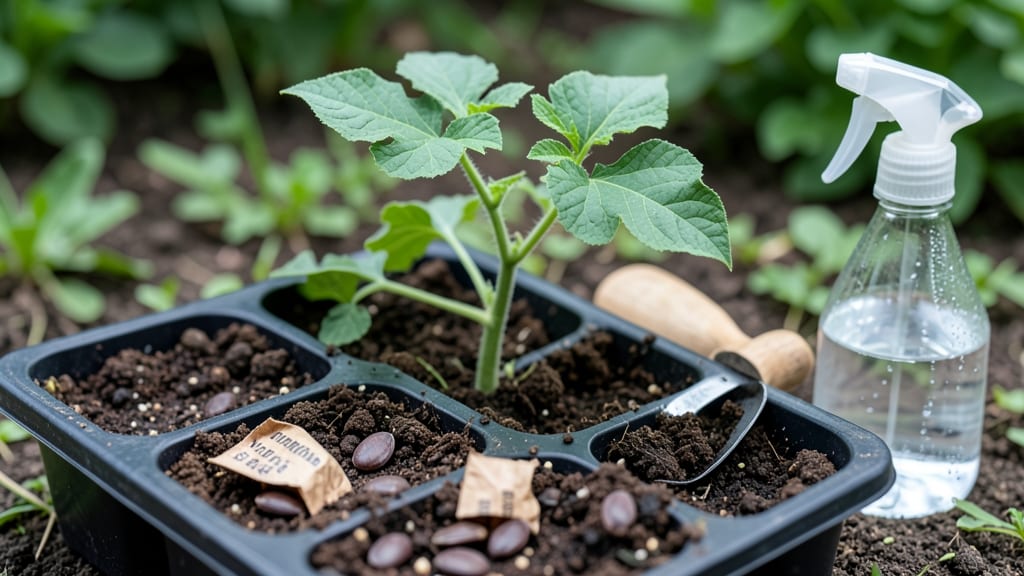
Watermelon seed germination is all about patience—and a few clever tricks to speed things up. 🌱 I've learned that the difference between a thriving patch of vines and a sad, empty row often comes down to how you handle those first critical days.
Some seeds pop up in a week; others take twice as long, leaving gardeners wondering if they'll ever see those first green leaves.
Start with fresh, plump seeds from a reputable source—old seeds (over 2 years) germinate poorly. Use a lightweight potting mix that drains well but holds moisture, and keep the soil consistently warm (70-90°F) with a heat mat if needed.
Plant seeds just 1 inch deep in individual pots or a seed tray, spacing them 2 inches apart. The key? Moisture without sogginess—think damp sponge, not wet towel.
Within 5-10 days, you'll see tiny sprouts pushing through the soil, and those first leaves will unfurl in another week. The real magic happens when you transplant them outdoors after the last frost, but that's where the hard work pays off—lush vines and sweet, juicy melons by summer's end.
This method works for both small-space gardeners and those with big plots.
For slow starters, try soaking seeds overnight in warm water or using a seedling heat mat. Avoid overwatering, which can cause rot, and keep the tray in bright, indirect light until germination. Once you crack the code, you'll never buy watermelon plants again—they're foolproof when you follow these steps.
📚 In This Guide
- What you need
- Instructions
- Tips and common mistakes
- Wrapping up and next steps
What you need
- ● Watermelon seeds: Fresh, high-quality seeds (10–20 per pot or tray for best results). Pro tip: 💡 Save seeds from organic watermelons for heirloom varieties!
- ● Seed-starting mix: Lightweight, sterile potting soil (1–2 gallons, depending on container size). Avoid garden soil—it’s too dense!
- ● Containers: Small pots (3–4 inches wide) or seed trays with cells (for individual seedlings).
- ○ Optional: Biodegradable peat pots (eliminates transplant shock!).
- ● Spray bottle: For gentle watering (avoid over-saturating seeds).
- ● Clear plastic dome or wrap: To create a mini greenhouse effect (e.g., plastic wrap or a humidity tent).
- ● Grow lights or sunny windowsill: Watermelons need 12–16 hours of light daily. A LED grow light works best for indoor setups.
- ○ Heat mat (optional but helpful): Keeps soil warm (70–90°F) to speed up germination. 🌡️ Ideal for cooler climates!
- ● Fertilizer: Balanced, water-soluble fertilizer (5-10-5 or 10-10-10) for early feeding once sprouts appear.
- ● Patience: Germination takes 5–10 days (sometimes longer in cold soil).
- ● Consistency: Keep soil moist but not soggy—overwatering drowns seeds!
- ● Warmth: Seeds germinate fastest in 75–90°F soil. Use a heat mat if your home is chilly.
- ● Space: Thin seedlings to 1–2 inches apart once they sprout to prevent crowding.
Step-by-step instructions for speed-sprouting watermelon seeds
Here's how I guarantee faster, stronger germination—no waiting weeks for those first green shoots.
🌱 Step 1: Soak Seeds Overnight for Faster Germination
Place your watermelon seeds in a small bowl and cover them with warm water (around 80°F). Let them soak for 12-24 hours—this softens the tough outer shell and kickstarts the germination process. You'll know they're ready when they look slightly plump and swollen compared to when you started.
Don't skip this step. I've tried planting dry seeds, and they can take 7-10 days to sprout instead of the 3-5 days you'll get with soaked seeds. After soaking, drain the water and let the seeds sit on a paper towel for 10-15 minutes to dry slightly. This prevents them from sticking together when you plant.
💧 Step 2: Prepare Warm, Moist Growing Medium
Fill your seed-starting trays or small pots with a lightweight seed-starting mix (never garden soil—it's too dense). Moisten the mix until it feels like a damp sponge, but not dripping. Watermelon seeds need warmth to germinate, so place the trays on a seedling heat mat set to 80-85°F.
Press the soil down gently to remove air pockets, then make small ½-inch deep holes with your finger. Space them 2 inches apart—you'll thin later, but crowded seeds can compete for nutrients. The soil should feel warm to the touch; if it's cool, your seeds will sit dormant for days.
☀️ Step 3: Plant and Cover for Optimal Germination Conditions
Drop 1-2 seeds per hole (just in case one doesn't sprout) and cover lightly with more mix. Press gently to ensure good seed-to-soil contact. Mist the surface with water until evenly moist, but avoid soaking—you want the soil to stay damp, not soggy. Place a clear plastic dome or plastic wrap over the tray to trap warmth and humidity.
Keep the tray in a warm, dark spot (like a closet or under a heat lamp) until sprouts appear. Check daily for condensation on the dome—if it's foggy, your humidity is perfect. If it's dry inside, mist lightly and reseal. Germination should happen within 3-5 days if conditions are right.
🌿 Step 4: Provide Light and Care for Young Seedlings
The moment you see the first green shoots, remove the dome immediately. Place the trays under grow lights or in a south-facing window where they'll get 12-14 hours of light daily. Watermelon seedlings need bright light to prevent leggy growth—if they stretch toward the light, they're not getting enough.
Water gently from the bottom (place the tray in ½-inch of water for 10 minutes) to avoid disturbing the roots. Keep the soil consistently moist but never waterlogged. Once the seedlings have 2-3 true leaves (not just the first seed leaves), thin to the strongest seedling per pot. Snip the weaker one at soil level with clean scissors.
⏰ Step 5: Harden Off Before Transplanting
Two weeks before your last frost date, start hardening off your seedlings. Move them outside to a shaded, sheltered spot for 1-2 hours the first day, gradually increasing time each day. By 10-14 days, they should be able to handle a full day outdoors.
Watch for signs of stress like wilting or yellowing leaves—this means they're not ready yet. Once they're toughened up, transplant to the garden after soil temperatures reach 70°F. Choose a spot with full sun and well-draining soil, and space plants 2-3 feet apart for vining varieties.
Tips & tricks for perfect seed germination
Here's what nobody tells you about getting those first green shoots without the waiting game.
Soaking Secret: That 12-24 hour soak isn't just about speed—it's about breaking dormancy. I've found using filtered water instead of tap water prevents mineral buildup that can inhibit germination. After soaking, spread seeds on a paper towel in a single layer to dry for exactly 10-15 minutes. This prevents clumping while keeping them moist enough to plant. Too long, and they'll dry out completely.
Heat Hack: Watermelon seeds need consistent warmth between 80-85°F to germinate reliably. If you don't have a heat mat, place your seed trays on top of your refrigerator (not inside—humidity matters more than cold). The top surface stays warm enough while the fridge maintains humidity. Just monitor closely—the seeds need warmth 24/7 during germination.
Light Timing: Those 12-14 hours of light in Step 4 are non-negotiable for strong seedlings. If you're using natural light, rotate trays daily so all seedlings get equal exposure. I've had leggy seedlings stretch toward one window while others stayed stunted. For grow lights, keep them 2-3 inches above the seedlings—closer equals stronger growth, but too close burns tender leaves.
Harden Off Smart: The 1-2 hour gradual hardening process prevents transplant shock. Start with just 30 minutes on day one if your seedlings look delicate. Watch for leaf curl—the classic sign they're not ready. I've transplanted too soon and lost half my seedlings to wilting. When they're ready, they'll bounce back within minutes of being moved outside.
Pro Tips for Watermelon Seed Germination
- Here's what nobody tells you about getting those first green shoots without the waiting game.
- Soaking Secret: That 12-24 hour soak isn't just about speed—it's about breaking dormancy.
- Heat Hack: Watermelon seeds need consistent warmth between 80-85°F to germinate reliably.
Frequently asked questions
How long does it take for watermelon seeds to germinate?
Watermelon seeds typically sprout in 3–7 days under ideal conditions (warm soil, 70–90°F/21–32°C, and consistent moisture). If you don’t see sprouts within 2 weeks, check soil temperature or seed viability. Patience pays off—some heirloom varieties take longer!
Can I germinate watermelon seeds in water?
Yes! Soak seeds in warm water for 12–24 hours to soften the outer shell, which speeds up germination. After soaking, plant them immediately in moist soil or a damp paper towel (keep them humid). Avoid over-soaking—seeds can rot. Pro tip: Use filtered water to prevent chemical exposure.
What’s the best way to speed up germination?
Boost success with these tricks:
- Heat mats (75–85°F/24–29°C) mimic summer soil.
- Pre-sprout seeds in damp paper towels (replace towels daily).
- Avoid cold drafts—watermelons hate chill.
- Use a clear lid (for containers) to trap humidity.
Why aren’t my watermelon seeds sprouting?
Common culprits:
- Cold soil (<60°F/15°C)—wait until nighttime temps stay above 50°F/10°C.
- Old or stored seeds (viability drops after 5+ years). Test with a float test: Sinkers germinate; floaters are dead.
- Poor drainage—seeds rot in soggy soil. Use a mix of 50% potting soil + 50% perlite.
- Hard seed coats—scratch lightly with sandpaper or soak longer.
Can I plant watermelon seeds directly outside?
Yes! After the last frost when soil is at least 70°F (21°C). Plant seeds 1 inch deep, 2–3 seeds per hill, spaced 3–6 feet apart. Thin to the strongest sprout. For cooler climates, start indoors 3–4 weeks before transplanting—use biodegradable pots to avoid root shock.
Wrapping up and next steps
Growing watermelon from seed is a rewarding journey that starts with patience and the right techniques! By understanding watermelon seed germination—from moisture control to optimal temperature—you’ll unlock the secret to faster, stronger sprouts.
Whether you’re a seasoned gardener or a curious beginner, these speed-sprouting tips will help you nurture vibrant plants and eventually enjoy juicy, homegrown watermelons.
Ready to take the next step? Start by planting your prepped seeds in your prepared soil or growing medium, and keep an eye out for those first tiny green shoots. Happy gardening! 🌱✨