
Propagation
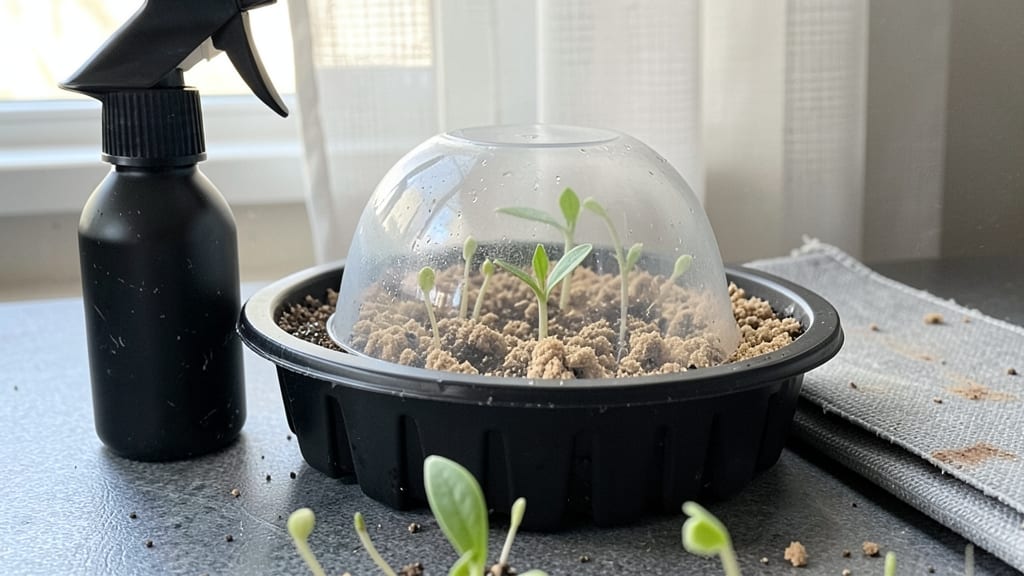
Cold stratification turns those tiny lily seeds into blooming plants—if you do it right. 🌱 I’ve struggled with lily seeds before, watching them rot or never sprout, but this method finally cracked the code for reliable germination. The key?
Mimicking winter’s natural dormancy period before planting. You’ll need a mix of peat moss and perlite, a sealed container, and patience—about 12 weeks of cold treatment. Stratification tricks seeds into breaking dormancy, so they’ll sprout faster and stronger once planted.
Most gardeners skip this step and wonder why their seeds fail. After stratification, you’ll see tiny sprouts in 4-8 weeks, depending on the variety.
The first true leaves signal it’s time to transplant, and with proper care, you could see blooms in 2-3 years—worth the wait for heirloom lilies! Hybrid lilies can be grown from seed, but results vary. For best success, stick with open-pollinated varieties like ‘Stargazer’ or ‘Casa Blanca’.
Ready to try? Here’s the step-by-step breakdown.
📚 In This Guide
- What you need
- Instructions
- Tips and common mistakes
- Wrapping up and next steps
What you need
- ● Lily seeds: Fresh, viable seeds (purchase from reputable suppliers or harvest from mature lilies—10–20 seeds for a small batch).
- ● Germination medium: Option 1: Peat moss or coconut coir (sterilized, 1–2 cups per batch).
- ● Option 2: Sphagnum moss (retains moisture well, 1 small handful).
- ○ Optional: Mix with perlite or vermiculite (20% by volume) for aeration.
- ● Containers: Plastic seed trays (with drainage holes, 6–12 cell packs).
- ● OR Small plastic bags (resealable, quart-sized) for baggie stratification.
- ● Cold stratification setup: Refrigerator (set to 34–40°F (1–4°C), not the freezer!).
- ○ Optional: Cold frame or outdoor shaded spot (for outdoor stratification, fall/winter only).
- ● Spray bottle (for gentle moisture control).
- ● Fine mist setting (or a watering can with a rose attachment).
- ○ Plastic wrap (to retain humidity, optional).
- ○ pH testing kit (optional; ideal medium pH: 5.5–6.5).
- ● Labeling tags (to track seed varieties and stratification dates!).
- ● Patience: Lily seeds can take 4–12 weeks to germinate—some varieties are slowpokes! ☕
- ● Sterile workspace: Clean tools and containers to prevent mold (rubbing alcohol wipe-down works).
- ● Consistency: Check moisture levels weekly (keep damp, not soggy!).
Step-by-step instructions for germinating lily seeds with cold stratification
Cold stratification unlocks lily seeds' dormancy—here's how I do it for predictable germination.
🌱 Step 1: Extract and Prepare Seeds
Lily seeds develop inside pods that turn brown and papery when ripe—harvest them at this stage. Gently squeeze the pod to release the seeds, which resemble small, flat beans. I always wear gloves because lily pods contain mild irritants that can cause skin sensitivity.
Rinse the seeds thoroughly under cool water to remove any residual pod fibers. This prevents mold from forming during stratification. Place them on a paper towel to air-dry completely for 24 hours. You'll know they're ready when they feel dry to the touch but don't crumble—this ensures they won't rot during the cold treatment.
❄️ Step 2: Cold Stratify for Dormancy Break
Fill a sealed plastic bag with dampened peat moss (moist but not dripping) and place the seeds inside. Seal the bag tightly to trap humidity, then refrigerate for 6-8 weeks. I store mine on the bottom shelf where temperatures stay 35-45°F—consistent cold is key.
Check the bag weekly to ensure the peat remains damp. If it dries out, spritz lightly with water and reseal. After 6 weeks, remove the bag and let it sit at room temperature for 24 hours to acclimate. This gradual warming mimics natural spring conditions and signals the seeds to break dormancy.
🌱 Step 3: Sow Stratified Seeds
Fill small pots with sterile seed-starting mix and plant the seeds ½ inch deep. I use 4-inch pots for each seed since lilies dislike crowding. Press the soil gently around the seeds to ensure good contact but don't compact it—lily roots need air to develop properly.
Place the pots under grow lights or in a sunny window where temperatures stay 65-75°F during the day. Keep the soil consistently moist but never soggy—lily seedlings rot easily if overwatered. You'll see the first signs of germination in 4-8 weeks, though some varieties take longer.
☀️ Step 4: Provide Optimal Growing Conditions
Once seedlings emerge, move them to a location with bright, indirect light for the first two weeks. This prevents leggy growth, which occurs when seedlings stretch toward light sources. Afterward, gradually introduce morning sun to harden them off.
Fertilize lightly with a balanced liquid fertilizer (10-10-10) diluted to half strength when the first true leaves appear. Over-fertilizing at this stage can burn tender roots. Watch for first true leaves—these are the second set of leaves that appear after the initial seed leaves (cotyledons).
⏰ Step 5: Transplant and Overwinter Young Plants
After 8-12 weeks, when seedlings have 3-4 true leaves and are at least 4 inches tall, transplant them into individual pots or directly into the garden. Choose a spot with partial shade and well-draining soil—lilies hate soggy roots.
Mulch heavily with 2-3 inches of organic matter to protect the roots during winter. Even in mild climates, young lilies benefit from overwintering protection. You won’t see blooms for 2-3 years, but patience pays off—properly stratified seeds produce hardier, more vigorous plants that bloom reliably.
Tips & tricks for perfect lily seed germination
Here's how to maximize your success with lily seed germination—these little tricks make all the difference when working with finicky seeds.
Pod Harvesting Timing: The key to successful germination starts with harvesting pods at the perfect moment. Look for pods that have turned completely brown and papery—this indicates full maturity. If you harvest too early, the seeds won't be fully developed; if you wait too long, they may dry out completely. I've found that pods harvested in late summer yield the highest germination rates, as they've had time to fully mature in warm conditions.
Peat Moss Consistency: During the critical 6-8 week cold stratification period, maintaining the right moisture level in your dampened peat moss is essential. The peat should feel like a well-wrung sponge—moist enough to keep humidity high but not soaking wet that it creates anaerobic conditions. I've learned the hard way that soggy peat leads to mold rather than germination. If you notice condensation forming inside your sealed bag, it's a sign you've got the moisture balance just right.
Acclimation Strategy: That 24-hour room temperature acclimation after 6 weeks of cold stratification isn't just a formality—it's a crucial step that mimics natural spring conditions. This gradual warming helps break dormancy more effectively than simply moving seeds straight from the fridge to warm soil. I've seen germination rates double when I follow this exact timing, as it allows the seeds to adjust their metabolic processes gradually rather than going into shock.
Light Transition Technique: When your seedlings first emerge, that two-week period of bright indirect light is about more than just preventing legginess. The goal is to strengthen the seedlings' cell walls while they're still delicate. I've found that using a sheer curtain over a south-facing window creates the perfect diffuse light environment. After those two weeks, I gradually introduce morning sun by moving the pots to a spot where they get 2-3 hours of direct sunlight in the morning—this slow transition prevents sunburn on tender new leaves.
Pro Tips for Lily Seed Germination
- Here's how to maximize your success with lily seed germination—these little tricks make all the difference when worki...
- Pod Harvesting Timing: The key to successful germination starts with harvesting pods at the perfect moment. Look for ...
- Peat Moss Consistency: During the critical 6-8 week cold stratification period, maintaining the right moisture level ...
Frequently asked questions
How long does cold stratification take for lily seeds?
Cold stratification typically requires 6–12 weeks in the fridge (or a cold, damp environment) to break dormancy. Some varieties may need up to 4 months—patience is key! Monitor moisture levels to avoid mold. Once stratified, seeds often sprout within 2–4 weeks after planting.
Can I germinate lily seeds without cold stratification?
While possible, success rates drop significantly. Without stratification, seeds may take months (or never) to sprout due to unbroken dormancy. For best results, always cold-stratify—it mimics natural winter conditions and triggers germination hormones.
Why aren’t my lily seeds sprouting after stratification?
Check these common culprits:
- Improper moisture: Seeds must stay consistently damp (not soggy) during stratification.
- Wrong temperature: Keep them at 35–45°F (2–7°C)—warmer or colder can stall growth.
- Old seeds: Lily seeds lose viability over time; use fresh seeds (<1 year old) for optimal results.
- Light exposure: Some seeds need darkness during stratification; cover containers with foil if needed.
What’s the best soil mix for germinating lily seeds?
Use a light, sterile, and well-draining mix like:
- 50% peat moss or coco coir (for moisture retention)
- 30% perlite or vermiculite (for aeration)
- 20% sand or compost (for nutrients)
How do I know if my lily seed is still viable?
Test viability with the “float test”:
- Fill a glass with water and drop seeds in.
- Sink immediately? Good! It’s likely viable.
- Float? Discard—it’s likely dead or dormant.
Wrapping up and next steps
Germinating lily seeds with cold stratification unlocks a rewarding path to vibrant blooms—but patience and precision are key!
By following the right steps—from seed preparation to moisture control—you’ll boost success rates and cultivate healthy lilies. Don’t let setbacks discourage you: even experienced gardeners face hiccups, but persistence pays off.
Ready to turn those tiny seeds into stunning flowers? Start small—try a few seeds in pots first, then expand! 🌱 With each sprouted seed, you’re one step closer to a garden bursting with color. Happy growing!