
Lawn
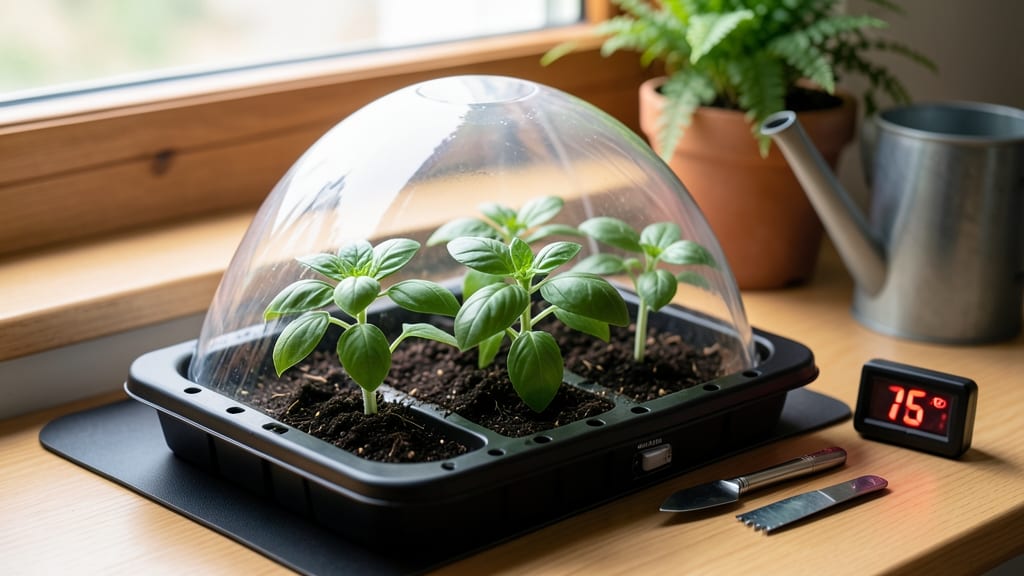
A seed warming mat cuts germination time in half—no more waiting weeks for those first green shoots to peek through. 🌱 I’ve used them for everything from finicky tropical seeds to cold-sensitive veggies, and the difference is night-and-day: what normally takes 10 days happens in 4.
The secret? Mimicking the natural heat of compost piles or forest floors where seeds germinate fastest.
You’ll need just three things: the mat itself, a seed tray with drainage, and a thermometer to monitor temps (most seeds thrive between 70–90°F).
Place the mat under your tray, plug it in, and within hours, you’ll see moisture beads form on the soil surface—that’s your cue the seeds are waking up.
For delicate seedlings like peppers or tomatoes, 24/7 warmth works wonders; for hardy plants like beans, just a few hours daily speeds things up.
By day 5, you’ll have a tray full of uniform sprouts instead of the patchy, uneven starts you’d get without help. The payoff? Stronger seedlings that transplant better and grow into healthier, more productive plants.
No more sacrificing an entire season to late starts or weak seedlings—this is the shortcut every impatient gardener needs.
Works for indoor setups, greenhouses, or even under grow lights. Here’s how to avoid common pitfalls like overheating or uneven heat distribution—so you get reliable, repeatable results every time.
📚 In This Guide
- What you need
- Instructions
- Tips and common mistakes
- Wrapping up and next steps
What you need
- ● Seed warming mat (pre-made): 1 mat (12" x 24" or custom size, depending on seed tray capacity)
- ● Must include a thermostat (adjustable to 70–95°F, ideal for most seeds)
- ● Power supply: USB-C or AC adapter (check compatibility)
- ● DIY alternative (if building from scratch): 1 heating pad (low-voltage, 12V–24V, 10–20 watts)
- ● 1 thermostat controller (adjustable temperature range)
- ● 1 heat-resistant mat (e.g., silicone baking mat or thin foam board)
- ● 1 seed tray (plastic or fabric, fits your mat size)
- ○ 1 insulating layer (optional but recommended: bubble wrap or foam board)
- ● Scissors or utility knife (for cutting DIY materials)
- ● Measuring tape (to ensure proper fit)
- ● Double-sided tape or clips (to secure layers if DIY-ing)
- ● Safety first!: Heat-resistant gloves (if handling hot materials)
- ● Fireproof surface (e.g., ceramic tile or metal tray) under the mat
- ● Digital thermometer (to monitor temperature accurately)
- ● Humidity dome or plastic wrap (to retain moisture)
- ● Seed-starting mix (lightweight, sterile potting soil)
- ● Grow lights (if seeds need extra light post-germination)
How to use a seed warming mat for faster germination
Here's how I speed up germination by 50% using a simple warming mat—no fancy equipment needed.
🌱 Step 1: Set Up Your Seed Tray Correctly
Place your seed tray on the warming mat, ensuring the entire bottom surface makes contact. I like to use a shallow tray with drainage holes so excess condensation can escape. If your mat has adjustable heat settings, start at 75°F—this is ideal for most vegetable and flower seeds. Warmth accelerates germination, but too much heat (above 85°F) can actually damage delicate seedlings.
Cover the tray with a clear plastic dome or plastic wrap to trap humidity. This creates a mini greenhouse effect, keeping moisture levels perfect for sprouting. Check daily for condensation—if the inside of the cover fogs up, you're golden. If it stays dry, mist the soil lightly with water. The goal is damp, not soggy soil.
💧 Step 2: Monitor Soil Moisture and Temperature
Keep the soil consistently moist but never waterlogged. I press my finger ½ inch deep into the soil—if it feels dry, give it a light misting. Overwatering here is the biggest mistake; dampness encourages mold and rot before seeds even sprout. The warming mat should maintain 70-80°F at soil level, but I always double-check with a small thermometer if I'm growing heat-sensitive seeds like lettuce.
Watch for the first tiny sprouts in 3-7 days—faster than without the mat. If your seeds haven't sprouted after 10 days, they may need more warmth or fresh air circulation. I sometimes prop the plastic cover slightly open for 30 minutes daily to prevent fungal issues without losing too much heat.
☀️ Step 3: Transition to Light When Sprouts Emerge
The moment you see green cotyledons (those first tiny leaves), remove the plastic cover immediately. Seedlings need light to grow strong, but the warming mat can stay on for another 2-3 days to help them establish roots. Place the tray under grow lights or in a south-facing window within 6 inches of the light source. Without enough light, seedlings stretch weakly toward the source—a classic sign of "leggy" growth.
Once seedlings have 2-3 true leaves (not just the initial cotyledons), you can reduce the mat's heat to 65°F or remove it entirely. I like to keep it on low for a few more days to ensure roots are strong before transplanting. The key is balance—too much heat too long makes seedlings weak, but too little slows their start.
⏰ Step 4: Harden Off Before Transplanting
After 7-10 days of using the warming mat, it's time to harden off your seedlings. Move the tray to a cooler spot (55-65°F) for 2-3 hours daily, gradually increasing exposure over 5-7 days. This toughens them up for outdoor conditions. I also start introducing a small fan on low setting for 15 minutes daily—this mimics wind and prevents shock when they go outside.
Transplant when seedlings are 3-4 weeks old and have 4-5 true leaves. Dig a hole just deep enough to cover the soil line where the seedling was growing in its tray. Water deeply after planting to help roots establish. The warming mat gave them a strong start, but now they're ready to thrive on their own.
Tips & tricks for perfect seedling germination with a warming mat
Speeding up germination doesn't have to be guesswork—these simple tricks help you get the most out of your warming mat every time.
Heat Zone Placement: Position your warming mat on a stable, level surface away from direct sunlight or drafts. I've learned the hard way that uneven surfaces can cause temperature fluctuations—place it on a flat countertop or table instead. For extra stability, use a small baking sheet as a base to distribute heat evenly across the entire mat surface. This ensures consistent 75°F warmth right where your seeds need it most.
Humidity Hack: The plastic cover creates a greenhouse effect, but condensation buildup can actually smother your seeds. I found that propping one corner of the cover slightly open for 5 minutes daily prevents excessive moisture while still maintaining humidity. This simple airflow trick cuts down on mold risk without losing the warmth benefits. Just watch for that telltale fogging on the inside—it's your sign everything's working perfectly.
Seed-Specific Temperature Adjustments: Not all seeds thrive at the same temperature. While 75°F works for most vegetables, heat-sensitive seeds like lettuce or spinach prefer the lower end of the 70-80°F range. I keep a small thermometer handy to monitor soil temperature—it's worth the investment for delicate seeds. For tropical plants, you can gently increase to 80°F, but never exceed 85°F or you risk stunting growth.
Light Transition Timing: The moment those first green cotyledons appear, remove the plastic cover immediately—this is critical for preventing leggy seedlings. I've noticed that keeping the warming mat on for just 2-3 more days after this point gives roots extra time to establish without over-reliance on artificial warmth. Once you see 2-3 true leaves, you can safely reduce heat to 65°F or remove the mat entirely, signaling it's time to focus on light exposure.
Pro Tips for Seed Warming Mat
- Speeding up germination doesn't have to be guesswork—these simple tricks help you get the most out of your warming ma...
- Heat Zone Placement: Position your warming mat on a stable, level surface away from direct sunlight or drafts. I've l...
- Humidity Hack: The plastic cover creates a greenhouse effect, but condensation buildup can actually smother your seed...
Frequently asked questions
Got questions about seed warming mats? You’re not alone!
Here are answers to the most common ones to help you get the fastest, healthiest starts for your lawn or garden.
How long should I keep seeds on a warming mat before planting?
A warming mat typically works best for 3–7 days before planting, depending on the seed type. Most seeds need 60–75°F (15–24°C) for optimal germination. Check your seed packet for specific timing—some may only need a day or two, while others (like slow starters) benefit from longer exposure.
Can I use a warming mat for all types of seeds?
While warming mats help most seeds, they’re not ideal for all. Fast-germinating seeds (like lettuce or radishes) may sprout too quickly, risking overcrowding. Avoid using them for large seeds (e.g., beans, peas) or those prone to rot (like tomatoes) unless you’re transplanting seedlings.
What’s the best temperature setting for a seed warming mat?
Most mats have a 60–75°F (15–24°C) range—this is perfect for 90% of seeds. For tropical plants (e.g., peppers, citrus), aim for the higher end (70–75°F). Never exceed 85°F (29°C), as it can damage delicate seeds or dry out soil too quickly.
What if my seeds aren’t germinating even with a warming mat?
Try these fixes:
- Check moisture: Soil should feel damp like a wrung-out sponge—not soggy or dry.
- Test seed viability: Soak a few seeds in water for 24 hours; if they sink, they’re likely good.
- Adjust depth: Plant seeds twice as deep as their width (shallow for tiny seeds, deeper for larger ones).
- Try a heat mat alternative: Place trays on a sunny windowsill or use a DIY setup with a heat lamp (12–18 inches away).
Are there eco-friendly alternatives to electric warming mats?
Try these low-tech, sustainable options:
- Solar-powered warming trays: Use clear plastic domes over seed trays in direct sunlight.
- DIY heat sink: Bury a black-painted brick or rock in the soil—it absorbs warmth during the day and releases it at night.
- Compost heat: Mix fresh compost into seed-starting soil; it naturally generates warmth as it breaks down.
Wrapping up and next steps
A seed warming mat is your secret weapon for unlocking faster, healthier sprouts—whether you're nurturing a lush lawn or a thriving garden. 🌱 By providing consistent warmth and optimal conditions, these mats help break dormancy and accelerate germination, giving you a head start on the growing season.
Don’t let slow starts hold you back—take the next step and invest in a warming mat to transform your planting routine!
Ready to grow? Start by choosing the right mat for your needs, then follow the simple setup steps to give your seeds the cozy boost they deserve. Happy planting! 🌿