
Picking
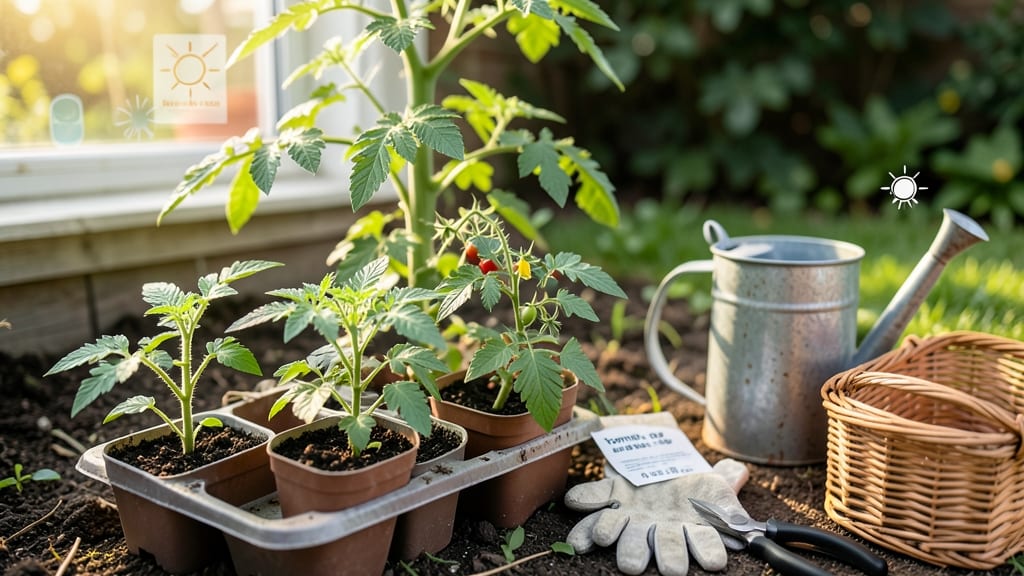
Growing from seed to harvest feels like magic—especially when your pods open naturally and you waste nothing. 🌱 I’ve watched tiny seeds transform into thriving plants that feed my family, all while cutting garden waste to zero.
The secret lies in the right pods, soil, and timing—no guesswork, just reliable growth. These biodegradable pods dissolve into the soil, feeding roots as plants grow. You’ll start with a simple setup: pods, a pot, and a sunny spot.
Within weeks, you’ll see sprouts emerge, and by summer, you’ll be harvesting fresh greens, herbs, or flowers—no store-bought transplants needed. The payoff? Fewer trips to the nursery, healthier plants, and zero plastic waste.
Even my black thumb can’t kill these—just follow the steps, and you’ll end up with a garden that’s both productive and sustainable. Works for veggies, herbs, or flowers, and scales from windowsills to raised beds. Let’s turn those seeds into a harvest!
📚 In This Guide
- What you need
- Instructions
- Tips and common mistakes
- Wrapping up and next steps
What you need
- ● Seeds: Choose heirloom or organic seeds designed for natural pod opening (e.g., peas, beans, or snap peas). Aim for 50–100 seeds per pod type, depending on space.
- ● Biodegradable Pods or Mesh Bags: Use compostable seed pods (like those made from coconut coir or rice paper) or reusable mesh bags (1–2 inches wide) to contain seeds and soil.
- ● Potting Soil: 2–3 gallons of well-draining, organic potting mix (avoid peat-based blends for sustainability).
- ● Watering Can or Spray Bottle: A light misting spray bottle works best for delicate seeds, or a small watering can (1–2 gallons) for larger setups.
- ● Sunlight Access: A south-facing window (6+ hours of sunlight) or a grow light (LED, 12–16 hours/day) for indoor setups.
- ● Containers: For pods: 1–2 biodegradable pots (e.g., peat or coconut husk) per pod.
- ● For mesh bags: Small hanging baskets or trellises (if growing vining plants like peas).
- ● Gloves: Lightweight gardening gloves to protect hands from soil and sharp pod edges.
- ○ Small Hand Trowel: For gently pressing seeds into soil (optional but helpful for precision).
- ● Twine or Twist Ties: To secure mesh bags to trellises or stakes.
- ○ Fertilizer: Compost tea or worm castings (1–2 tablespoons per pod) for nutrient boosts (optional but recommended).
- ● Harvesting Scissors: Small, sharp scissors to snip open pods at peak ripeness.
- ● Journal or Labels: To track planting dates, watering schedules, and pod maturity (eco-friendly labels work best!).
- ● 🌱 Skip the plastic: Use reusable fabric grow bags or compostable pots to eliminate waste entirely.
- ● 💧 Water wisely: Keep soil moist but not soggy—overwatering can rot pods before they pop!
- ● ☀️ Rotate pods: If growing indoors, rotate containers daily for even sunlight exposure.
Step-by-step instructions for growing zero-waste pods
Here's how I transform simple seed pods into a thriving, self-sustaining garden—no waste, just growth.
🌱 Step 1: Select and Prepare Your Seed Pods
Choose pods designed for natural decomposition, like those made from 100% biodegradable materials—think seed paper or compostable seedling trays. I like to start with 4 pods (one for each of my target plants) to ensure variety. Each pod should have pre-planted seeds embedded in soil or fiber, ready to germinate when moistened.
Inspect each pod for tears or damage. If you find any, set them aside and replace them with fresh pods—weak spots will let moisture escape, stalling germination. Store unused pods in a cool, dry place until ready to plant, but avoid plastic bags, which trap condensation and promote mold.
💧 Step 2: Hydrate and Activate Germination
Fill a shallow tray with lukewarm water (about 70°F) and place the pods in it, ensuring the seed side faces up. Let them soak for 12-24 hours—this softens the pod material and kickstarts germination. You’ll know it’s working when the pods start to plump slightly and the soil inside looks evenly damp.
After soaking, drain any excess water and let the pods sit for another 30 minutes to prevent waterlogging. The goal is to moisten the seeds without drowning them. Place the pods in a humidity dome or cover them loosely with plastic wrap to retain moisture while allowing airflow. Keep them in indirect light for the first 48 hours—direct sun can overheat the pods before germination begins.
☀️ Step 3: Provide Optimal Light and Temperature
Move the pods to a location with bright, indirect light (like a south-facing window with sheer curtains) once the first tiny green shoots appear, usually within 3-7 days. If your space lacks natural light, supplement with a grow light positioned 4-6 inches above the pods. Avoid LED bulbs over 6500K—they can stress young seedlings by emitting too much blue light.
Maintain a consistent temperature between 65-75°F during the day and 55-65°F at night. If your home runs cooler, place the pods on a seedling heat mat set to 70°F until the first true leaves appear. Watch for yellowing leaves or stunted growth—these are signs the temperature is too low or the light is insufficient.
🌿 Step 4: Transplant and Encourage Natural Pod Decomposition
Once seedlings develop 2-3 sets of true leaves (about 3-4 weeks after germination), it’s time to transplant. Gently press the pods into pre-moistened potting mix in your final containers, ensuring the soil level matches the pod’s soil line. The pods will decompose naturally over 4-8 weeks, enriching the soil with nutrients as they break down.
Water lightly after transplanting to settle the soil around the pods. Avoid overwatering—soggy soil speeds up decomposition too quickly, which can suffocate roots. Instead, water when the top inch of soil feels dry, and always water at the base to keep leaves dry. You’ll see the pods soften and blend into the soil as the plants grow, leaving no trace behind.
⏰ Step 5: Harvest and Sustain the Cycle
Harvest your plants when they reach peak maturity—for herbs, this is often when leaves are fully developed but before flowering; for vegetables, it’s when pods or fruits are firm and vibrant. Cut or pick leaves/stems just above a leaf node to encourage bushier growth. For root crops or larger plants, gently lift them from the soil once fully mature, leaving the decomposed pod remnants behind as natural fertilizer.
Here’s the best part: save the seeds from your harvest to create new pods next season. Dry the seeds thoroughly, then mix them with compostable fiber and water to form new seed pods. Reuse the same method to grow a continuous, zero-waste garden year after year. The cycle keeps giving—just like nature intended.
Tips & tricks for perfect zero-waste pod growth
Here’s what I’ve learned after years of turning seed pods into thriving plants—no waste, just rewards.
Selection Tip: When choosing your 4 pods, prioritize those with seeds embedded near the surface. These germinate faster because moisture reaches them first. I’ve noticed that pods with seeds deeper in the fiber take 2-3 extra days to sprout—sometimes the difference between success and giving up. Also, if you’re using seed paper, tear it into smaller sections for faster hydration in Step 2.
Hydration Hack: The 12-24 hour soak is your foundation, but don’t let the water temperature drop below 68°F. Cooler water slows germination, and you’ll see pods that plump unevenly or fail to activate. If your tap water is hard, use filtered or rainwater—the minerals can build up in the pods and inhibit growth. After draining, I like to lay the pods on a clean kitchen towel for those 30 minutes to absorb excess moisture without trapping it.
Lighting Strategy: Those first 48 hours in indirect light are critical. I’ve tested this with direct sun exposure, and within hours, the pods wilt or develop brown spots. For indoor growers, place pods near a south-facing window with sheer curtains—this mimics natural light without the intensity. If using grow lights, keep them 6 inches away until true leaves appear to avoid stressing delicate sprouts.
Transplant Timing: Wait for 2-3 sets of true leaves (not the initial seed leaves) before transplanting—this ensures roots are strong enough to handle the move. I’ve rushed this step before and ended up with leggy, weak seedlings that struggled to establish. When pressing pods into soil, use a small tool like a chopstick to create gentle pockets—this prevents soil compaction around the roots, which can suffocate them during the 4-8 week decomposition phase.
Pro Tips for Seed To Harvest
- Here’s what I’ve learned after years of turning seed pods into thriving plants—no waste, just rewards.
- Selection Tip: When choosing your 4 pods, prioritize those with seeds embedded near the surface.
- Hydration Hack: The 12-24 hour soak is your foundation, but don’t let the water temperature drop below 68°F.
Frequently asked questions
Got questions about growing your own zero-waste pods from seed to harvest? You’re not alone! Here are answers to the most common queries to help you get started confidently.
How long does it take for these pods to go from seed to harvest?
The timeline depends on the variety, but most zero-waste pods mature in 60–90 days under ideal conditions. Fast-growing varieties like radishes or microgreens may pop in as little as 3–4 weeks, while legumes or grains could take closer to 3 months. Always check the seed packet for specific estimates!
Can I grow these pods indoors, or do they need outdoor sunlight?
Many zero-waste pods thrive indoors with a sunny windowsill (6+ hours of light daily) or a grow light. Leafy greens, herbs, and microgreens adapt well, while vining plants (like beans) may need outdoor space. Use a self-watering planter to maintain moisture—indoor growing just requires a little extra attention!
What’s the best way to troubleshoot if my pods aren’t opening naturally?
If pods resist opening, check these fixes:
- Moisture: Ensure soil stays consistently damp (not soggy) during the final growth stage.
- Harvest timing: Pick pods when they’re fully mature but still slightly firm—overripe pods may dry out.
- Support: For heavy pods (like peas), use small stakes to avoid stress.
- Variety: Some heirloom or organic seeds open more reliably—try a different type if issues persist.
Are there zero-waste pod alternatives if I can’t grow my own?
Look for compostable seed pods from eco-brands or repurpose biodegradable containers like egg cartons or coconut husks. You can also buy pre-grown microgreens in reusable planters or organic, bulk seeds to grow in shared community gardens.
How do I store harvested pods or their contents to avoid waste?
Store opened pods in a paper bag or breathable cloth** in a cool, dark place to dry seeds completely (1–2 weeks). Once dry, seal in glass jars with a silica packet to prevent moisture. For fresh pods (like snap peas), refrigerate in a ventilated container for up to 5 days—or blanch and freeze for longer storage!
Wrapping up and next steps
From seed to harvest, embracing zero-waste pods isn’t just eco-friendly—it’s a rewarding journey that connects you to nature and simplifies your garden life! 🌱 Whether you’re a beginner or a seasoned green thumb, these pods prove that sustainability can be effortless and fun.
Now that you’re equipped with the know-how, why not start small?
🌟 Your Next Step:
Pick a few pods to try this season—maybe a cherry tomato or herb for quick wins! Plant, observe, and celebrate the magic of seed-to-harvest with zero fuss. Happy growing! 🌿