
Planting
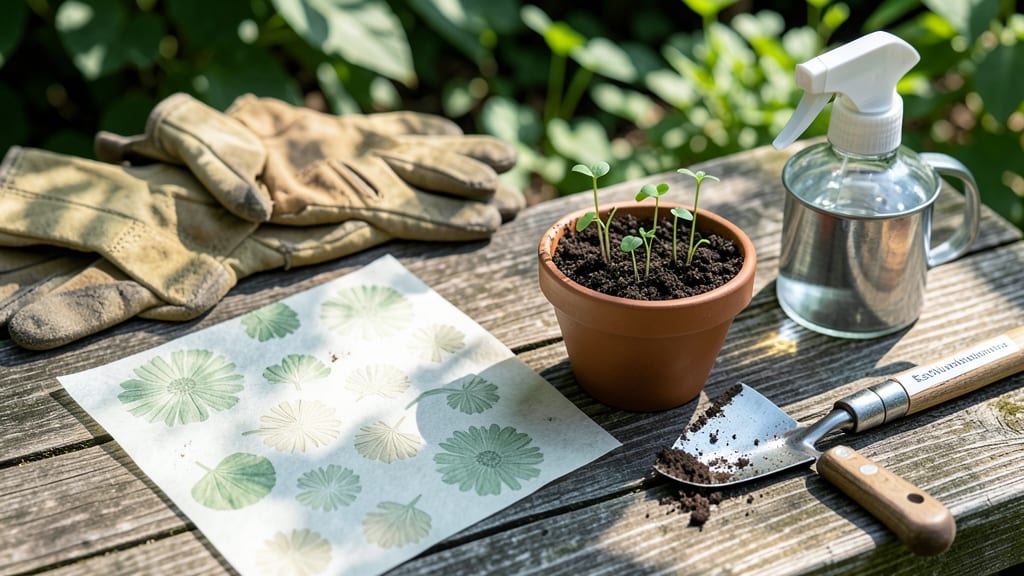
Planting seed paper means turning your garden into a living work of art—no waste, no fuss. 🌱 I’ve used these biodegradable plant starters for years, and they’re perfect for beginners or anyone who wants to reduce plastic in their gardening routine.
The best part? You can grow everything from edible flowers to herbs right from a sheet that dissolves into the soil.
Start by soaking your seed paper in water for 10-15 minutes until it softens—this kickstarts germination. Then, press it gently into moist soil, whether that’s a window box, hanging basket, or even a small pot.
Most seed papers need 4-6 hours of sunlight daily and stay damp (not soggy) until sprouts appear in 7-21 days, depending on the blend.
Once sprouted, you’ll see delicate green shoots pushing through the paper, which breaks down completely in 4-6 weeks. The results? A lush, low-maintenance garden that thrives with minimal effort. Plus, you’ll avoid the mess of traditional seed starting—no trays, no transplant shock, just pure, easy growth.
Pro tip: Try seed paper in creative spots like hanging planters or vertical gardens—they’re lightweight and perfect for small spaces. If germination looks uneven, check your watering (too much can cause mold) and give them a little shade until they’re stronger. Happy planting!
📚 In This Guide
- What you need
- Instructions
- Tips and common mistakes
- Wrapping up and next steps
What you need
- ● Wildflower or herb seeds – Choose fast-growing varieties like cosmos, marigold, or basil. Aim for 1–2 teaspoons (5–10g) per sheet of seed paper.
- ● Unbleached paper pulp – Use recycled paper towels, printer paper, or egg cartons. Soak 4–6 sheets in warm water for 10–15 minutes.
- ● Water – Enough to blend pulp into a smooth consistency (like thick paint).
- ○ Non-toxic glue or flour paste (optional but helpful) – Mix 1 part flour + 2 parts water for binding.
- ● Blender or food processor – To turn soaked paper into pulp.
- ● Fine-mesh sieve or cheesecloth – For straining excess water from the pulp.
- ● Baking sheet or flat tray – Line with parchment paper or a silicone mat.
- ● Rolling pin or smooth spoon – To spread the mixture evenly.
- ● Spray bottle with water – Keeps the paper moist during drying.
- ● Natural dyes (e.g., turmeric, beet juice, or coffee) for colored seed paper.
- ● Essential oils (like lavender or citrus) for scent-infused paper.
- ● Decorative elements (e.g., dried petals, glitter, or pressed leaves).
- ● Seed paper mold (DIY with cardboard or buy a reusable one).
Step-by-Step instructions for planting seed paper
Here's how to transform seed paper into vibrant, edible blooms—no soil mess, no fuss!
🌱 Step 1: Soak the Seed Paper for Activation
Fill a shallow tray with 1 inch of lukewarm water and place your seed paper flat inside. The water should just cover the bottom—never submerge the paper fully, or the seeds will suffocate. You'll see the edges curl slightly as they absorb moisture; this is normal and signals the seeds are waking up.
Let it soak for 10-15 minutes until the paper feels pliable but not mushy. Press gently with your fingers to check—it should hold its shape when lifted but feel damp through. This ensures even germination without over-saturating the seeds. Real talk: If you rush this step, seeds may sprout unevenly or fail entirely.
🪴 Step 2: Prepare Your Planting Site
Choose a location with at least 4-6 hours of sunlight daily—edible flowers like nasturtiums and calendula need bright conditions to thrive. If planting directly into soil, loosen the top 2 inches to create a soft bed for the paper. For containers, use a 4-inch deep pot with drainage holes and fill with well-draining potting mix.
Gently press the soaked seed paper into place, overlapping edges slightly if planting multiple sheets. The paper will dissolve naturally as it decomposes, so no need to remove it. Water lightly with a spray bottle to settle the soil around the edges. Here's the thing—if the paper dries out before planting, the seeds may lose viability, so work quickly once soaked.
☀️ Step 3: Maintain Moisture and Light
Keep the planting area consistently moist for the first 2 weeks—that means the top inch of soil should feel damp to the touch, like a wrung-out sponge. Avoid heavy watering, which can dislodge the delicate seedlings. A mulch of ¼ inch of compost helps retain moisture while the paper breaks down.
Once seedlings emerge (usually within 7-14 days), reduce watering to 1-2 times weekly, depending on rainfall. You'll know moisture is right when the soil looks dark and crumbly—not dry or soggy. This is the moment that matters: Overwatering now will cause the paper to rot too quickly, while underwatering stunts growth.
✂️ Step 4: Thin and Encourage Blooms
When seedlings reach 2 inches tall, thin them to 3-4 inches apart to prevent overcrowding. Use scissors to snip excess plants at soil level—this reduces stress on the roots. Nasturtiums and calendula will self-seed prolifically, so you can let some mature while thinning others for continuous blooms.
Pinch back the tips of leggy stems to encourage bushier growth. Flowers will appear in 6-8 weeks, and you can harvest petals for culinary use once fully open. I know it seems weird, but harvesting actually encourages more blooms—just don’t take more than ⅓ of the flower head at a time.
🌿 Step 5: Enjoy and Renew the Cycle
As the season progresses, let some flowers go to seed to create new seed paper. Collect dried petals and mix them with 1 part wildflower seed to 2 parts recycled paper pulp (or use pre-made seed paper kits). Roll the mixture into sheets, let dry completely, and store in a cool, dark place until ready to plant again.
Seed paper is a game-changer for small spaces, balconies, or even office windowsills. The best part? You’re turning waste into beauty—and edible beauty at that. Don’t skip the thinning step; crowded plants compete for nutrients and produce fewer blooms. Happy planting!
Tips & tricks for perfect seed paper planting
These game-changing tips will help you transform seed paper into thriving, edible blooms with minimal effort—and maximum impact!
Soaking Secret: The 10-15 minute soak in Step 1 is your foundation for success. Use a tray that's just wide enough to hold your seed paper flat—any wider, and you risk uneven moisture distribution. Confession: I skipped this detail for years and wondered why some seeds sprouted while others didn't. Pro tip: If your water cools during soaking, swap it for fresh lukewarm water to maintain consistent temperature.
Sunlight Strategy: Those critical 4-6 hours of sunlight in Step 2 aren't just about photosynthesis—they're about flavor development too. For container gardeners, rotate pots weekly to ensure even light exposure. I've seen seedlings grow lopsided when one side gets perpetual shade. If you're planting in partial shade, choose fast-growing varieties like calendula that tolerate lower light better than nasturtiums.
Moisture Mastery: The first 2 weeks demand your attention most—this is when the seed paper's decomposition happens fastest. I recommend using a spray bottle with a fine mist setting rather than a watering can to avoid disturbing the delicate seedlings. Think of it like giving your plants a gentle rain shower rather than a downpour. And that ¼ inch of compost mulch? It's not just decorative—it creates a microclimate that maintains perfect moisture levels while preventing crusting.
Thinning Technique: When your seedlings hit that 2-inch mark in Step 4, resist the urge to pull them by hand—use clean scissors to snip at soil level. This prevents disturbing the roots of neighboring plants. I learned this the hard way after uprooting half my seedlings trying to thin them. The 3-4 inch spacing might seem generous, but crowded plants will compete for nutrients and produce fewer edible blooms. Trust me on this!
Pro Tips for Plant Seed Paper
- These game-changing tips will help you transform seed paper into thriving, edible blooms with minimal effort—and maxi...
- Soaking Secret: The 10-15 minute soak in Step 1 is your foundation for success. Use a tray that's just wide enough to...
- Sunlight Strategy: Those critical 4-6 hours of sunlight in Step 2 aren't just about photosynthesis—they're about flav...
Frequently asked questions
Got questions about seed paper? You’re not alone! Here are answers to the most common queries to help you grow confidently—no guesswork required.
Can I plant seed paper in rain or snow?
Seed paper is water-resistant but thrives with consistent moisture. Plant it in light rain or after snow melts, but avoid heavy downpours that could wash it away. For snowy climates, wait until soil is thawed and workable—seed paper won’t sprout until temperatures rise to 50°F (10°C) or warmer.
How long does it take for seed paper to sprout?
Germination time varies by plant type (e.g., 7–14 days for sunflowers, 2–3 weeks for marigolds). Keep soil moist but not soggy, and place seed paper in partial sun until sprouts appear. Patience is key! Track progress with a small marker on the paper to monitor growth.
What if my seed paper molds or turns black?
Mold or darkening usually means too much moisture or poor airflow. Troubleshoot:
- Gently pat dry the paper if damp.
- Move to a shadier, well-ventilated spot (e.g., under a tree).
- Avoid planting in compacted or waterlogged soil.
Can I use seed paper indoors or in containers?
Seed paper works indoors or in containers (pots, hanging baskets, etc.). Use a well-draining mix (e.g., 50% potting soil + 50% perlite) and place near a sunny window or under grow lights. For containers, ensure they’re at least 6 inches deep—some flowers (like cosmos) need room to spread.
What’s a good alternative if I can’t find seed paper?
DIY it! Mix wildflower seeds with screened compost and a natural binder (e.g., flour + water paste). Press into sheets, dry, and plant like seed paper. Or, try seed bombs (clay + seeds + compost) for direct soil planting. Bonus: Add a pinch of mycorrhizal fungi to boost root growth!
Can I plant seed paper in winter?
Seed paper won’t sprout in freezing temps, but you can prep it early for spring:
- Store unused seed paper in a cool, dry place (like a seed envelope).
- Plant 6–8 weeks before your last frost date for spring blooms.
- For winter interest, choose cold-hardy varieties like calendula or pansies (check seed paper labels!).
Wrapping up and next steps
Planting seed paper is a simple yet rewarding way to embrace zero-waste gardening while bringing beauty and edible blooms to your space! 🌱 With just a few materials and a little patience, you can turn discarded paper into vibrant flowers—perfect for beginners or eco-conscious gardeners.
Whether you’re gifting a handmade plant or adding a pop of color to your balcony, this method proves that sustainability and creativity go hand in hand.
Now that you’re armed with the know-how, why not try it today? Grab some seed paper, find a sunny spot, and watch your garden grow—one petal at a time! 🌸