
Lawn
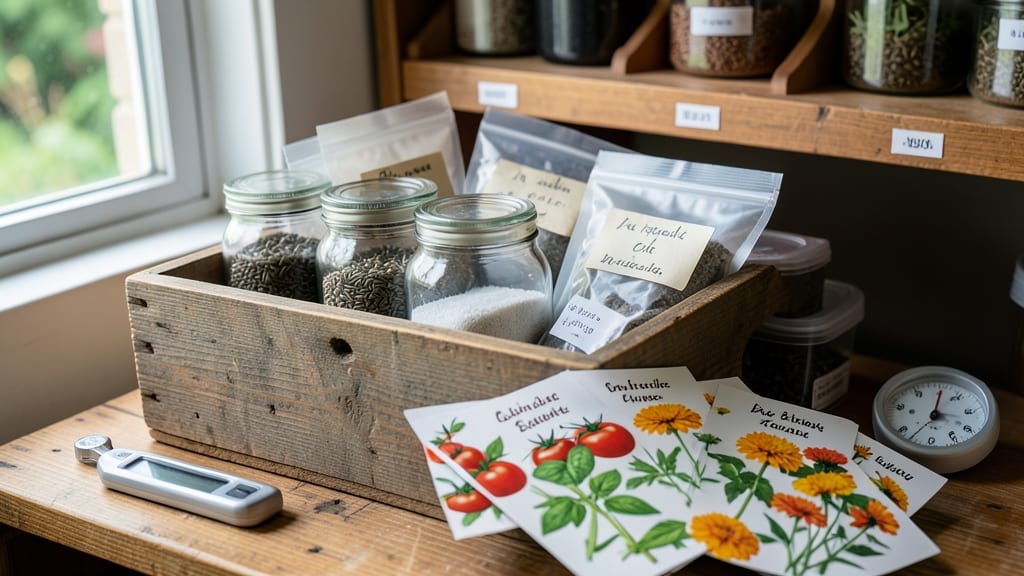
Your seeds' future starts with the right storage conditions—humidity and temperature are the secret weapons that keep germination rates high for years. 🌱 I’ve lost count of the packets I’ve saved from one season to the next, and the difference between thriving sprouts and dusty failures comes down to these two factors alone.
A single misstep—like storing seeds in a damp basement or a hot attic—can turn a $5 packet into a $5 lesson.
The ideal setup keeps seeds in a cool, dry place between 32°F and 41°F with 30-50% humidity—think refrigerator crisper drawers or airtight containers in a basement. Most seeds last 1-5 years under these conditions, but heirlooms and rare varieties can stay viable even longer.
The key is sealing them in moisture-proof containers (glass jars or Mylar bags) with a silica gel packet to absorb any lingering dampness.
When done right, you’ll open a packet years later and still get 90%+ germination—no wilting, no mold, just fresh starts ready to grow. The payoff? A pantry stocked with seeds that outperform anything you’d buy fresh, plus the satisfaction of knowing you’re preserving biodiversity one packet at a time.
Even small mistakes (like forgetting to label) can derail this system, so we’ll cover those too.
This method works for any climate—whether you’re in a humid Southeast or a dry Southwest—because it controls the variables you can’t change outside. Let’s get those seeds stored like a pro, so next spring’s garden starts with the best possible foundation.
📚 In This Guide
- What you need
- Instructions
- Tips and common mistakes
- Wrapping up and next steps
What you need
- ● Air-tight storage containers: Glass jars with rubber gaskets (e.g., Mason jars) or mylar bags with oxygen absorbers (minimum 1-gallon capacity for bulk storage).
- ● Desiccant packets: Silica gel or clay-based desiccants (1–2 packets per container for humidity control).
- ● Oxygen absorbers: Small packets (e.g., 500–1,000 cc capacity) to prevent mold and degradation.
- ● Labeling supplies: Permanent markers, sticky labels, or a seed inventory spreadsheet to track varieties and dates.
- ● Thermometer & hygrometer: Digital or analog (±2°F/±1°C accuracy) to monitor temperature (32–41°F) and humidity (5–15%).
- ● Seed paper or breathable bags: For short-term storage (3–6 months) if air-tight containers aren’t available.
- ● Vacuum sealer: For extra-long-term storage (reduces oxygen exposure).
- ● Refrigerator/freezer: If storing seeds beyond 5 years (aim for 0–32°F).
- ● Seed catalog or database: To cross-reference storage needs by seed type (e.g., warm-season vs. cool-season grasses).
- ● UV-protective containers: If storing near windows (prevents light damage).
How to store seeds for maximum longevity
Here's the foolproof system I use to keep seeds viable for years—no fancy equipment needed.
🪴 Step 1: Dry Seeds Thoroughly Before Storage
Spread seeds in a single layer on a paper towel or clean screen. Let them air-dry for 3-5 days in a cool, dry place—a windowsill works well unless humidity is high. You'll know they're ready when they feel crisp and dry to the touch, with no moisture remaining between them.
Don't rush this step. Even slightly damp seeds develop mold or rot in storage. If you're in doubt, test one seed by placing it between two paper towels overnight. If it stays dry, the batch is ready.
⏰ Step 2: Choose the Right Containers and Seal Tightly
Use airtight containers like glass jars, metal tins, or heavy-duty plastic bags with zip seals. Label each container with the seed type and date using a permanent marker—ink fades over time. I like to add a small silica gel packet (the kind that comes in shoe boxes) to absorb any lingering moisture.
Vacuum-sealed bags work too, but only if they're completely airtight. If you notice condensation inside after sealing, open the container and let it dry again before resealing.
☀️ Step 3: Store in a Cool, Stable Environment
Keep seeds in a location with consistent temperatures between 32-41°F—a refrigerator crisper drawer or basement corner works perfectly. Avoid storing near the fridge motor, where temperatures fluctuate. The goal is to slow metabolic activity and preserve viability for 5-10+ years depending on the seed type.
Never store seeds in the freezer unless you're using a deep-freeze method for ultra-long-term preservation. Most seeds don't need the extreme cold—just stable coolness. Check containers every 6-12 months to ensure no moisture has developed.
💧 Step 4: Monitor Humidity Levels
Ideal humidity for seed storage is 30-50%. If your storage area runs drier (like a basement in winter), you're golden. In humid climates, place a small dehumidifier nearby or add extra silica gel packets. You'll know humidity is right when seeds remain crisp and don't develop a musty smell.
If you notice condensation on the inside of containers, remove seeds immediately and dry them again. Even slight moisture reduces viability dramatically. For extra protection, store seeds in Mylar bags inside the containers—this creates a secondary moisture barrier.
✂️ Step 5: Test Viability Periodically
Every 2-3 years, germinate a small sample of each seed type to check viability. Plant 10 seeds in moist paper towels, seal in a plastic bag, and place in a warm spot. After 5-7 days, count how many sprout. If 80% or more germinate, your stored seeds are still excellent. Below that, it's time to refresh your supply.
This simple test prevents wasted money on old seeds. I keep a small notebook to track germination rates by seed type—it's become my go-to reference for planning future plantings.
Tips & tricks for perfect seed storage conditions
Keeping seeds viable for years isn't rocket science—it's all about controlling the right conditions. Here's what I've learned after years of perfecting my seed storage system.
Drying is Non-Negotiable: That 3-5 day drying period in Step 1 is absolutely critical. I've learned the hard way that even slightly damp seeds develop mold within weeks. For extra confidence, place your seeds in a paper bag with a few silica gel packets overnight before final drying—this gives you a second chance to catch any lingering moisture. The goal is seeds that feel like they're whispering "crisp" when you touch them.
Container Seal Test: When you seal your containers in Step 2, do the condensation check right away. I've ruined batches by ignoring this—if you see any moisture inside the container after 24 hours, open it immediately and dry the seeds again. For extra peace of mind, I like to place containers in a warm spot (like on top of the fridge) for a few hours after sealing to encourage any remaining moisture to condense on the inside before it can cause damage.
Temperature Stability Matters: That 32-41°F range in Step 3 is your sweet spot, but don't get too hung up on exact numbers. What's more important is consistency. I've had seeds last perfectly well in a basement corner that fluctuated between 38-42°F—it's the dramatic swings that cause problems. If your fridge crisper is the only stable option, use it! Just avoid the door where temperatures can jump around when you open it.
Humidity Hack: For Step 4, if you're in a particularly humid climate, consider adding two silica gel packets instead of one. I've found that in areas with 60%+ humidity, the extra packet makes all the difference in preventing that musty smell. And here's a pro move: place a small digital hygrometer near your storage area—these are cheap and give you real-time humidity readings so you can adjust before problems start.
Pro Tips for Seed Storage Conditions
- Keeping seeds viable for years isn't rocket science—it's all about controlling the right conditions. Here's what I've...
- Drying is Non-Negotiable: That 3-5 day drying period in Step 1 is absolutely critical. I've learned the hard way that...
- Container Seal Test: When you seal your containers in Step 2, do the condensation check right away. I've ruined batch...
Frequently asked questions
How long can seeds stay viable if stored properly?
With ideal seed storage conditions—cool (32–41°F), dry (5–10% humidity), and dark—most seeds retain viability for 1–5 years. Vegetable seeds (like tomatoes or peppers) often last 2–4 years, while flower and herb seeds may drop in quality after 1–2 years. Always check seed packets for specific lifespan estimates!
Can I store seeds in the freezer for longer shelf life?
Yes! Freezing seeds (0°F or below) can extend viability for decades in some cases. For best results, dry seeds thoroughly (use silica gel packets) and store in airtight, moisture-proof containers. Label everything with the date and seed type—freezer burn is real, even for seeds!
What happens if my seeds get damp during storage?
Moisture is the #1 enemy of seed longevity. If seeds absorb humidity, they’ll sprout prematurely, mold, or lose viability. Signs of dampness? Clumping, musty smells, or visible mold. Act fast: Spread seeds on a tray to dry (no heat!) and transfer to a desiccant-filled container ASAP. If mold appears, discard the batch—it’s not worth the risk.
Are refrigerator or pantry storage good alternatives?
A refrigerator (35–40°F) is better than a pantry (60–80°F) but not ideal long-term. Pantries are too warm and humid unless you use airtight, sealed containers with desiccants. For short-term storage (<1 year), a cool, dark pantry works—but for seed storage conditions that last, a dedicated seed fridge (32–41°F) or freezer wins.
How do I test if stored seeds are still good?
Perform a germination test before planting: Moisten a paper towel, place 10 seeds inside, fold it up, and seal in a bag. Keep in a warm spot (70–80°F) for 5–7 days. If 80%+ sprout, your seeds are viable. Fewer? Try planting a few directly in soil—or restock!
Wrapping up and next steps
Mastering seed storage conditions is your secret weapon for keeping your lawn thriving year after year! 🌱 By controlling humidity and temperature, you’re not just preserving seeds—you’re investing in future growth. Whether you’re a seasoned gardener or just starting, these blueprints make the process simple and stress-free.
Ready to take the next step? Test your setup with a small batch of seeds, monitor their viability over time, and fine-tune as needed. Your green thumb (and wallet) will thank you!