
Lawn
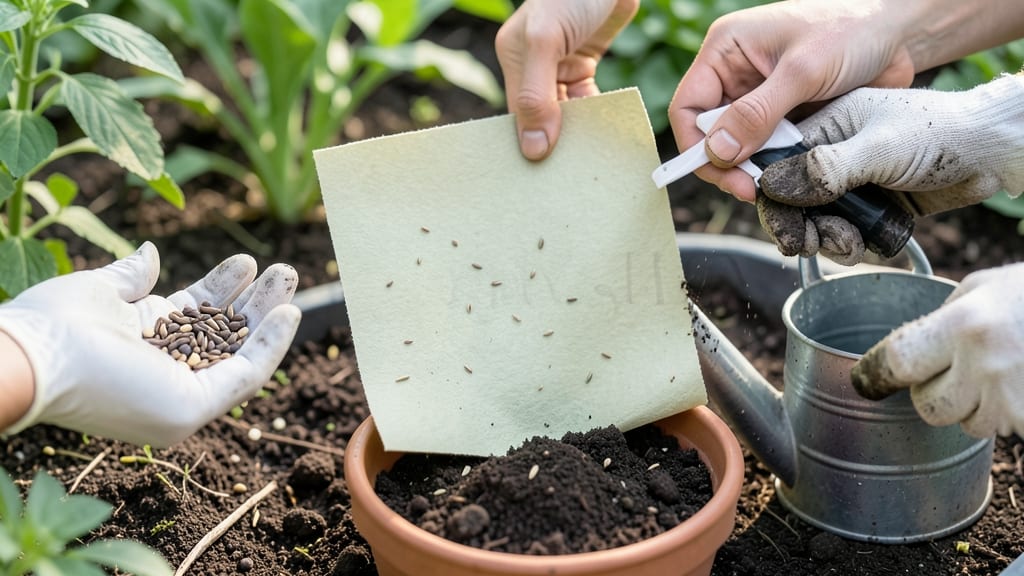
The best seed paper instructions turn your old newspapers into blooming gifts that grow. 🌱 The process is simpler than you think—just blend paper pulp, mix in wildflower seeds, and dry into delicate sheets that become living confetti when planted. You’ll need basic supplies: a blender, wildflower seed mix, water, and an old screen or mesh. The magic happens when you spread the pulp-seed mixture evenly, let it dry completely, and store it until planting day. No special equipment required—just patience and a little creativity. Once planted, these sheets break down naturally, releasing seeds into moist soil. Within weeks, you’ll see delicate sprouts pushing through, turning your yard into a pollinator paradise. Perfect for weddings, birthdays, or just adding a touch of green to your garden. Troubleshooting is easy: uneven germination? Lightly scratch the paper before planting. Mold? Add a pinch of cinnamon to the mix. This zero-waste project gives back to the earth while creating something beautiful.
📚 In This Guide
- What you need
- Instructions
- Tips and common mistakes
- Wrapping up and next steps
What you need
- ● Unbleached paper: 1-2 sheets of printer paper or handmade paper (avoid glossy or coated paper). Size: 8.5" x 11" (standard letter) or custom shapes (e.g., circles, squares).
- ● Wildflower or herb seeds: Quantity: 1-2 teaspoons per sheet (adjust for larger shapes).
- ● Seed types: Tiny seeds like clover, basil, marigold, or wildflower mixes work best. Pro tip: Mix seeds for a pollinator-friendly garden! 🐝✨
- ● Water: 1 cup of lukewarm water (not boiling).
- ● Blender or food processor: 1 unit (dedicated to crafting if possible).
- ● Fine-mesh strainer or sieve: 1 (pore size: 0.5mm or smaller to trap fibers).
- ● Large mixing bowl: 1 (stainless steel or glass preferred).
- ● Rolling pin or smooth bottle: 1 (for flattening).
- ● Baking sheet or tray: 1 (lined with parchment paper or a silicone mat).
- ● Newspaper or cardboard: 1 sheet (for drying underneath).
- ● Essential oils or dried herbs: 1-2 drops (e.g., lavender or rosemary) for scent and pest-repellent properties.
- ● Natural dyes: Turmeric, beet juice, or coffee grounds for colored paper.
- ● Decorative elements: Tiny dried flowers, glitter (biodegradable), or pressed leaves for embellishments.
- ● Seed paper mold: DIY stencils (e.g., hearts, stars) for creative shapes.
- ● Spray bottle: For lightly misting dried paper before planting.
- ● Designate a clean workspace (easy to wipe down—paper pulp is messy!).
- ● Ensure seeds are dry and viable (check seed packets for expiration dates).
- ● Work in a well-ventilated area (blenders can be loud!).
- ● Plan for 24-48 hours of drying time before handling.
Step-by-Step guide for making zero-waste seed paper
Here's how to craft seed paper that blooms with flowers or herbs—no plastic waste, just pure growing potential.
🌱 Step 1: Prepare Your Base Materials
Start with 1 cup of loose, unbleached paper pulp (recycled paper or coffee filters work best). Tear the paper into small strips and soak them in warm water for 10-15 minutes until fully saturated. The pulp should break down into a thick, mushy consistency—this is your canvas.
Drain excess water through a fine mesh strainer, then blend the pulp with ½ cup of water in a food processor or blender until smooth. You want a thick, paint-like texture that holds together when pressed. If it's too runny, add more pulp; if too stiff, thin with a splash of water. The goal is a workable, moldable mixture.
💧 Step 2: Mix in Seeds and Binding Agents
Add 1 tablespoon of wildflower or herb seeds (choose small seeds like marigold, basil, or clover for even distribution) to the pulp mixture. Stir gently to avoid breaking seeds. For binding, mix in 1 teaspoon of natural glue (like flour paste or gelatin) or 1 tablespoon of cornstarch—this ensures seeds stay embedded when dry.
Here's the thing—don't overmix. You want seeds dispersed evenly but not crushed. Test consistency by pressing a small amount between your fingers; it should hold shape without sticking. If too sticky, add a pinch of cornstarch; if too dry, add a few drops of water. This is your final seed paper "dough."
☀️ Step 3: Shape and Dry the Seed Paper
Lay a sheet of parchment paper or a non-stick silicone mat on a flat surface. Spread the seed-pulp mixture evenly with a spatula or your hands to create a ¼-inch thick sheet. Smooth the edges and press firmly to remove air bubbles. The thinner you spread it, the faster it dries—but too thin risks breaking when wet.
Let the sheet air-dry for 24-48 hours in a warm, dry place away from direct sunlight. You'll know it's ready when it feels crisp to the touch and lifts easily from the parchment. Flip it halfway through drying to prevent warping. Once fully dry, the paper should hold its shape when folded gently—this means your seeds are securely embedded.
🪴 Step 4: Plant and Water for Germination
To plant, simply place the seed paper on top of 1-2 inches of moist soil in a pot or garden bed. Press it lightly into the soil to ensure contact, then mist the surface with water until the soil is evenly damp. The paper will break down naturally as it absorbs moisture, releasing seeds into the soil.
Keep the soil consistently moist (not soggy) for the first 2-3 weeks—this is critical for germination. You'll see sprouts emerge within 7-14 days, depending on the seed type. Avoid disturbing the paper until seedlings are 1-2 inches tall, as the paper provides temporary structure. Once sprouts appear, water at the base to prevent washing away seeds.
⏰ Step 5: Maintain and Transplant Seedlings
After 4-6 weeks, when seedlings have 2-3 sets of true leaves, it's time to transplant. Gently lift the paper from the soil—it should disintegrate easily, leaving seedlings intact. Handle them by the leaves, not the stems, to avoid damage. Space them 6-12 inches apart, depending on the plant variety, and water deeply after transplanting.
Real talk: Seed paper isn't permanent. The paper will decompose as roots grow, so treat it as a temporary scaffold. Mulch around seedlings to retain moisture and reduce stress. If some seeds don't sprout, don't panic—germination rates vary, and you can always replant or let nature take its course. Your zero-waste effort is already a win.
Tips & tricks for perfect zero-waste seed paper
Between us, these little details make all the difference between seed paper that crumbles apart or grows into thriving plants.
Pulp Consistency Matters: In Step 1, aim for a pulp texture that's like thick pudding—it should hold together when pressed between your fingers but still be moldable. If your mixture feels too stiff after blending, add just a splash of water (about 1 tablespoon at a time). Too runny? Add more unbleached paper pulp gradually. The right consistency ensures your seeds stay embedded while allowing the paper to dry properly.
Seed Distribution Secret: When mixing seeds in Step 2, think of it like folding in chocolate chips—you want them evenly dispersed but not overworked. Use a silicone spatula to gently fold seeds into the pulp mixture in three parts, turning the bowl between each addition. This prevents seed clumping while keeping them whole. A quick visual check: when you press a small amount between your fingers, you should see seeds visible throughout, not just concentrated in one area.
Drying Strategy: For Step 3's 24-48 hour drying period, place your seed paper in a location with good airflow but no direct sunlight—think of a windowsill with indirect light or a cooling rack in a dry, shaded spot. If your kitchen is particularly humid, you might need the full 48 hours. Flip the paper halfway through drying to prevent warping, and avoid touching it until completely crisp. The goal is to dry it evenly so the paper maintains its integrity when planted.
Planting Precision: In Step 4, the 1-2 inches of moist soil is your sweet spot—any deeper and the paper may not break down properly, any shallower and seeds might not get enough moisture. Press the seed paper gently into the soil so it makes contact along the entire surface. This ensures even moisture distribution and proper seed germination. A light misting after planting helps settle the paper into place without disturbing the seeds.
Pro Tips for Seed Paper Instructions
- Between us, these little details make all the difference between seed paper that crumbles apart or grows into thrivin...
- Pulp Consistency Matters: In Step 1, aim for a pulp texture that's like thick pudding—it should hold together when pr...
- Seed Distribution Secret: When mixing seeds in Step 2, think of it like folding in chocolate chips—you want them even...
Frequently asked questions
Got questions about seed paper? You’re not alone! Here are answers to the most common queries to help you get started with your eco-friendly planting project.
What is seed paper, and how does it work?
Seed paper is a biodegradable plantable paper embedded with wildflower or herb seeds. When planted, the paper breaks down, allowing seeds to germinate naturally. It’s perfect for gardeners who want a zero-waste, easy way to grow flowers or herbs without soil prep.
How long does it take for seeds in paper to grow?
Germination time varies by seed type, but most wildflower seed paper sprouts within 7–21 days after planting. Keep the soil moist and place it in a sunny spot for best results. Check the specific seed paper instructions for exact timelines.
Do I need to soak seed paper before planting?
No soaking is required! Simply press the seed paper into moist soil, seeds-side down, and lightly water the area. The paper will dissolve over time, releasing the seeds. Overwatering can cause the paper to disintegrate too quickly, so keep it damp—not soggy.
Can I use seed paper in containers or hanging planters?
Seed paper works great in pots, window boxes, or even hanging baskets. Just ensure the container has drainage and use well-draining soil. For hanging planters, secure the paper with a bit of soil or a mesh liner to prevent it from blowing away.
What if my seed paper doesn’t sprout? Troubleshooting tips?
If seeds aren’t sprouting, check these common issues:
- Light: Ensure the area gets at least 6 hours of sunlight daily.
- Moisture: Keep soil consistently moist (not waterlogged).
- Depth: Plant no deeper than ¼ inch—seeds need light to germinate.
- Patience: Some seeds take longer; wait 3–4 weeks before re-evaluating.
Wrapping up and next steps
Creating your own seed paper is a simple yet impactful way to reduce waste and grow beautiful plants—all while spreading a little green love! 🌱 With just a few household items and a dash of creativity, you’ve got everything you need to craft eco-friendly plantable paper that’s as useful as it is sustainable.
Now that you’re armed with the know-how, why not take the next step? Try making a batch today and share your green journey with friends or family. Every sheet planted is a tiny victory for the planet—so go ahead, get crafting, and let your seeds grow! 🌿