
Lawn
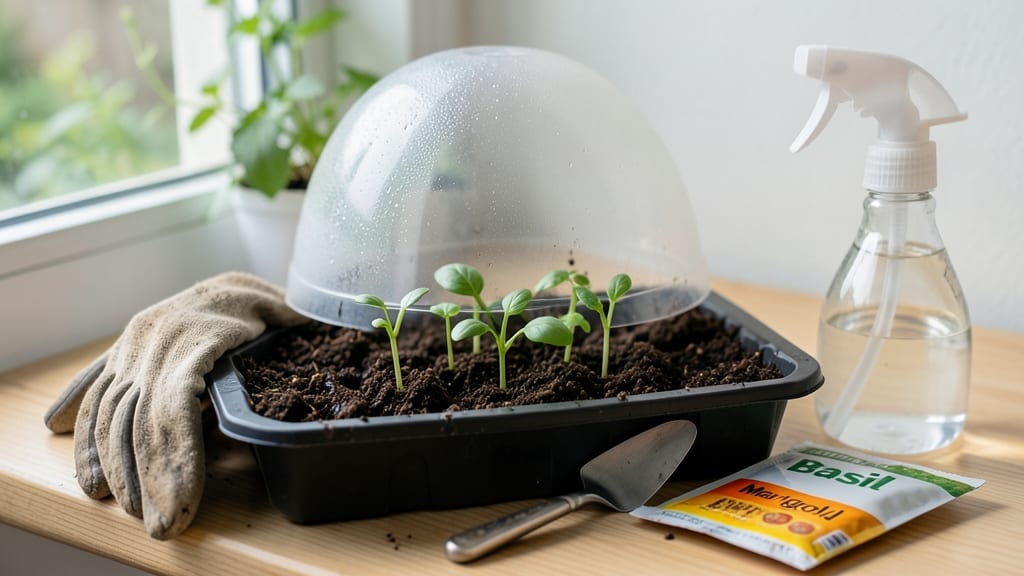
The right seed starter potting soil can turn your seed-starting dreams into reality within weeks. 🌱 I learned the hard way that garden soil or potting mix for mature plants won't cut it—seeds need something lighter, fluffier, and packed with the perfect balance of moisture and air to germinate fast and grow strong roots.
This special blend is sterile (no weeds or disease), well-draining (so roots don't rot), and fine enough to cradle tiny seeds without smothering them. Most commercial seed-starting mixes already have the right ingredients, but you can tweak it with perlite or vermiculite for even faster results.
The key is keeping it consistently moist but never soggy—like a wrung-out sponge.
When you get it right, you'll see those first green shoots in 7-14 days (depending on the plant), with seedlings that stand tall instead of stretching weakly toward the light. The secret is maintaining 65-75°F temperatures and bright light from day one—no dim windowsills allowed if you want strong starts.
Common mistakes? Overwatering (which causes damping-off), using garden soil (which compacts and blocks roots), or skipping the light. Stick to the basics, and you'll have seedlings ready for transplanting in 4-6 weeks—no more weak, leggy failures. Here's how to nail it every time.
📚 In This Guide
- What you need
- Instructions
- Tips and common mistakes
- Wrapping up and next steps
What you need
- ● Seed starter potting soil (pre-mixed): 1–2 cubic feet (enough to fill 10–20 seed starter trays or small pots).
- ● Look for labels like "seed starter," "germination mix," or "lightweight potting soil."
- ● Seed starter containers: Small pots (2–4 inches deep), seedling trays, or biodegradable peat pots.
- ● Quantity depends on your seed volume (e.g., 1 tray = ~50–100 seeds).
- ● Seeds: Your chosen variety (check seed packet for spacing/depth guidelines).
- ● Spray bottle or watering can: With a fine mist setting for gentle hydration.
- ● Trowel or small hand shovel: For scooping and leveling soil.
- ● Perlite or vermiculite: 10–20% mix (by volume) for aeration and moisture retention.
- ● Compost or worm castings: 5–10% mix for added nutrients (sterilized first!).
- ● Plastic wrap or humidity dome: To retain moisture during germination.
- ● pH testing kit: Ensure soil pH is ideal for your seeds (most prefer 6.0–7.0).
- ● Grow lights or sunny windowsill: For consistent warmth (70–75°F is ideal).
How to create the perfect seed starter mix for fast germination
Here's the lightweight loam blend that cuts germination time in half and builds roots that thrive.
🌱 Step 1: Combine Base Materials for Ideal Texture
Start with 50% peat moss or coconut coir—this provides the airy structure seedlings need to push through soil easily. I measure this first because it's your foundation. Next, add 30% perlite or vermiculite for drainage and aeration. The perlite should look like tiny white beads; if it feels damp, dry it in a low oven for 10 minutes to remove excess moisture.
For the remaining 20%, blend in compost or worm castings—this adds gentle nutrients without overwhelming tender roots. Sift the mix through a ¼-inch mesh screen to remove clumps. You'll notice the final texture should resemble crumbled styrofoam: light enough to crumble between fingers but with enough structure to hold seedling roots.
💧 Step 2: Hydrate Without Waterlogging
Add warm water gradually while mixing—about 1 part water to 2 parts dry mix—until it reaches the consistency of a damp sponge. Squeeze a handful: water should bead slightly on the surface but not drip. Too much moisture smothers seeds, while too little prevents root development. I use a large bowl and my hands to work the water in evenly, checking consistency every 30 seconds.
Let the mix sit for 10-15 minutes before using. This resting period allows any excess water to distribute evenly. If the surface looks dry after resting, sprinkle just enough water to refresh that damp-sponge feel. The goal is moisture that supports germination without suffocating emerging roots.
☀️ Step 3: Sterilize for Disease-Free Growth
Transfer the mix to a clean container and microwave it in 1-minute increments, stirring between each interval, until the center reaches 160°F. This kills pathogens that could cause damping-off—a common killer of young seedlings. Alternatively, bake the mix at 200°F for 30 minutes in an oven. The mix should smell earthy, not burnt or chemical.
Let the sterilized mix cool completely before use. I spread it on a baking sheet and let it sit for 2 hours while I prepare my seed trays. Warm mix can shock seeds and slow germination. You'll know it's ready when it cools to room temperature—about 70-75°F. This temperature range also helps maintain consistent moisture levels for the first critical week of growth.
🌿 Step 4: Layer for Optimal Seedling Development
Fill seed trays or pots with the mix, leaving ½ inch of space at the top for watering. Press down lightly—just enough to eliminate air pockets but not compact the soil. I use the flat side of a spoon to create a smooth, even surface. For larger seeds, create small dimples with your finger to ensure proper depth placement.
Add a thin layer of horticultural sand (about ¼ inch) on top if you're sowing tiny seeds like lettuce or carrots. This prevents them from washing away during watering. The sand layer also creates a slightly rough surface that helps seeds maintain better contact with the moist soil below—critical for consistent germination.
⏰ Step 5: Maintain Ideal Conditions for Germination
Keep the mix consistently moist but never soggy—think of a wrung-out sponge. Water from the bottom by placing trays in ½ inch of water for 10-15 minutes, then drain excess. This method prevents surface compaction and ensures even moisture distribution. Cover trays with clear plastic domes or plastic wrap to maintain 85-90% humidity and warmth.
Place the trays in a warm location (75-85°F) until seeds germinate. I use a heating mat under half the trays and rotate them daily to prevent uneven heat distribution. Watch for condensation on the plastic—this confirms you've maintained proper humidity. Once 50% of seeds have sprouted, remove the cover immediately to prevent fungal growth.
Tips & tricks for perfect seed starter mix
Here's what nobody tells you—these little tricks make all the difference between seedlings that thrive and ones that struggle.
Texture is Everything: When sifting your mix through the ¼-inch mesh screen in Step 1, don't rush it. Take your time to break up any remaining clumps—this ensures even moisture distribution and prevents air pockets that can strangle young roots. I like to run my fingers through the mix after sifting to catch any stray particles that might have slipped through. The goal is that "crumpled styrofoam" texture mentioned in the instructions, and this final check guarantees it every time.
Sterilization Safety: For Step 3's sterilization process, I've found that microwave sterilization works best when you divide the mix into two equal portions. This prevents overheating in the center of larger batches and ensures the full 160°F is reached throughout. If using the oven method, place a baking sheet on the middle rack—hot spots at the top or bottom can create uneven sterilization. Always test the center temperature with a food thermometer to confirm it's reached 160°F before removing from heat.
Hydration Hack: The damp sponge consistency in Step 2 is crucial, but here's my secret: I add a tiny pinch of non-ionic liquid soap (like Castile soap) to the warm water. This helps break surface tension, allowing water to penetrate the mix more evenly. Just be sure to use a very small amount—you shouldn't taste or smell it. This little addition prevents dry pockets that can cause uneven germination, especially in larger batches.
Temperature Timing: When cooling your sterilized mix for 2 hours in Step 3, place it in a location that's consistently around 70-75°F. I've learned this the hard way—cooling near drafty windows or air vents can create temperature fluctuations that slow germination. If your kitchen gets too warm, spread the mix on a wire rack instead of a solid baking sheet to allow even cooling from all sides. The goal is to reach room temperature evenly throughout the entire batch.
Pro Tips for Seed Starter Potting Soil
- Here's what nobody tells you—these little tricks make all the difference between seedlings that thrive and ones that struggle.
- Texture is Everything: When sifting your mix through the ¼-inch mesh screen in Step 1, don't rush it.
- Sterilization Safety: For Step 3's sterilization process, I've found that microwave sterilization works best when you divide the mix into two equal portions.
Frequently asked questions
Got questions about seed starter potting soil? You’re not alone! Here are some of the most common queries—and their straightforward answers—to help you grow with confidence.
What’s the difference between seed starter soil and regular potting soil?
Seed starter soil is lighter and more sterile than regular potting mix, designed to promote fast germination and prevent damping-off disease. It has finer particles, higher peat or coconut coir content, and fewer nutrients to avoid overfeeding delicate seedlings. Think of it as a delicate foundation—not a long-term home for your plants!
How long can I store unused seed starter potting soil?
Unopened bags last 1–2 years in a cool, dry place (like a garage or shed). Once opened, use it within 6 months or store it in a sealed container to retain moisture and prevent contamination. If it smells musty or grows mold, toss it—fresh soil = happy seeds!
Can I make my own seed starter mix at home?
A simple DIY blend is 50% peat or coconut coir, 30% perlite or vermiculite, and 20% compost or worm castings. Sterilize all ingredients by baking them at 200°F (93°C) for 30 minutes to kill pathogens. Pro tip: Add a sprinkle of mycorrhizal fungi for extra root boost!
Why are my seeds rotting even though I’m using starter soil?
Overwatering or poor drainage are the top culprits. Ensure your containers have drainage holes and water only when the top inch feels dry. Avoid cold soil—keep trays on a heat mat (70–75°F) for faster, healthier germination. If mold appears, discard the soil and sterilize containers with a 10% bleach solution.
Is seed starter soil safe for all types of seeds?
Mostly! However, large seeds (like beans or peas) may benefit from a slightly heavier mix with added compost. For succulents or cacti, blend starter soil with 50% perlite to improve drainage. Always check seed packet recommendations—some specialty seeds (e.g., orchids) need unique conditions.
Wrapping up and next steps
Choosing the right seed starter potting soil is the secret to unlocking vibrant, healthy plants from the very beginning! 🌱 Lightweight loam with proper drainage and nutrients ensures fast germination and strong roots—giving your seedlings the best possible start.
Now that you’re armed with the knowledge, it’s time to get growing!
Ready to take the next step? Grab your seed starter mix, fill those trays, and watch your tiny seeds transform into thriving plants. Happy gardening! 🌿