
Lawn
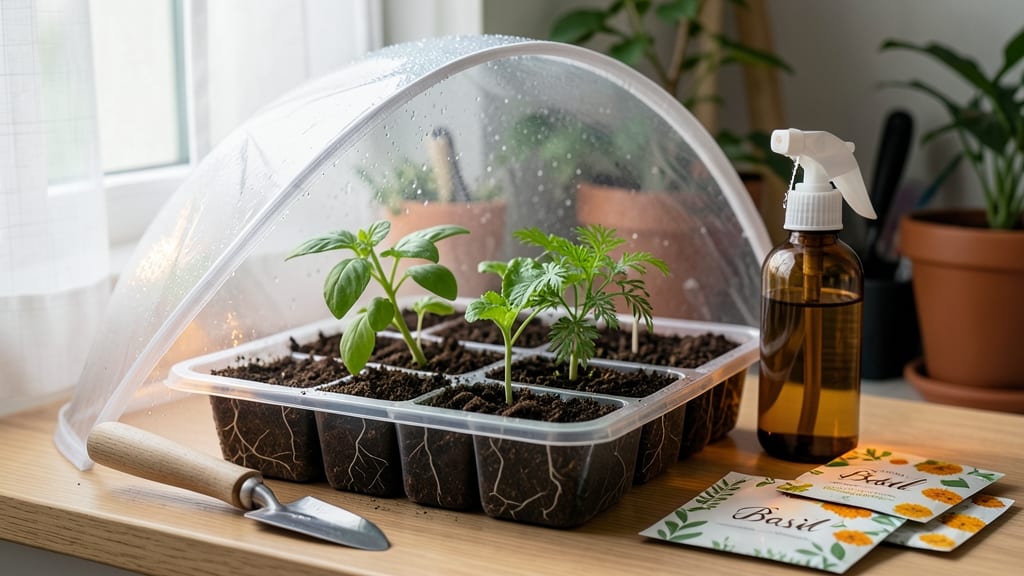
A DIY seed starter tray can be made from things you already have at home—no fancy supplies needed. 🌱 I’ve turned egg cartons, yogurt cups, and even old wooden crates into perfect starter trays that cost pennies and break down into the soil later.
The key is matching the tray to your seeds: tiny herbs fit in egg carton cells, while tomatoes need deeper containers to grow strong roots.
Sterilization is where most beginners trip up. A quick rinse with hot, soapy water kills fungus, but for extra safety, bake plastic containers at 200°F for 30 minutes. Drainage holes are non-negotiable—poke them yourself if your materials don’t have them.
The right soil mix (50% peat moss, 30% perlite, 20% compost) keeps seeds from drowning while holding enough moisture for steady growth.
By week three, you’ll see seedlings reaching for the light, and they’ll be ready to transplant without shock. The best part? No plastic waste, no expensive trays, and the flexibility to adjust sizes for every plant type. Even my black thumb can’t kill these sprouts when the setup is right.
Start with one tray this season—herbs or lettuce are foolproof—and save enough money to buy better seeds next year. The first time you watch a seedling poke through the soil in your homemade tray, you’ll never buy store-bought again.
📚 In This Guide
- What you need
- Instructions
- Tips and common mistakes
- Wrapping up and next steps
What you need
- ● Base tray: 1 shallow container (e.g., plastic takeout tray, wooden crate, or recycled egg carton)
- ● Dimensions: At least 6" x 12" (or larger, depending on seedling needs)
- ● Dividers: Toothpicks, popsicle sticks, or cardboard strips (cut to ~2" tall)
- ● Quantity: Enough to create 2–4" deep cells (adjust based on tray size)
- ● Growing medium: 1 bag seed-starting mix or potting soil (sterilized and well-draining)
- ○ Optional: Add perlite or vermiculite (10–20% by volume) for aeration
- ● Seeds: Your chosen variety (check seed packet for spacing recommendations)
- ● Spray bottle: For gentle watering (avoid over-saturating soil)
- ● Basic tools: Scissors or craft knife (for cutting dividers)
- ● Ruler (for precise measurements)
- ● Pencil (to mark cuts)
- ○ Optional upgrades: Drill with small bit (to pre-poke drainage holes in the tray)
- ● Clear plastic wrap or humidity dome (to retain moisture)
- ● Plant labels & marker (to track seed varieties)
- ● Sunny windowsill or grow light (6–8 hours of light daily)
- ● Patience! Seedlings need time to germinate (check seed packets for specifics)
- ● Pro tip: 💡 Sanitize your tray and tools with a 1:9 bleach-water solution (rinse well) to prevent mold!
Step-by-Step instructions for building your own seed starter trays
Here's how I make sturdy, reusable trays that give seedlings the perfect start—no fancy tools required.
🪴 Step 1: Gather Materials and Tools
You'll need 4 recycled plastic containers (like yogurt cups or takeout boxes) and 1 sheet of cardboard (about 12x18 inches). I like to use containers with lids—they double as humidity domes later. Clean them thoroughly first; leftover food residue can harm seedlings.
For tools, grab a utility knife, ruler, pencil, and drill with small bit (if your containers don't have drainage holes). I always test my drill bit on scrap plastic first—some plastics melt instead of cutting cleanly. The cardboard will form the base, so choose something sturdy like cereal box cardboard, not thin shipping cardboard.
📏 Step 2: Cut and Assemble the Tray Base
Lay the cardboard flat and arrange your 4 containers in a square pattern, spacing them about 2 inches apart. Trace around each container with your pencil, then cut out the shapes using your utility knife. Press firmly but don't force it—thick cardboard needs patience to cut cleanly.
Flip the cardboard over and score along the lines between containers with the knife. Fold along these lines to create dividers between planting cells. The base should now have 4 raised sections matching your container shapes. Place the containers on top—they'll sit snugly in their cutouts, creating individual planting cells.
✂️ Step 3: Add Drainage and Final Touches
If your containers lack drainage holes, use the drill to make 2-3 small holes in the bottom of each. Place a scrap piece of cardboard or mesh over the holes to prevent soil from washing out while still allowing water to drain. I like to mark drainage hole locations with a pencil first—it keeps me from drilling crooked.
Arrange your tray on a baking sheet or shallow pan to catch any drainage. This prevents water from pooling underneath and keeps your workspace clean. Now your tray is ready for soil! I recommend filling each cell about ¾ full with seed-starting mix, leaving room for seeds and watering without spillage.
💧 Step 4: Test and Prepare for Planting
Give your tray a test watering to check for leaks. Fill each cell with water and let it drain completely. If water pools in the bottom of the baking sheet, your drainage isn't adequate—add more holes or adjust the mesh. Once dry, your tray is ready for seeds.
Here's the thing—this design gives you 4 separate planting cells that can be transplanted together when ready. The cardboard base will break down in the soil, so you won't need to remove it when transplanting. Just place the entire tray in the garden and gently separate the containers if needed.
Tips & tricks for perfect DIY seed starter trays
These simple strategies will help you build trays that give your seedlings the strongest start possible—without any of the common pitfalls.
Material Selection: For the 4 recycled plastic containers, prioritize ones with straight sides and uniform thickness. Clear containers let you monitor soil moisture, while opaque ones retain heat better. I've found that yogurt cups with snap-on lids work best—they create perfect humidity domes when closed. Avoid containers with cracks or thin spots that might collapse under soil weight.
Cutting Precision: When tracing your containers onto the 1 sheet of cardboard in Step 2, use a ruler to ensure consistent spacing between the 2-inch gaps. I mark the center of each container first, then measure 2 inches outward before tracing—this guarantees even spacing every time. For thick cardboard, score the lines with your utility knife before cutting to prevent tearing. A steady hand and patience make all the difference here.
Drainage Strategy: The 2-3 small holes in Step 3 are non-negotiable for healthy roots. If you're nervous about drilling, start with just 2 holes per container and test drainage first. For extra protection, layer mesh or a coffee filter over the holes before covering with soil—this prevents clogging while maintaining drainage. Remember, soggy soil equals root rot, so never skip this step.
Transplanting Hack: The cardboard base breaks down in soil, but you can speed up the process by soaking it in water for 10 minutes before planting. This helps it decompose faster without harming your seedlings. When transplanting, gently squeeze the sides of each container to loosen the soil ball—this makes it easier to slide seedlings out without disturbing their roots.
Pro Tips for Diy Seed Starter Tray
- These simple strategies will help you build trays that give your seedlings the strongest start possible—without any of the common pitfalls.
- Material Selection: For the 4 recycled plastic containers, prioritize ones with straight sides and uniform thickness.
- Cutting Precision: When tracing your containers onto the 1 sheet of cardboard in Step 2, use a ruler to ensure consistent spacing between the 2-inch gaps.
Frequently asked questions
about DIY seed starter trays—because every gardener has those aha! moments (or panicked "why isn’t this working?!" ones). Here’s your quick guide to troubleshooting, timing, and creative swaps!What’s the best material for a DIY seed starter tray?
Recycled materials like egg cartons, plastic containers, or even old wooden crates work great! Just ensure they have drainage holes (poke them with a nail if needed). For long-term use, opt for reusable trays like plastic storage bins or wooden frames with removable sections.
How long until seedlings are ready to transplant?
Most seedlings are ready in 4–6 weeks, but timing depends on the plant. Check seed packets for specifics—leafy greens (like lettuce) may need just 3–4 weeks, while tomatoes or peppers can take 6–8 weeks. Harden off seedlings (acclimate to outdoor conditions) for a week before transplanting!
Can I reuse a seed starter tray?
Clean trays thoroughly with soap and water to remove soil and debris. For plastic or metal, a vinegar rinse kills bacteria. Wooden trays? Sand lightly between uses. Pro tip: Label trays with plant names to track progress!
What if my seedlings look weak or leggy?
Leggy seedlings (tall, thin stems) often mean they need more light. Move them to a sunny windowsill or under grow lights (12–16 hours/day). Burpee them gently (press soil around stems) to encourage root growth. Overwatering can also cause issues—let soil dry slightly between waterings!
Are there alternatives to soil for seed starting?
Yes! Try coco coir (sustainable and moisture-retentive), peat moss, or even a mix of vermiculite and perlite for better drainage. For hydroponic starters, use a water-and-nutrient solution in a shallow tray with a mesh base. Just ensure your chosen medium holds moisture but doesn’t stay soggy!
Can I start seeds indoors in winter?
Winter seed starting is totally doable! Use a heat mat (60–75°F) to speed germination, and supplement with grow lights if natural light is scarce. Group trays together to retain warmth, and avoid cold drafts. Just be patient—some seeds (like carrots) germinate slower in cooler temps.
Wrapping up and next steps
Creating your own DIY seed starter tray is a rewarding way to jumpstart your gardening journey while keeping costs low and sustainability high! 🌱 With just a few household items, you’ll give your seedlings the perfect head start—whether you’re growing flowers, veggies, or herbs.
The best part? You’ll save money, reduce waste, and enjoy the satisfaction of nurturing tiny plants into thriving greens.
Now that you’re equipped with the how-to and FAQs, it’s time to roll up your sleeves and get planting! Start small with a few trays, experiment with different seeds, and watch your green thumb grow. Happy gardening—your future garden (and the planet) will thank you! 🌿