
Lawn
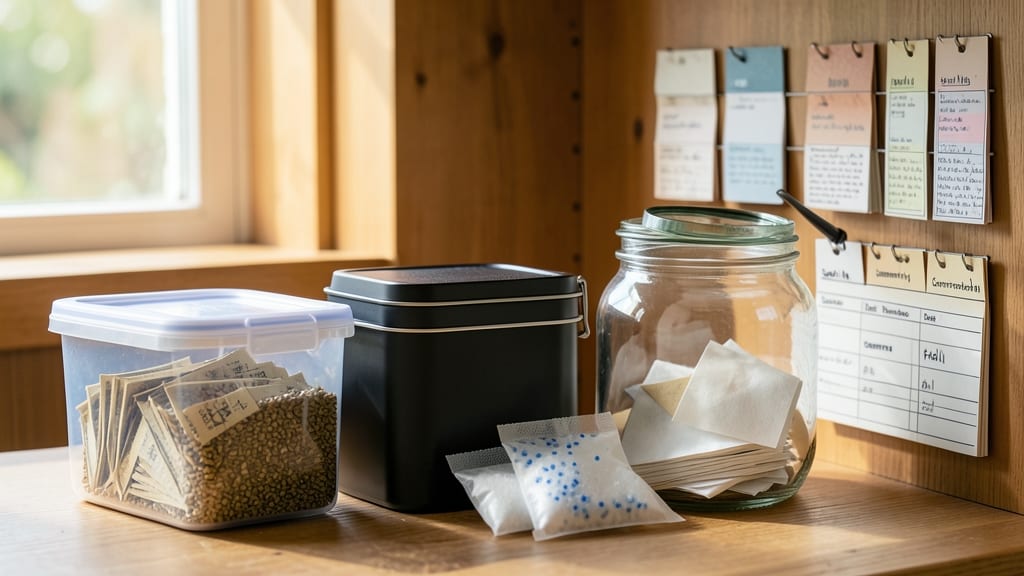
Your seed packet storage could last for years—or just a few months, depending on how you store them. 🌱 The difference between a viable seed stash and a dusty relic comes down to airtight containers, steady humidity, and a few simple habits that keep seeds fresh for planting seasons to come.
Most people overlook humidity control, but it’s the silent killer of seed viability. Too dry, and seeds lose moisture and viability; too damp, and mold takes over.
The solution? Pair airtight containers with a humidity packet (like those in shoeboxes) to keep moisture balanced. A cool, dark spot—like a basement shelf—keeps temperatures stable, too.
With the right setup, you’ll pull out packets next spring ready to plant, not crumbling or sprouting prematurely. Label everything clearly (variety, year, and germination notes) to avoid confusion, and you’ll never waste seeds again. This system works for heirlooms, vegetables, and flowers alike.
Even small mistakes—like storing seeds in the fridge or near chemicals—can ruin them. But once you master this, you’ll have a seed bank that outperforms store-bought packets every time. Ready to set it up?
📚 In This Guide
- What you need
- Instructions
- Tips and common mistakes
- Wrapping up and next steps
What you need
- ● Air-tight containers – Choose glass jars with rubber seals (e.g., mason jars) or hard plastic bins with gasket lids (e.g., Tupperware). Aim for 1–2 containers per 50 seed packets to avoid overcrowding.
- ● Desiccant packets – 2–4 packets per container (e.g., silica gel or clay-based desiccants). Ensure they’re food-safe if storing edible seeds.
- ● Seed packet organizer – A small plastic divider tray or cardboard egg carton to separate packets and prevent moisture buildup.
- ● Permanent markers or labels – For writing seed names, varieties, and storage dates on containers.
- ○ Fine-mesh breathable bags – Optional but helpful for bulk seeds (e.g., Mylar bags with oxygen absorbers for long-term storage).
- ● Humidity indicator cards – Small strips that change color if moisture levels rise (place 1 per container).
- ● Vacuum-sealing machine – For extra-long-term storage (removes air and extends shelf life).
- ● Label templates or a spreadsheet – To track seed viability, germination rates, and last-used dates.
- ● Soft cloth or paper towels – For gently wiping containers before sealing to remove dust or condensation.
How to store seed packets for maximum viability
Proper seed storage keeps your packets fresh for years—here’s the airtight method I swear by.
🪴 Step 1: Remove Seeds from Original Packaging
Open each seed packet carefully and transfer the seeds into a small, airtight container. I use glass jars with silicone seals because they prevent moisture buildup while keeping seeds protected from light. Avoid plastic bags—they trap too much humidity and degrade faster.
Label each container with the seed variety, purchase date, and germination rate (if known). I write directly on the jar lid with a permanent marker so I don’t lose track. This ensures you’ll know which seeds to plant first—older seeds often have lower viability, so prioritize them.
💧 Step 2: Add a Humidity Absorber
Seeds thrive in low-moisture environments—too much humidity accelerates deterioration. Place a small silica gel packet (the kind included in shoe boxes) inside each container. These packets absorb excess moisture without harming the seeds. If you don’t have silica gel, uncooked rice works as a natural moisture absorber, though it’s less effective.
For best results, store containers in a cool, dark place like a pantry or basement. I keep mine in a cardboard box lined with aluminum foil to block any stray light. Temperatures should stay consistent between 32-41°F—fluctuations speed up seed aging.
⏰ Step 3: Monitor and Rotate Storage
Check your seed containers once every 6-12 months to ensure the silica gel remains dry. If it’s clumped or damp, replace it immediately—this means moisture has built up. I also rotate containers so older seeds get planted first. Most seeds last 1-5 years depending on the type, but vegetable seeds (like tomatoes or peppers) lose viability faster than flower or herb seeds.
If you notice mold, discard the seeds and container immediately. Mold means the humidity control failed, and the seeds are no longer safe to plant. A quick sniff test—if the container smells musty, toss it. Prevention is easier than dealing with spoiled seeds later.
☀️ Step 4: Test Germination Before Planting
Before committing to a full planting, test a few seeds from each container. Moisten a paper towel, place 5-10 seeds between two, and fold it into a loose packet. Store in a warm, dark place (around 70°F) for 5-7 days. If fewer than 50% germinate, the seeds may be past their prime—consider buying fresh ones.
This simple test saves money and frustration. I’ve planted "fresh" seeds that failed to sprout because their storage conditions weren’t ideal. A quick germination check ensures you’re not wasting time or garden space on seeds that won’t perform.
Tips & tricks for perfect seed packet preservation
Here's what I've learned after years of keeping seeds viable for planting seasons to come.
Container Material Matters: Glass jars with silicone seals are ideal for seed storage because they're impervious to moisture and light penetration. I've tried plastic containers before, but they develop condensation over time, which can ruin seeds. If you don't have glass jars, look for containers with airtight, rubberized seals—just avoid anything with plastic lids that might degrade over years of storage. The key is preventing any moisture exchange with the environment.
Labeling System: I can't stress enough how important it is to label your containers with seed variety, purchase date, and germination rate. I've seen gardeners forget what's in their storage containers, and that's a waste of good seeds. Use a permanent marker directly on the lid so you can always see the information without opening the container. This system also helps you prioritize planting older seeds first, which tend to lose viability faster.
Temperature Consistency: Maintaining temperatures between 32-41°F is crucial for long-term seed viability. I store my containers in a basement pantry where the temperature stays cool and stable year-round. If you don't have a basement, consider using a refrigerator's crisper drawer—just make sure the seeds aren't exposed to temperature fluctuations from frequent door openings. The more consistent the temperature, the longer your seeds will remain viable.
Germination Test: That 5-7 day germination test in Step 4 is non-negotiable if you want to avoid disappointment. I've planted seeds that looked perfect but failed to sprout because their storage conditions weren't ideal. The test gives you concrete data about seed viability—if fewer than 50% germinate, it's time to invest in fresh seeds. This simple step can save you money and frustration in the long run.
Pro Tips for Seed Packet Storage
- Here's what I've learned after years of keeping seeds viable for planting seasons to come.
- Container Material Matters: Glass jars with silicone seals are ideal for seed storage because they're impervious to moisture and light penetration.
- Labeling System: I can't stress enough how important it is to label your containers with seed variety, purchase date, and germination rate.
Frequently asked questions
Got questions about keeping your seed packets in top shape? Here are some common ones—and their answers—to help you store seeds like a pro!
How long can I store seeds in airtight containers?
Most seeds stay viable for 1–5 years in ideal conditions (cool, dry, dark). Vegetable seeds (like tomatoes or peppers) last 2–3 years, while flower seeds (e.g., marigolds) may hold up 3–5 years. Always check the packet for a germination rate—if it drops below 80%, it’s time to refresh!
What’s the best temperature for seed storage?
Aim for 32–41°F (0–5°C)—your fridge’s crisper drawer works great! Avoid freezer storage (below 32°F/0°C) unless you’re preserving long-term heirloom seeds for decades. Heat and humidity are the real enemies—keep seeds away from windows or attics!
Do I need a humidity pack, or will a regular container work?
Humidity control is key! A silica gel packet or DampRid keeps moisture at bay, but a regular airtight container alone won’t cut it—condensation can ruin seeds. Pro tip: Label your humidity packs so you know when to refresh them (every 6–12 months).
Can I reuse old seed packets for storage?
Yes, but with caution! Clean and dry the packets thoroughly to avoid mold. Mylar bags or vacuum-sealed bags are better long-term, but repurposed packets work for short-term storage (under 1 year). Just add a humidity absorber and store in a cool, dark place.
How do I know if my stored seeds are still good?
Test a few seeds with the “paper towel test”:
- Moisten a paper towel, place seeds inside, and fold.
- Seal in a bag and store in a warm spot (70°F/21°C).
- Check in 3–7 days—if 50%+ sprout, your seeds are viable!
Wrapping up and next steps
Proper seed packet storage is your secret weapon for a thriving garden—whether you're prepping for spring or saving seeds for next year! 🌱 By using airtight containers with humidity control, you’ll keep your seeds viable, vibrant, and ready to grow.
Don’t let wasted seeds hold you back—take action today and store them like a pro.
Your Next Step:
Ready to elevate your seed-saving game? Gather your supplies and repurpose those containers you already have—no extra cost, just smarter storage! Start small with one packet, then expand as you master the technique. Happy gardening awaits!