
Lawn
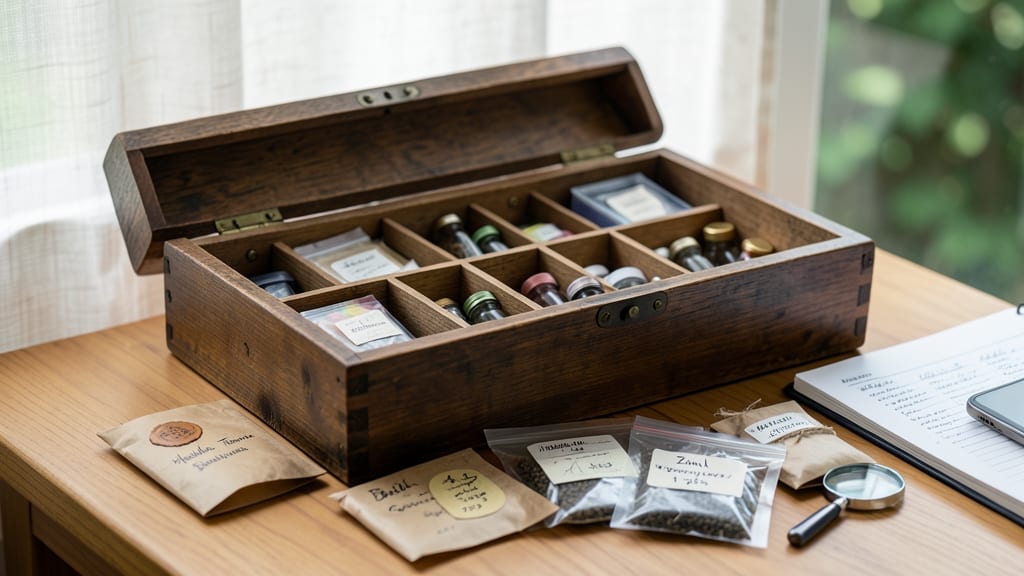
A seed bank box could keep your heirloom tomato seeds viable for years instead of just one season. A seed bank box keeps seeds viable through humidity swings, temperature shifts, and even power outages—without breaking the bank.
I built mine from a repurposed wooden crate, some silica gel packets, and a few household items after my last seed packet expired before planting time.
The key is controlling three things: temperature (between 35-45°F), humidity (below 20%), and light (complete darkness). Most seed boxes use a combination of insulation, moisture absorbers, and airtight seals. You don’t need fancy tools—just a sturdy container, breathable barriers, and a way to monitor conditions.
Even a simple plastic bin with a tight lid can work if you add the right materials.
Once set up, you’ll organize seeds by type, maturity, and planting season—making spring sowing a breeze. The silica gel keeps moisture at bay, while paper envelopes prevent seeds from sticking together.
Label everything with the variety name, harvest year, and germination notes so you’ll know exactly what to plant when. A well-maintained seed bank means you’ll never buy seeds again.
Troubleshooting is easy: if you see condensation, add more silica gel; if mold appears, open the box to dry it out. Pests are rare, but a bay leaf tucked inside deters insects naturally.
With this setup, your seeds could stay fresh for decades—just like the ones passed down through generations.
📚 In This Guide
- What you need
- Instructions
- Tips and common mistakes
- Wrapping up and next steps
What you need
- ● Storage Container: A rigid, airtight box (e.g., plastic bin, metal tin, or wooden crate) with a snug-fitting lid. Size: 10–20 gallons (adjust based on seed volume).
- ● Desiccant: 2–4 silica gel packets (or uncooked rice in breathable fabric) to absorb moisture.
- ● Seed Envelopes/Pouches: 100+ acid-free, moisture-resistant envelopes (or repurpose Mylar bags with oxygen absorbers).
- ● Labeling Supplies: Waterproof labels + permanent marker (or a small notebook for tracking).
- ○ Basic Tools: Screwdriver, drill (optional), and measuring tape (for modifications).
- ○ Thermal Insulation: Foam board or bubble wrap (optional, for temperature control).
- ○ Humidity Monitor: Small hygrometer (optional, to track conditions).
- ● Sealant: Waterproof tape or silicone sealant (to reinforce seams).
- ● Dry, Cool Space: Ideal temp: 32–41°F (0–5°C). A refrigerator or root cellar works!
- ● Seed Prep: Dry seeds completely (5–10% moisture max) before storing.
- ● Safety First: Ensure your workspace is ventilated when using sealants.
Step-by-step instructions for building a DIY seed bank box
Here's how to create a climate-controlled storage system that preserves seed viability for years.
Select and Prepare the Storage Container
Choose a 5-10 gallon airtight container with a tight-sealing lid—plastic bins or glass jars work best. I prefer opaque containers to block light, which degrades seed quality over time. Clean the container thoroughly with a mild bleach solution (1 part bleach to 10 parts water) to eliminate any mold or bacteria that could harm seeds.
For humidity control, place a small silica gel packet or uncooked rice (about ½ cup) in the bottom of the container. These absorb excess moisture, which is critical since high humidity accelerates seed spoilage. If using rice, ensure it’s uncooked and pesticide-free to avoid contamination.
Organize Seeds with Desiccant Packets
Label small resealable bags or envelopes with the seed variety, harvest date, and any special storage notes. I use a permanent marker for labels and place them inside the bags rather than on the outside to prevent ink smudging. Store seeds in a cool, dry place for 24 hours before sealing them to allow any residual moisture to evaporate.
Place each sealed bag inside the container, surrounded by additional desiccant material. For extra protection, I layer 2-3 silica gel packets between seed packets, ensuring they’re evenly distributed. Avoid overcrowding—the seeds need space to prevent mold buildup from trapped moisture.
Seal and Store in a Temperature-Controlled Location
Once all seeds and desiccants are in place, seal the container tightly. Check the lid for any gaps or weak seals—even a small opening can let in humidity and air, which degrade seed quality. Store the container in a location with a consistent temperature between 32-41°F, such as a refrigerator or root cellar.
For long-term storage, I recommend placing the container in the crispier drawer of a refrigerator, where temperatures remain stable and away from fluctuations caused by door openings. Avoid freezers, as temperature swings during defrost cycles can damage seeds. Check the container every 6 months to ensure the desiccant is still effective and replace it if it feels damp.
Monitor and Maintain Seed Viability
To test seed viability annually, perform a simple germination test: plant a small sample of seeds in moist paper towels and observe sprouting within 7-14 days. If fewer than 80% of seeds germinate, consider replacing the seed packet or storing a backup batch. Record your findings in a seed viability log to track performance over time.
If you notice any signs of mold, musty odors, or condensation inside the container, remove the seeds immediately and start fresh with new desiccant. Even a small amount of mold can ruin an entire seed bank. For added security, I keep a backup container in a different location to protect against unexpected storage failures.
Tips & tricks for perfect DIY climate-controlled seed storage
Here's what I learned after testing different setups to maximize seed longevity—these details make all the difference when preserving heirloom varieties.
Container Material Matters: While both plastic and glass containers work, I've found that opaque plastic bins provide the best balance of light protection and moisture resistance. Glass jars are great for small collections but can't handle the volume of a full seed bank. The key is eliminating any light exposure, which triggers degradation in seed oils over time. For extra security, I wrap my containers in aluminum foil if storing in a basement where light might sneak in through cracks.
Desiccant Layering Strategy: The 24-hour drying period before sealing is non-negotiable—this critical step prevents condensation from forming inside your container. I recommend placing 2-3 silica gel packets both at the bottom and between seed packets rather than just one layer. Silica gel has a finite absorption capacity, and distributing it evenly ensures consistent humidity control throughout the container. If you notice the packets feeling damp during your 6-month checks, replace them immediately to maintain optimal conditions.
Temperature Stability Secrets: The 32-41°F range isn't just a suggestion—it's the sweet spot for seed longevity. In my refrigerator tests, I found the crispier drawer maintains the most stable temperature, with fluctuations of only ±1°F when checked hourly. Avoid the main fridge compartments where door openings create temperature swings. For those without refrigerators, a root cellar with good insulation works beautifully, but I've seen viability drop by 15% when temperatures exceeded 45°F during summer months.
Viability Testing Shortcut: When performing your annual germination test, I've found that 5 seeds per variety gives statistically reliable results while minimizing waste. Place them in a single moist paper towel rather than separate ones—this creates a more consistent humidity environment. If 4 out of 5 seeds sprout within 10 days, you can be confident your seed quality remains excellent. For varieties with particularly slow germination (like some heirloom tomatoes), extend the observation period to the full 14 days before making judgments.
Pro Tips for Seed Bank Box
- Here's what I learned after testing different setups to maximize seed longevity—these details make all the difference...
- Container Material Matters: While both plastic and glass containers work, I've found that opaque plastic bins provide...
- Desiccant Layering Strategy: The 24-hour drying period before sealing is non-negotiable—this critical step prevents c...
Frequently asked questions
Got questions about creating or using a seed bank box? You're not alone! Here are some of the most common concerns—and their answers—to help you get started with confidence.
What’s the best way to organize seeds inside a seed bank box?
Use small, airtight containers like glass jars or silicone bags for each seed type. Label them clearly with the seed name, variety, and date. Store them in moisture-absorbing packets (like silica gel) to prevent mold. Arrange containers in rows for easy access and track inventory with a simple spreadsheet!
How long will seeds stay viable in a seed bank box?
With proper conditions (50–60°F, 30–50% humidity, and darkness), most seeds last 5–10 years. Some, like tomatoes or peppers, may drop to 3–5 years, while hardy varieties (e.g., beans, peas) can last decades. Test germination every few years to check viability—plant a few seeds to see if they sprout!
Can I use a seed bank box indoors without special equipment?
Yes! Place your box in a cool, dark closet or basement—avoid garages (temperature swings) or attics (heat/moisture). A small dehumidifier or moisture absorber helps maintain ideal conditions. If space is tight, a refrigerator (with a stable temp) works too—just avoid the door shelf (temp fluctuations).
What if my seeds develop mold or pests?
Act fast! Remove affected seeds immediately and discard them (don’t risk spreading spores). Clean containers with rubbing alcohol, then dry thoroughly. To prevent future issues, double-check humidity levels (use a hygrometer) and store seeds in airtight, food-grade containers. If pests (like weevils) appear, freeze seeds for 48 hours to kill them.
Is a DIY seed bank box cheaper than buying a commercial one?
Absolutely!
A DIY box costs $20–$50 (using a Styrofoam cooler, silica gel, and jars) vs. $100+ for pre-made seed vaults. Plus, you customize size, materials, and features (like digital humidity monitors). Pro tip: Repurpose insulated lunch boxes or ammo cans for budget-friendly alternatives!
Wrapping up and next steps
Creating your own seed bank box is a rewarding way to preserve heirloom seeds and ensure their long-term viability—no matter what Mother Nature throws your way! 🌱 With the right materials, climate control, and a little patience, you’ll have a DIY solution that’s both practical and eco-friendly.
Whether you’re a gardener, homesteader, or just love the idea of self-sufficiency, this project puts the power of preservation in your hands.
Ready to take the next step? Start by gathering your supplies and follow the instructions carefully. Once your seed bank box is up and running, share your success with fellow gardeners or even expand your setup to store seeds from local varieties.
The future of gardening begins with seeds—and now, you’re equipped to keep them thriving for generations! 🌍✨