
Lawn
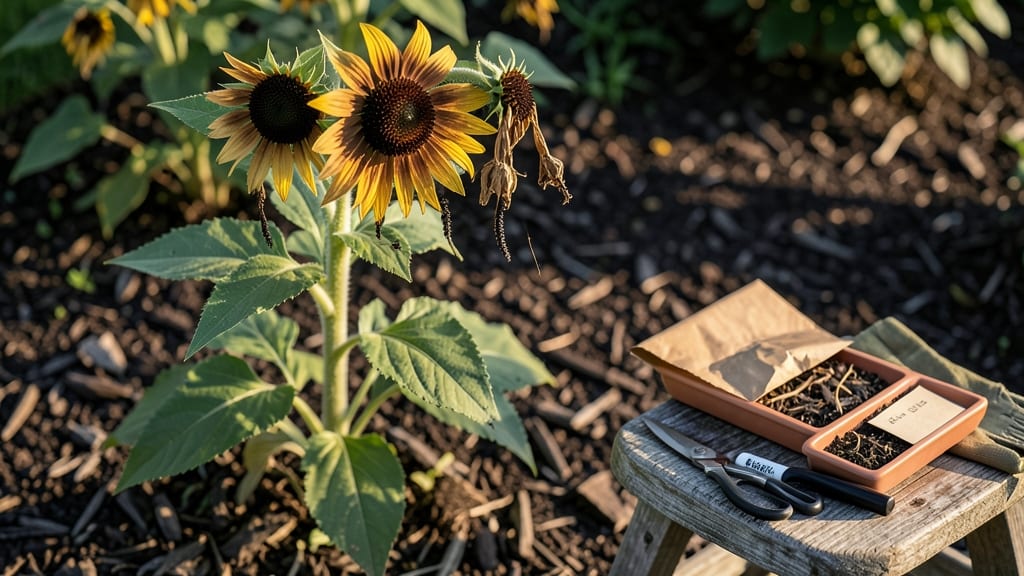
Rudbeckia seed collection turns late-season blooms into next year's garden gold. 🌻 The secret lies in timing—wait until the seed heads turn papery brown and the petals drop completely, but before they shatter or twist off the stem. I've saved seeds from my favorite varieties this way for years, and it's the easiest way to multiply plants without spending a dime.
You only need two things: a pair of clean pruning shears and a paper bag for each variety. Cut the seed heads when they're fully dry but still attached, then hang them upside down in a dry, dark place for a week to finish drying.
The seeds will rattle inside when they're ready to collect—no fancy equipment needed, just patience and a little observation.
Once collected, store the seeds in an airtight container with a moisture absorber like silica gel. Viability lasts up to three years if kept cool and dry, so you can build a seed stash for future gardens or share with fellow gardeners.
The best part? These seeds grow into the same vibrant, drought-tolerant plants you love, year after year.
If you miss the perfect timing, don't worry—rudbeckia seeds are forgiving. Even slightly damp seeds can dry out properly if you spread them on a tray. And if birds or squirrels get to them first, just replant the seeds you find scattered around your garden; they'll grow just as well.
📚 In This Guide
- What you need
- Instructions
- Tips and common mistakes
- Wrapping up and next steps
What you need
- ● Ripe rudbeckia flower heads: Choose fully browned, dry seed heads (typically late summer/fall). Aim for 10–20 heads depending on your needs.
- ● Sharp pruning shears or scissors: 1 pair with clean, sharp blades (sterilize with rubbing alcohol if reusing).
- ● Brown paper bags or seed envelopes: 5–10 (labeled with the rudbeckia variety and date). Paper bags work best for airflow.
- ○ Newspaper or cardboard: 1–2 sheets for drying seeds indoors (optional but helpful for bulk collection).
- ● Fine mesh sieve or strainer: 1 (with 1/8-inch holes) to separate seeds from chaff.
- ● Small paintbrush or soft-bristle brush: 1 for gently dislodging seeds from stubborn pods.
- ● Glove box or seed storage jars: Airtight containers with silica gel packets to preserve seeds long-term.
- ● Hand lens or magnifying glass: For inspecting seed quality (especially if saving heirloom varieties).
- ● Labeling tags + permanent marker: For organizing seeds by type/year if storing multiple varieties.
- ● Outdoor workspace: A clean, dry tarp or tray to lay out seed heads for processing.
Step-by-step instructions for collecting rudbeckia seeds
Here's how I harvest seeds without twisting pods or wasting a single flower.
🌿 Step 1: Wait Until Seed Heads Turn Brown
Rudbeckia seeds are ready when the flower heads turn a uniform dry, papery brown—usually 4-6 weeks after blooming. You'll see the petals drop away naturally, leaving just the spiky seed heads. If you harvest too early, the seeds won't be fully mature and won't store well.
I like to check seed heads on a dry morning after a week without rain. The heads should feel light in your hand, almost hollow-sounding when tapped. If they still feel heavy or green, wait another week. This ensures maximum seed viability and storage life.
✂️ Step 2: Cut the Seed Heads with Clean Shears
Use sharp pruning shears to snip the stems just above the first set of leaves. This prevents disease from spreading into the plant. I always sterilize my shears with rubbing alcohol between cuts—rust or bacteria can ruin future blooms.
Leave the seed heads intact on the stems. The stems act as natural handles, making it easier to hang them for drying. If you cut too close to the leaves, the heads may fall apart before you can process them. Aim for a 2-3 inch stem when cutting.
🪴 Step 3: Dry the Seed Heads Properly
Hang the seed heads upside down in a well-ventilated, dry location with indirect sunlight—like a garage or covered porch. A paper bag or brown paper sack over each head helps catch falling seeds while allowing airflow. I poke small holes in the bag to prevent mold.
Drying takes 7-10 days, depending on humidity. The heads are ready when they rattle loudly when shaken—this means the seeds are loose inside. If your climate is damp, speed up drying by placing a small fan nearby to circulate air gently.
🌱 Step 4: Extract and Clean the Seeds
Once the heads are completely dry, rub them between your hands over a clean sheet of newspaper or a white tray. The seeds will fall out easily, while chaff and debris will blow away. I use a fine-mesh sieve to separate any remaining debris from the seeds.
Store the clean seeds in a paper envelope or glass jar labeled with the variety and date. Keep them in a cool, dark place—like a pantry or fridge—where they'll stay viable for 2-3 years. Moisture is the enemy, so avoid plastic bags.
💡 Step 5: Discard or Compost the Remaining Pods
After extracting the seeds, the empty seed heads can be composted or discarded. If you're composting, chop them into smaller pieces first—they break down quickly. I always compost mine because they add organic matter to the soil without introducing weeds.
This zero-waste method means every part of your rudbeckia plant contributes to next year's garden. Plus, you'll have seeds ready for free transplants or sharing with fellow gardeners—no store-bought packets needed!
Tips & tricks for perfect rudbeckia seed collection
Took me a while to figure these out, so here's how I make seed collection foolproof every time.
Timing Secret: The 4-6 week window after blooming is your magic timeframe, but don't guess—check the petals. When they naturally drop away and the center turns completely brown, that's your cue. I test by gently tapping the heads: if they sound hollow, they're ready. Waiting too long means seeds may scatter on their own, while harvesting too early gives you immature seeds that won't store properly.
Cutting Technique: That 2-3 inch stem length isn't arbitrary—it's what keeps your seed heads intact during drying. I've learned the hard way that shorter stems make the heads too top-heavy and they'll fall apart when you try to hang them. Sterilizing your shears between cuts is non-negotiable too; I keep rubbing alcohol handy and wipe them after every 3-4 cuts to prevent cross-contamination.
Drying Strategy: The 7-10 day drying time can feel like forever, but don't rush it! I've tried speeding up the process with heat, and it always leads to moldy seeds. Instead, I place a small fan nearby in humid climates to maintain airflow without adding heat. The "loud rattle" test is your best friend—shake each head before processing, and if it doesn't sound like a maraca, it needs more time.
Storage Wisdom: That 2-3 year viability window only applies if you store seeds properly. I've had seeds last 4 years in my cool pantry, but they sprouted at only 30% rate by year 4. The key is keeping them completely dry—transfer seeds to your storage container immediately after cleaning, and use silica gel packets if you're concerned about humidity. Labeling with the date is crucial too; I mark mine with both the variety and harvest year to avoid confusion.
Pro Tips for Rudbeckia Seed Collection
- Took me a while to figure these out, so here's how I make seed collection foolproof every time.
- Timing Secret: The 4-6 week window after blooming is your magic timeframe, but don't guess—check the petals.
- Cutting Technique: That 2-3 inch stem length isn't arbitrary—it's what keeps your seed heads intact during drying.
Frequently asked questions
Got questions about collecting rudbeckia seeds? You’re not alone! Here are answers to the most common ones—so you can harvest with confidence and zero fuss.
When is the best time to collect rudbeckia seeds?
Harvest seeds when the dry, papery seed pods turn brown and begin splitting open—usually late summer to early fall (August–October, depending on your climate). Wait until morning dew dries to avoid moisture, which can cause mold. Pro tip: If pods twist closed, they’re not ready yet!
How do I know if the seeds are mature enough?
Mature rudbeckia seeds are dark brown/black and rattle inside the pod when shaken. If they’re still green or the pod feels plump, they’re not ready. Overripe seeds may scatter—collect them before they self-sow everywhere! For extra assurance, gently squeeze the pod; if it crumbles easily, it’s harvest time.
What if my rudbeckia pods twist shut before I can collect seeds?
Don’t worry—this natural defense mechanism (called pod torsion) just means you missed the window. To prevent it, harvest pods early (when they’re brown but still open) or cut the entire flower head and hang it upside down in a paper bag to dry. Twisted pods can still yield seeds if you split them open carefully!
Can I collect seeds from spent rudbeckia flowers in my garden?
Deadhead
faded blooms (remove spent flowers) to redirect energy to seed production. Leave the seed heads on the plant until they dry—no need to cut them unless pests (like birds or squirrels) are raiding them. Bonus: Let some seeds self-sow for next year’s free rudbeckia!
How should I store rudbeckia seeds for planting next year?
Clean seeds by rubbing pods between your fingers or winnowing them in a bowl. Store them in a cool, dry place (like a sealed envelope or jar) for up to 2–3 years. Label them with the variety name and harvest date—rudbeckia seeds lose viability over time, so plant them as soon as possible for the best germination.
Wrapping up and next steps
Collecting rudbeckia seeds is a rewarding way to embrace zero-waste gardening while ensuring next year’s blooms!
With just a few simple steps—like choosing the right pods, timing your harvest, and storing seeds properly—you’ll be well on your way to a thriving garden. Now that you’re equipped with the know-how, why not share your new skills with fellow gardeners or try growing a few more twist-free beauties?
🌱 Next step: Grab those dried pods and start your seed-saving journey today—your future garden will thank you!