
Lawn
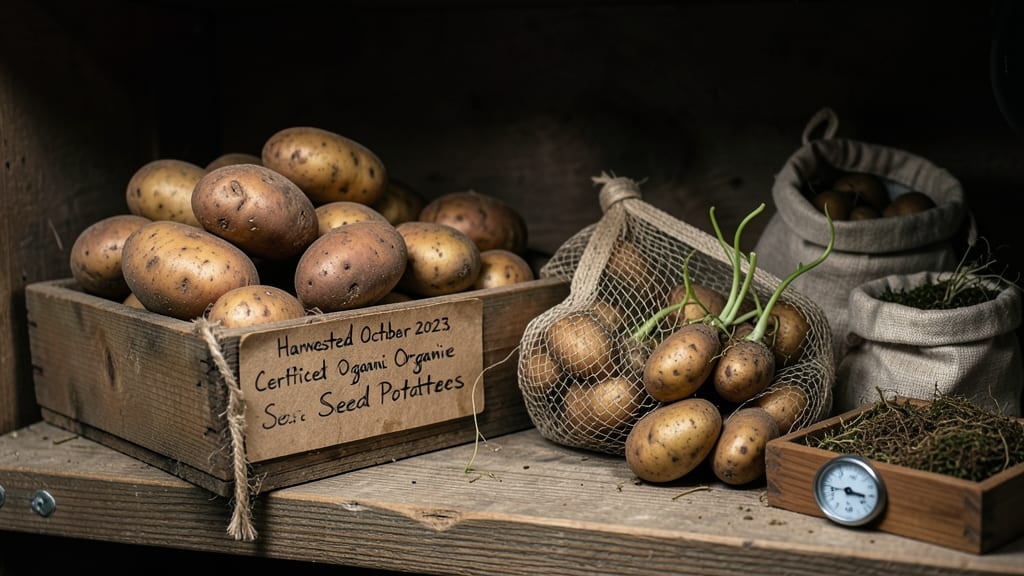
Proper potato seed storage means the difference between next spring's harvest and a wasted bin of sprouts. ✨ I’ve learned that even the best seed potatoes turn to mush if you don’t control temperature, light, and airflow—so I developed a foolproof system that keeps them viable for months.
The secret isn’t complicated: a cool, dark spot (around 40-50°F) with good airflow prevents rot and sprouting too early. Humidity matters too—too damp and they’ll mold; too dry and they’ll shrivel.
I use a mesh bag with a few ventilation holes in a basement corner, and it works every time. Before planting, I do a quick viability test: cut one in half and check for firm, white flesh with no dark spots.
If it passes, you’re golden—those potatoes will grow strong, disease-free plants. Skip this step, and you risk weak starts or total failure. This method works for any variety, from fingerlings to russets, and saves you money by avoiding store-bought starts. Here’s exactly how to do it right—no guesswork, no waste.
📚 In This Guide
- What you need
- Instructions
- Tips and common mistakes
- Wrapping up and next steps
What you need
- ● Potato tubers: 5–10 lbs of organic, disease-free seed potatoes (certified if possible). Choose varieties suited to your climate.
- ● Storage containers: 1–2 dark, breathable mesh bags (5–10 lb capacity) or
- ● A wooden crate with slatted sides (for airflow) or
- ● A paper bag (avoid plastic—it traps moisture!).
- ● Temperature-controlled space: A cool, dark area (40–50°F / 4–10°C) like a basement, root cellar, or unheated garage.
- ○ Humidity control: A dehumidifier (optional but ideal) or a small silicagel packet to absorb excess moisture.
- ● Labeling supplies: Waterproof tags + marker to note variety, date, and storage conditions.
- ● A fan for gentle airflow (prevents mold).
- ● Potato curing tray: A shallow tray lined with paper towels to dry tubers for 1–2 weeks before storage.
- ● Spray bottle with 1% hydrogen peroxide solution (for sanitizing cuts/scrapes on tubers).
- ● Digital thermometer/hygrometer to monitor conditions (aim for <60% humidity).
How to test potato seed viability before storage
Save money and space by ensuring only healthy potatoes make it to your long-term seed stash.
🌱 Step 1: Select and Inspect Your Potatoes
Choose firm, medium-sized potatoes with no signs of sprouting, rot, or soft spots. I always skip the small ones—they often have underdeveloped eyes, which are the future sprouts. Look for smooth skin and a weight that feels solid when held. Store-bought potatoes often have a chemical coating that prevents sprouting, so if you're using those, you'll need to wait longer for viable seed.
Cut the potatoes in half lengthwise and examine the interior. Healthy seed potatoes have small, firm buds (eyes) embedded in the flesh. Discard any with hollow centers, dark spots, or a musty smell. The eyes should be evenly spaced and not sunken. If you find a potato with a few good eyes and some damaged ones, you can still use it—just cut away the bad sections and save the healthy portion.
💧 Step 2: Perform the Water Float Test
Fill a bowl with cool water and gently place the potato halves in it. Let them sit for about 10-15 minutes. Healthy seed potatoes will sink to the bottom because they're dense and full of starch. If any float, they're waterlogged or rotting inside and should be discarded. This test weeds out about 20% of my potatoes before I even start the viability check.
While waiting, run your fingers over the potato skins to feel for any soft or mushy areas. If you find any, those sections are likely rotting internally, even if the rest of the potato looks fine. Trim away any questionable spots with a clean knife, but don't use the same knife for cutting and testing—sanitation matters here.
☀️ Step 3: Conduct the Sprout Viability Test
Place the selected potato halves in a cool, dark, well-ventilated spot like a cardboard box with holes punched in the sides. I like to line the bottom with newspaper to catch any condensation. Leave them undisturbed for 2-3 weeks at a temperature between 45-55°F. This mimics natural winter dormancy and encourages even sprouting.
After 10-14 days, check for sprouts. Healthy seed potatoes will develop small, firm green sprouts about 1-2 inches long. If you see only white, fuzzy growth (mold), discard those potatoes immediately. Mold means the potato is rotting and won't produce viable seed. If sprouts appear unevenly, the potato may not store well long-term—consider using it sooner rather than later.
⏰ Step 4: Prepare Viable Potatoes for Long-Term Storage
Once you've confirmed viable sprouts, let the potatoes cure for another 1-2 weeks in the same conditions. This allows the sprouts to develop slightly, which helps them survive the drying process. Handle them gently—rough treatment can damage the delicate sprouts. I like to label each potato with the variety and date using a soft marker, so I don't forget what I'm storing.
Store the cured potatoes in a cool, dark, dry place with good airflow, like a root cellar or a paper bag in the refrigerator's crisper drawer. For long-term storage beyond a year, you can dry the sprouted potatoes further by hanging them in a 50-60°F environment with 50-60% humidity for 2-3 weeks. This slow-drying process prevents the potatoes from rotting while preserving the sprouts' viability.
🌿 Step 5: Monitor and Rotate Your Seed Stock
Check your stored potatoes every 2-3 months for signs of sprouting, shrinking, or mold. Potatoes lose viability over time, so I always use the oldest ones first. If you notice any sprouts developing during storage, that's a good sign—they're still alive and ready to plant. However, if you see mold or soft spots, discard those potatoes immediately to prevent the rest of your stash from spoiling.
For best results, plant your stored potatoes in early spring, about 2-3 weeks before your last frost date. The sprouts should be 2-3 inches long by then, ready to grow into strong plants. If you're storing potatoes for multiple years, consider planting a portion each year to maintain a fresh supply—this keeps your seed stock healthy and reduces waste.
Tips & tricks for perfect potato seed storage
Here's what nobody tells you about maximizing your potato seed success—and avoiding common pitfalls.
Selection is Everything: In Step 1, when inspecting potatoes, pay special attention to the eyes. Healthy seed potatoes should have eyes that are evenly spaced and not sunken. I've learned the hard way that potatoes with sunken eyes often produce weak sprouts. Also, avoid potatoes with a waxy coating—these are often treated to prevent sprouting and won't yield viable seed.
Temperature Matters: The 45-55°F range in Step 3 is critical for mimicking winter dormancy. If your space runs warmer, place the potatoes in a cooler area or use a small refrigerator set to this range. Too-warm conditions can cause uneven sprouting or even mold growth. I keep mine in my garage during winter when temperatures naturally drop to this range.
Storage Wisdom: For long-term storage beyond a year, the 50-60°F environment with 50-60% humidity in Step 4 is non-negotiable. I use a small dehumidifier in my root cellar to maintain this balance. Too much humidity causes rot, while too little causes the potatoes to dry out prematurely. A simple hygrometer helps monitor these conditions accurately.
Monitoring is Key: The 2-3 month check interval in Step 5 is where many gardeners fail. I've seen perfectly good seed potatoes ruined by mold because they weren't checked regularly. Keep a small notebook to track each potato's condition and viability. This simple record-keeping prevents wasted storage space and ensures you always have viable seed ready for planting.
Pro Tips for Potato Seed Storage
- Here's what nobody tells you about maximizing your potato seed success—and avoiding common pitfalls.
- Selection is Everything: In Step 1, when inspecting potatoes, pay special attention to the eyes.
- Temperature Matters: The 45-55°F range in Step 3 is critical for mimicking winter dormancy.
Frequently asked questions
Got questions about storing potato seeds the right way? You’re not alone! Here are some of the most common concerns—and straightforward answers to keep your seeds viable and ready for planting.
How long can I store potato seeds before they lose viability?
Freshly harvested potato seeds stay viable for 3–4 months at room temperature, but for long-term storage (up to 1–2 years), keep them in a cool, dark place (like a fridge or root cellar). After that, germination rates drop significantly—test a few seeds before committing to a full planting!
Do I need to refrigerate potato seeds for storage?
While not always necessary, refrigeration (around 35–40°F) slows aging and extends viability. If you’re storing seeds for more than 6 months, a fridge or root cellar is your best bet. Just avoid freezing—the cold can damage the seeds!
Can I reuse potato seeds from store-bought potatoes?
Technically yes, but it’s not recommended for seed potatoes. Store-bought potatoes are often treated to prevent sprouting and may carry diseases. For reliable seeds, use certified disease-free potatoes or save seeds from your own organic harvest.
What do I do if my stored potato seeds start sprouting?
Sprouting means your seeds are ready to plant! If you’re not ready, move them to a darker, cooler spot (like a paper bag in the fridge) to slow growth. Once sprouts reach 1–2 inches, it’s time to plant—don’t wait too long, or they’ll become leggy and weak.
Are there alternatives to traditional potato seed storage?
Yes! If you lack space for long-term storage, try short-term methods like:
- Chitting: Place whole potatoes in a bright, cool spot (like a windowsill) to encourage early sprouting.
- Clay pots: Store cut seed potatoes in dampened pots to keep them moist and ready for planting.
- Sand or peat moss: Bury seeds in a cool, humid environment to mimic natural conditions.
Wrapping up and next steps
Storing potato seeds properly is your first step toward a thriving, zero-waste garden! By testing viability before drying and following best practices, you’ll ensure healthy sprouts and maximize your harvest. Now that you’re equipped with the right knowledge, it’s time to put it into action.
🌱 Next step: Gather your supplies, pick a cool, dark spot, and start storing those seeds with confidence. Happy gardening—your future plants will thank you!