
Container Gardens
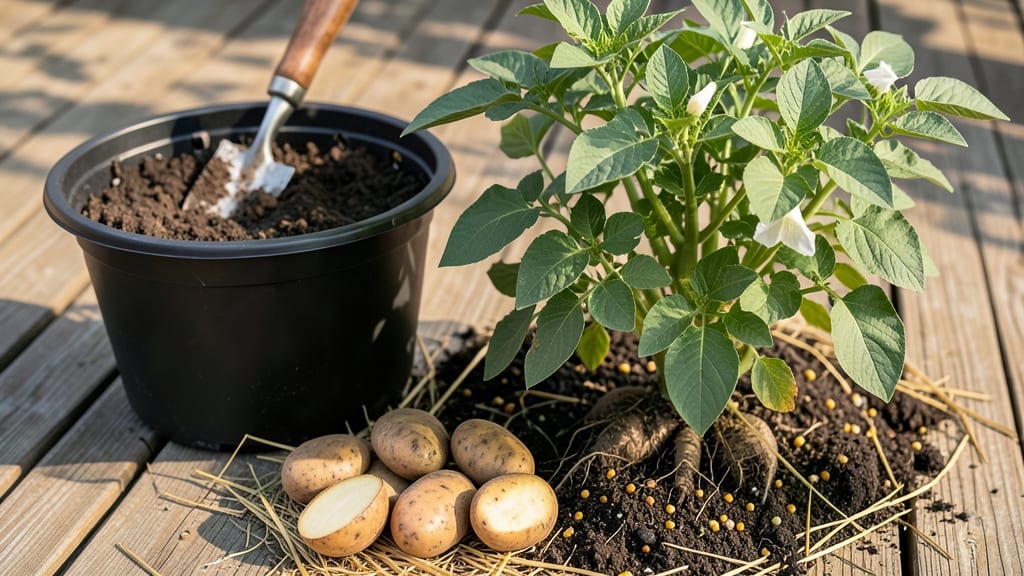
Growing seed potatoes in containers means harvesting crisp, homegrown spuds without a backyard—just a sunny spot and a few simple supplies. 🌱 I’ve grown enough potatoes in 5-gallon buckets to feed my family for months, and the best part?
No digging required. The secret lies in chitting your seed potatoes before planting, then letting them climb in layers as they grow.
You’ll need seed potatoes (not grocery-store spuds), a container with drainage, and a mix of potting soil and compost. Small varieties like ‘Yukon Gold’ thrive in 5-gallon pots, while larger types need 10+ gallons.
Plant your chitted potatoes 4–6 inches deep, then add soil as stems emerge—this “hilling” trick boosts yields by encouraging more tubers to form.
By 12 weeks, you’ll be harvesting potatoes that taste sweeter and fresher than anything from the store. The key is consistent moisture (never soggy soil) and 6+ hours of sunlight daily. Even beginners get it right with this method—no fancy tools or green thumbs required.
Troubleshooting is simple: too much water causes rot, so use containers with drainage holes. Pests? A light row cover keeps critters out. And if your plants yellow? They might need more nitrogen—just add a bit of compost when you hill.
📚 In This Guide
- What you need
- Instructions
- Tips and common mistakes
- Wrapping up and next steps
What you need
- ● Seed potatoes: 3–5 certified disease-free seed potatoes per container (choose varieties like Yukon Gold, Red Pontiac, or Fingerlings).
- ● Containers: 1–2 large pots (10–12 inches deep) or a single 5-gallon bucket with drainage holes. Drill holes if needed!
- ● Potting mix: 2–3 bags of high-quality, well-draining container mix (avoid garden soil—it compacts!).
- ● Drainage material: Small rocks, gravel, or broken pottery (1–2 inches) for the container’s base.
- ● Watering can or hose: With a gentle spray nozzle to avoid displacing soil.
- ● Fertilizer: Balanced organic fertilizer (5-5-5 or 10-10-10) or compost tea for a nutrient boost.
- ○ Grow lights (optional): If growing indoors, a full-spectrum LED bulb to supplement sunlight.
- ● Mulch (straw or shredded leaves) to retain moisture.
- ● Plant labels to track varieties.
- ● A potato grow bag (if using a vertical setup).
- ● Insect netting to protect from pests like flea beetles.
Step-by-step instructions for growing seed potatoes in containers
Here’s how to grow a full harvest of potatoes in just a few square feet of space.
🌱 Step 1: Chit Your Seed Potatoes Before Planting
Start by placing your seed potatoes in a bright, cool spot—like a sunny windowsill—for 4-6 weeks before planting. This process, called "chitting," encourages early sprouting. You’ll see tiny shoots (called "chits") emerge from the eyes of the potato. These shoots are your first sign that the potato is ready to grow.
Use a shallow tray or egg carton to hold the potatoes upright. Place them with the rose end (the side with the most eyes) facing up. Keep them in a spot where they get indirect light—direct sun can scorch the developing shoots. Once the chits reach about ½ inch long, they’re ready for planting.
🪴 Step 2: Choose the Right Containers and Fill with Soil
For 4 plants, use 4 containers that are at least 12 inches deep and 12 inches wide. Drill drainage holes in the bottom if they don’t already have them. I like using fabric grow bags or wooden crates because they allow excess water to drain while keeping the soil structure intact.
Fill the containers with a lightweight, well-draining potting mix. Avoid garden soil—it’s too heavy and can compact, which stunts root growth. Mix in a handful of compost or aged manure to give the potatoes a nutrient boost. Leave about 2 inches of space at the top of the container for adding more soil later.
🌿 Step 3: Plant the Chitted Potatoes and Keep Them Warm
Place one chitted potato in each container, 4 inches deep, with the shoots facing up. Cover lightly with soil, leaving the top of the potato exposed. Water gently until the soil is evenly moist but not soggy. The goal is to encourage roots to grow into the soil while keeping the shoots above ground.
Keep the containers in a warm spot (around 60-65°F) for the first 2-3 weeks. This mimics spring planting conditions and helps the roots establish quickly. You’ll know they’re settling in when you see the shoots grow another 1-2 inches. Avoid moving them until they’re firmly rooted.
⏰ Step 4: Add Soil and Water as the Plants Grow
When the shoots reach 6 inches tall, it’s time to "hill" the plants. Gently mound 2-3 inches of soil around the base of the stems, covering about half of the plant. This encourages more roots to form along the buried stems, which leads to a bigger harvest. Repeat this process every 2-3 weeks until the container is full or the plants flower.
Water deeply once a week, or whenever the top inch of soil feels dry. Avoid overhead watering—it can spread disease. Instead, water at the base of the plants. You’ll know you’re doing it right when the soil stays consistently moist but never waterlogged. Too much water can cause the potatoes to rot before they mature.
☀️ Step 5: Provide Sunlight and Watch for Harvest Cues
Move the containers to a spot where they get full sun (6-8 hours daily). Potatoes need plenty of light to produce energy for growth. If you notice the plants turning pale or stretching, they need more light. A south-facing window or a grow light will work if outdoor space is limited.
Harvest time comes when the flowers fade (usually around 10-12 weeks after planting). Gently dig around the base of the plants with your hands or a small trowel. You’ll find small, new potatoes ready to eat. For larger potatoes, wait until the foliage yellows and dies back, which can take up to 12-14 weeks. Handle the potatoes carefully to avoid bruising them.
Tips & tricks for growing seed potatoes in containers
Here's what I learned after growing container potatoes for five seasons—these tricks make all the difference between a modest harvest and a bountiful one.
Chitting Optimization: The 4-6 week chitting period might seem long, but you can speed it up slightly by placing your potatoes in a slightly cooler spot (around 55-60°F) for the first week. This helps prevent leggy sprouts. Once you see the ½-inch chits, move them to brighter light to encourage stronger growth. I've found that using a seedling tray with drainage holes works best—it keeps the potatoes stable while allowing excess moisture to escape.
Container Selection Secret: While the instructions call for containers that are at least 12 inches deep, I've had great success with 18-inch deep grow bags—they give your potatoes more room to grow without taking up extra floor space. The key is ensuring your containers have drainage holes (or drilling them yourself) to prevent waterlogging, which is the #1 cause of rot in container potatoes. If using fabric grow bags, place them on a tray to catch excess water.
Hilling Technique: When you reach the hilling stage with your 6-inch tall plants, use a gentle mound rather than a sharp pile of soil. This prevents disturbing the delicate stems. I like to use a small shovel to create a gradual slope rather than piling soil abruptly. This gradual approach also helps prevent soil from sliding off the sides of your containers, which can happen with sudden mounding. Repeat every 2-3 weeks until your plants flower or the container is full—this is where you'll get the majority of your harvest.
Sunlight Strategy: The 6-8 hours of full sun requirement is non-negotiable, but you can supplement with a grow light if natural light is limited. Position the light about 6-12 inches above the plants and use it for 12-14 hours daily to mimic summer conditions. I've grown container potatoes successfully under grow lights in winter, though yields will be smaller than with full sun. Just be sure to rotate your containers daily so all sides get even light exposure.
Pro Tips for Grow Seed Potatoes In Containers
- Here's what I learned after growing container potatoes for five seasons—these tricks make all the difference between ...
- Chitting Optimization: The 4-6 week chitting period might seem long, but you can speed it up slightly by placing your...
- Container Selection Secret: While the instructions call for containers that are at least 12 inches deep, I've had gre...
Frequently asked questions
Got questions about growing seed potatoes in containers? You’re not alone! Here are answers to the most common concerns—so you can grow confidently and troubleshoot like a pro.
Can I use regular grocery store potatoes as seed potatoes?
It’s not recommended—grocery store potatoes are treated to prevent sprouting and may carry diseases. Instead, buy certified seed potatoes from garden centers or online. They’re disease-free and guaranteed to sprout! For a budget-friendly hack, try organic potatoes (unsprouted) from the store and chill them for 4–6 weeks to encourage sprouting.
How long does it take for seed potatoes to sprout in containers?
Sprouts usually appear in 2–4 weeks after planting, depending on temperature and light. Keep containers in a cool, bright spot (50–60°F) until sprouts are 1–2 inches tall, then move them to full sun. Pro tip: If sprouts take longer than 6 weeks, check for rot (soggy potatoes) or pests (chewed sprouts).
What’s the best container size for growing seed potatoes?
Aim for containers that are at least 12 inches deep and 10–12 inches wide per potato. For multiple potatoes, use a 5-gallon bucket or larger (e.g., fabric grow bags or half barrels). Space-saving tip: Stack containers vertically or use tall, narrow pots (like 20-gallon grow bags) to save space while allowing roots to grow downward.
How do I prevent pests and diseases in container-grown potatoes?
Container gardens are less prone to pests, but watch for:
- Colorado potato beetles: Handpick adults/larvae or use neem oil.
- Blight (fungus): Avoid overhead watering; use copper fungicide if spots appear.
- Rot: Ensure containers have drainage holes and use light, airy potting mix.
Rotate crops yearly and never compost diseased potato plants.
What can I plant with potatoes in containers to save space?
Pair potatoes with companion plants that thrive in similar conditions:
Companion Plant
Benefit
Bush beans
Fix nitrogen in soil; deter beetles.
Spinach or lettuce
Grow fast in early spring before potatoes leaf out.
Marigolds
Repel pests naturally.
Warning: Avoid planting with tomatoes, peppers, or eggplants—they share diseases (e.g., blight).
Wrapping up and next steps
Growing seed potatoes in containers is a rewarding and space-efficient way to enjoy homegrown spuds without a backyard! 🌱 With the right setup—chosen varieties, proper containers, and consistent care—you’ll harvest fresh, crisp potatoes in just 12 weeks.
Whether you’re a beginner or a seasoned gardener, this method proves that even small spaces can yield big results.
Now that you’re armed with tips and tricks, roll up your sleeves and get planting! Start small with a few containers, experiment with different varieties, and watch your green thumb grow. Next up? Share your harvest with friends, try roasting or mashing your homegrown potatoes, or even save some seeds for your next batch.
Happy growing! 🌟