
Lawn
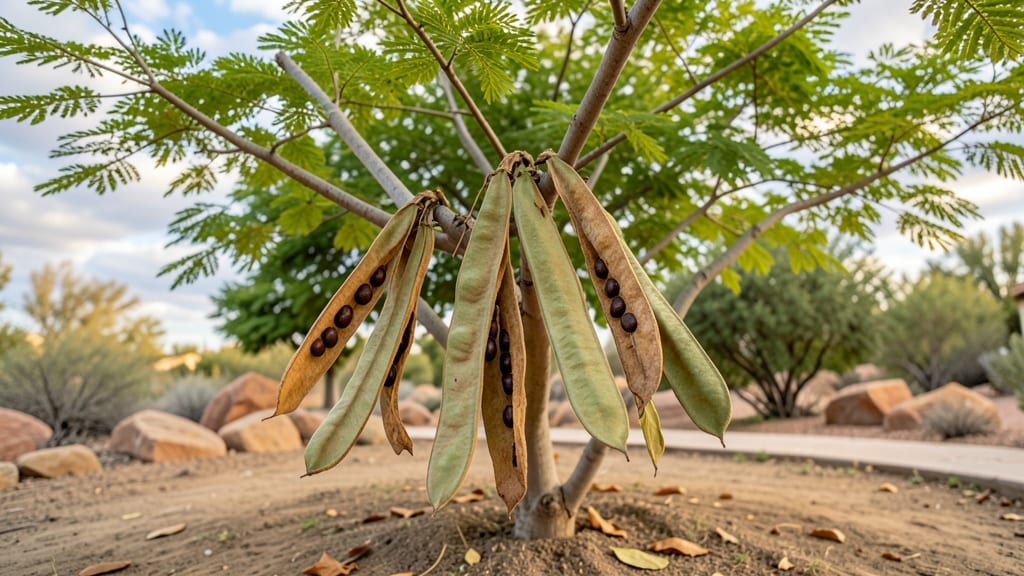
Harvesting palo verde seed pods turns desert waste into drought-proof landscaping gold. 🌵 These papery pods hold seeds that germinate with surprising reliability, letting you grow your own trees for free—no nursery tags required.
The key is knowing when to collect them, how to process the seeds, and what to do with the seedlings once they sprout.
I’ve collected pods from fallen branches in late winter through early spring, when they’re dry and ready to open. The seeds inside are tiny but tough, designed to survive our harshest conditions.
You’ll need gloves (the pods are prickly), a bucket, and a bit of patience—processing them takes about 30 minutes for a full harvest. Once you crack them open, soaking the seeds overnight speeds up germination.
What you end up with are fast-growing seedlings that thrive in poor soil and full sun—exactly what you want for a low-maintenance, water-wise yard. Within 6-8 weeks, you’ll have sturdy young trees ready for transplanting.
The best part? These trees grow 10-15 feet per year in ideal conditions, turning a single seed into shade and wildlife habitat faster than you’d expect.
Works for urban lots, desert landscapes, or even container growing—just adjust spacing. Here’s how to do it without wasting a single pod.
📚 In This Guide
- What you need
- Instructions
- Tips and common mistakes
- Wrapping up and next steps
What you need
- ● Mature palo verde seed pods (harvest when dry and brown, typically late summer to early fall). Aim for 50–100 pods for a good seed yield.
- ● Pruning shears or sharp scissors (for safely cutting pods from branches). Opt for bypass pruners (clean cuts!) or long-handled loppers (if pods are high up).
- ● Large bucket or mesh bag (to collect pods without crushing them). A 5-gallon bucket or berry-picking bag works well.
- ● Tarp or large cardboard box (for drying pods indoors). Use a waterproof surface to prevent moisture buildup.
- ○ Fan or dehumidifier (optional but helpful for faster drying in humid climates). A small box fan on low setting suffices.
- ● Paper towels or newspaper (for spreading pods out to dry). Avoid plastic—it traps moisture!
- ● Fine-mesh sieve or colander (for separating seeds from chaff). A #20–30 mesh sieve (0.5–0.6mm holes) is ideal.
- ● Paper envelopes or airtight containers (for seed storage). Use kraft paper envelopes (breathable) or glass jars with silica gel packets (long-term storage).
- ● Permanent marker (to label seeds with harvest date and variety, if applicable).
- ● Gloves (to protect hands from pod spines or sap). Nitrile gloves work best for grip and durability.
- ● Ladder or pole pruner (if pods are out of reach). A 3–4 ft. extension pole can save your back!
- ● Food dehydrator (for even faster drying). Set to 95°F (35°C) for 12–24 hours.
- ● Seed viability test kit (to check germination rates). A simple paper towel test works too!
- ● Camera or notebook (to document pod stages for future reference). Snap pics of color changes or seed development.
Step-by-Step guide to harvesting and processing palo verde seed pods
Turn those fallen pods into a sustainable seed source with these precise techniques.
🌱 Step 1: Identify and Collect Mature Seed Pods
Palo verde seed pods turn from green to tan when ready—wait until they're completely dry and brittle to the touch. Harvest them directly from the tree or collect them from the ground, shaking branches gently to dislodge any remaining pods. I always wear gloves because the pods can be prickly, and the seeds inside are tiny but potent.
Look for pods that are hollow-sounding when tapped—they should rattle with seeds inside. Avoid green or partially dried pods, as their seeds won't germinate. Collect pods in a paper bag to prevent moisture buildup, which can cause mold before you even process them.
🪴 Step 2: Extract Seeds and Remove Chaff
Spread the collected pods on a clean, flat surface like a baking sheet or large tray. Use a hammer or mallet to gently tap each pod open—this releases the seeds while preserving their viability. I like to work outside or over a bucket to catch any debris. The seeds will look like small, flat, dark brown or black beans, surrounded by fibrous chaff.
Separate the seeds from the chaff by pouring the mixture through a fine-mesh strainer or sifter. Shake it gently to let the heavier seeds fall through while the lighter chaff remains on top. Discard the fibrous material and rinse the seeds briefly under cool water to remove any remaining dust or debris. Let them dry completely on a paper towel for 24 hours before storage.
💧 Step 3: Stratify Seeds for Germination
Palo verde seeds require a cold stratification period to break dormancy. Place the dried seeds in a sealed plastic bag with a damp paper towel—just enough moisture to keep the towel damp, not soaked. Store the bag in your refrigerator for 6-8 weeks, checking occasionally to ensure the towel remains moist. This mimics winter conditions and signals the seeds that it’s time to grow.
After stratification, remove the seeds from the fridge and let them sit at room temperature for 3-5 days to acclimate. This gradual shift prevents shock and improves germination rates. You’ll know they’re ready when the seeds look plump and slightly darker—this means they’ve absorbed moisture and are primed for planting.
☀️ Step 4: Plant Stratified Seeds Indoors
Fill small pots or seed trays with a well-draining cactus or succulent mix—palo verde seeds need excellent drainage to avoid rot. Plant the seeds ¼ inch deep, spacing them about ½ inch apart to prevent overcrowding. Press them lightly into the soil and mist gently with water until the surface is evenly moist but not soggy.
Cover the pots with plastic wrap or a humidity dome to retain moisture and place them in a warm, sunny spot. A south-facing window or under a grow light works best. Keep the soil consistently moist but never waterlogged—overwatering is the fastest way to kill these seeds. Germination typically takes 2-4 weeks, so patience is key.
✂️ Step 5: Transplant Seedlings Outdoors
Once seedlings develop 2-3 sets of true leaves and reach about 3-4 inches tall, they’re ready for their permanent home. Harden them off by gradually exposing them to outdoor conditions over 7-10 days, starting with just a few hours of shade each day and increasing exposure slowly.
Plant them in full sun with well-draining soil, spacing them 6-8 feet apart to allow for mature growth. Water deeply after transplanting to help roots establish, but reduce watering once they’re settled. Palo verde trees are drought-tolerant, so avoid overwatering—they thrive in dry conditions once established.
Tips & tricks for perfect palo verde seed processing
These practical insights will help you maximize seed viability and germination success.
Pod Selection: The 24-hour drying period after collection is critical—don't rush it! Place pods in a well-ventilated area where they can fully dry out. I've found that pods dried in direct sunlight (but not scorching heat) maintain better seed quality. This prevents premature germination during storage and ensures you'll have viable seeds ready when you're ready to plant.
Seed Extraction: When using a hammer or mallet to open pods in Step 2, work in small batches to avoid crushing seeds. I recommend placing pods on a thick towel or cardboard first to protect your work surface. The goal is to release seeds gently—think of it like cracking walnuts rather than smashing them. This careful approach preserves seed integrity for the stratification process ahead.
Stratification: During the 6-8 week cold stratification in Step 3, I've noticed the seeds absorb moisture unevenly. To prevent clumping, I place a small piece of mesh screen between the seeds and damp towel in the bag. This allows air circulation while maintaining humidity. After removing from cold storage, the 3-5 day acclimation period is where most germination success hinges—don't skip this gradual transition, as it mimics natural spring conditions.
Germination: The 2-4 week germination window mentioned in Step 4 can be extended to 6 weeks if your environment stays consistently warm (75-80°F). To speed up germination, place pots under a heat mat set to 80°F during this period. Just remember to maintain that well-draining soil mix—palo verde seeds despise soggy conditions, which can cause rot before they even sprout.
Pro Tips for Palo Verde Seed Pods
- These practical insights will help you maximize seed viability and germination success.
- Pod Selection: The 24-hour drying period after collection is critical—don't rush it! Place pods in a well-ventilated ...
- Seed Extraction: When using a hammer or mallet to open pods in Step 2, work in small batches to avoid crushing seeds....
Frequently asked questions
Got questions about harvesting and using palo verde seed pods?
Here are some of the most common ones—plus expert tips to make your zero-waste project a success!
When is the best time to harvest palo verde seed pods?
Harvest pods when they’re dry and papery (late summer to early fall) but before they split open. Overripe pods release seeds prematurely, reducing viability. Look for pods that turn from green to tan—this signals peak harvest time. Pro tip: Morning harvests avoid humidity, keeping pods crisp for easier seed extraction.
How do I tell if the seeds inside are still viable?
Viable seeds are plump, firm, and dark brown (not shriveled or hollow-sounding). Float-test them: Drop seeds in water—sinkers are viable, while floaters are likely dead. Store harvested seeds in a cool, dry place (like a sealed jar) for up to 2 years. Troubleshoot: If germination is low, try soaking seeds overnight to soften hard coats.
Can I use palo verde seed pods for anything other than planting?
Beyond seeds, pods add texture to crafts (dried arrangements, wreaths) or serve as natural mulch for gardens. Crush dried pods for compost—they break down slowly, enriching soil. Bonus: Kids love using them for seed pod necklaces (just string them with twine!).
What should I do if birds or squirrels steal my seed pods?
Palo verde pods are highly attractive to wildlife—use mesh bags or netting to protect harvests. Shake trees gently to dislodge pods before they’re fully ripe, or harvest early in the morning when critters are less active. Alternative: Plant pods in ground-level containers to deter climbing animals.
Are palo verde seeds safe for all climates to grow?
Palo verde trees thrive in USDA Zones 7–11 (arid/semi-arid regions). While seeds may sprout elsewhere, they require full sun and well-draining soil to survive long-term. In cooler climates, start seeds indoors 8–10 weeks before last frost. Note: Young trees are frost-sensitive—wait until soil temps stay above 60°F before transplanting.
Wrapping up and next steps
Palo verde seed pods offer a sustainable, zero-waste way to harvest viable seeds year-round—no green thumb required! 🌱 Whether you're a gardener, an eco-conscious homeowner, or just curious about nature’s bounty, these pods are a game-changer for seed-saving and landscape resilience.
With the right tools and a little patience, you can turn fallen pods into a self-sustaining seed source for future planting.
Ready to put your newfound knowledge to work? Start by grab your supplies and head outside—your next batch of seeds is waiting! 🌿