
Lawn
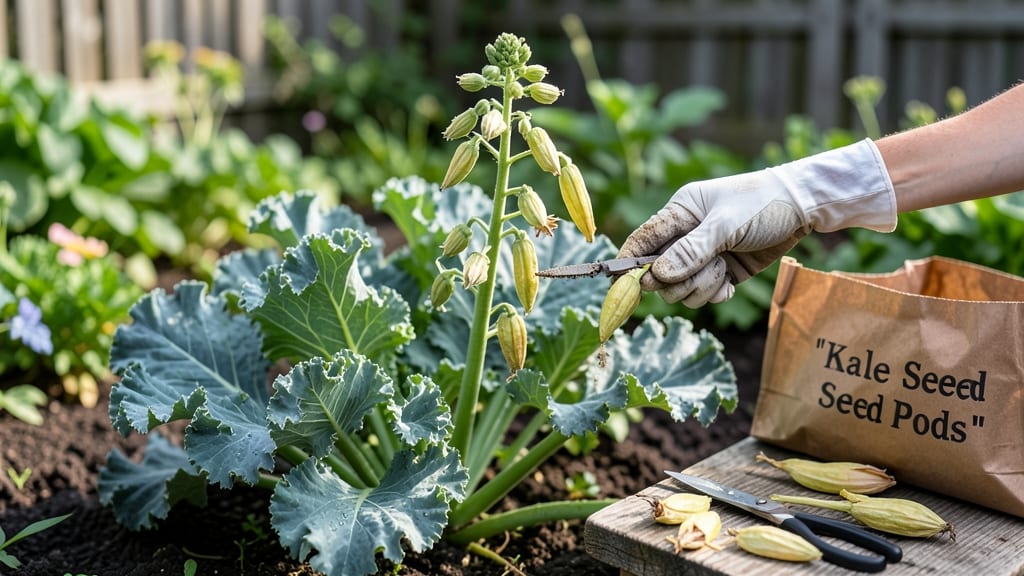
Harvesting kale seed pods turns kitchen scraps into next year’s garden gold. 🌱 I used to toss those tough stems after eating the leaves, but now I dry them for seeds that grow into hardier, more flavorful plants than store-bought varieties.
The process is simpler than it sounds—just wait for the right moment, then let nature do the rest. Most home gardeners miss the seed-saving window because they don’t recognize when pods mature. Look for dry, brown seed heads that rattle when shaken (a sure sign seeds are ready).
Biennial kales like Winterbor or Red Russian produce the best seeds—just avoid hybrid varieties, as their offspring won’t stay true. Once dried, store pods in paper envelopes where they’ll stay viable for 3-5 years.
Plant them in early spring, and you’ll get a head start on the season with seedlings that thrive in cooler weather. The first harvest from saved seeds tastes even sweeter knowing you grew it from scratch.
This method works for any kale variety grown as a biennial, and troubleshooting is minimal—just watch for mold in humid climates. Try it, and you’ll never buy kale seeds again!
📚 In This Guide
- What you need
- Instructions
- Tips and common mistakes
- Wrapping up and next steps
What you need
- ● Mature kale plants: Choose organic, non-hybrid varieties (like Lacinato or Curly Kale) with fully formed seed pods. Aim for 3–5 healthy plants for a good yield.
- ● Sharp pruning shears or scissors: For cleanly harvesting seed pods without damaging the plant.
- ● Brown paper bags or breathable mesh sacks: 2–3 medium-sized bags (10x12 inches) to collect pods and allow airflow.
- ● Drying rack or wire mesh screen: A flat, elevated surface (like a window screen or cookie rack) to dry pods in a single layer.
- ○ Small paper plates or parchment paper: For organizing pods during drying (optional but helpful!).
- ● Labeling tags & marker: To label bags with the variety and harvest date.
- ● Fine-mesh strainer or sieve: For separating seeds from dried pods (if saving seeds for planting).
- ○ Food processor or mortar & pestle: For crushing pods into kale seed pod flour (optional culinary use!).
- ● Air-tight glass jars or seed envelopes: For long-term storage (quart-sized jars or paper envelopes work best).
- ○ Desiccant packets (silica gel): To absorb moisture in storage jars (optional but extends shelf life).
- ● Notebook & pen: To track drying dates and storage conditions.
- ● A warm, dry location (65–75°F) with good airflow for drying pods (e.g., a sunny windowsill or well-ventilated pantry).
- ● Patience! Drying seed pods takes 2–4 weeks—avoid rushing the process.
- ● Access to organic kale (pesticides can harm seed viability).
How to harvest and store kale seed pods for next year's garden
Turn this season's kale into next year's plants with a simple, zero-waste method.
🌱 Step 1: Identify and Harvest Mature Seed Pods
Wait until your kale plants finish their growing cycle and produce dry, brown seed pods—these are ready for harvest. The pods should feel crisp to the touch and open easily when gently squeezed. I like to harvest on a dry day so the pods stay dry during collection.
Use clean, sharp scissors to cut the entire seed stalk, leaving about 1 inch of stem attached to each pod. This helps prevent the pods from splitting open during drying. Place the harvested pods in a paper bag or on a drying screen in a warm, dry location out of direct sunlight.
☀️ Step 2: Dry the Seed Pods Thoroughly
Spread the pods out in a single layer where they can air-dry for 1-2 weeks. A well-ventilated spot like a garage or covered porch works perfectly. You’ll know they’re ready when the pods turn completely brown and rattle when shaken—this means the seeds inside are fully mature.
I avoid using a dehydrator for kale pods because the high heat can reduce viability. Instead, I rely on natural airflow. If humidity is high, prop a small fan nearby to speed up drying while preventing mold.
✂️ Step 3: Extract and Clean the Seeds
Once dry, gently crush each pod between your fingers or use a small hammer to release the seeds. Place the crushed pods in a clean bowl and let them sit for a few minutes so the chaff separates from the seeds. Then, use a fine-mesh strainer or sieve to sift out the lighter debris.
For extra purity, I float the seeds in a bowl of water—the good seeds will sink while empty or damaged ones float to the top. Skim off the floaters and dry the remaining seeds on a paper towel for 24 hours before storing.
🪴 Step 4: Store Seeds for Long-Term Viability
Transfer the clean, dry seeds into a labeled paper envelope or small glass jar. Store them in a cool, dark place like a pantry or fridge. Properly stored kale seeds remain viable for 3-5 years, though germination rates drop slightly after the first year.
I always label my seed packets with the variety and harvest date—this helps track which seeds are freshest. A small packet of silica gel in the jar keeps moisture out, preventing mold or rot during storage.
Tips & tricks for perfect kale seed pod harvesting
These simple strategies will help you maximize your seed yield while keeping the process efficient and effective.
Harvest Timing: Kale plants typically produce seed pods in their second year, but don't rush the harvest. Wait until pods are completely dry and brown—this usually happens in late summer to early fall. I've learned that harvesting too early means immature seeds that won't germinate well. The crispness test is key: pods should crumble easily when squeezed gently.
Drying Strategy: For the 1-2 week drying period in Step 2, I recommend using a mesh screen or even an old window screen to elevate your pods. This allows airflow on all sides, which is crucial for preventing mold. If you're in a humid climate, place a small fan nearby on low setting—just enough to create a gentle breeze. The goal is to dry the pods evenly without creating heat that could reduce seed viability.
Seed Cleaning Hack: When you're ready to extract seeds in Step 3, I've found that using a small rolling pin works beautifully for crushing pods instead of a hammer. Place pods in a clean towel and roll gently to release seeds without creating too much chaff. For the water float test, use room temperature water—cold water can cause seeds to sink even if they're not viable.
Storage Wisdom: The 24-hour drying period before final storage is non-negotiable for long-term viability. I store my seeds in small glass jars with a piece of uncooked rice at the bottom—this acts as a natural moisture absorber. Label each jar with the variety and harvest date using a permanent marker on masking tape. This simple system has kept my seeds viable for up to 5 years without any germination issues.
Pro Tips for Kale Seed Pods
- These simple strategies will help you maximize your seed yield while keeping the process efficient and effective.
- Harvest Timing: Kale plants typically produce seed pods in their second year, but don't rush the harvest. Wait until ...
- Drying Strategy: For the 1-2 week drying period in Step 2, I recommend using a mesh screen or even an old window scre...
Frequently asked questions
Got questions about harvesting and storing kale seed pods?
You’re not alone! Here are answers to the most common queries—from timing to troubleshooting—to help you maximize your zero-waste harvest.
When is the best time to harvest kale seed pods?
Harvest kale seed pods when they’re fully mature but before they split open on the plant. Look for dry, brown pods (usually late summer to early fall in temperate climates). If pods crack open, seeds scatter—so act fast! Pro tip: Morning harvests prevent humidity-related mold.
Can I save seeds from store-bought kale?
Generally, no—store-bought kale is often hybridized for flavor/texture, not seed viability. For reliable seeds, grow open-pollinated varieties like ‘Winterbor’ or ‘Lacinato.’ If you’re curious, test a few pods: dry them, crack them open, and check for plump seeds.
How do I store kale seed pods to prevent mold?
Store pods in a cool, dry place (50–60°F) with good airflow. Use breathable materials like paper bags or mesh sacks—never airtight containers. Humidity is the enemy! For extra protection, sprinkle a bit of food-grade diatomaceous earth at the bottom of your storage container. Warning: Avoid basements if they’re damp.
What can I do with kale seed pods if they won’t dry properly?
If humidity ruins your pods, don’t toss them! Crush dried pods (even if moldy) into a fine powder and use as a nutrient-rich compost activator. Alternatively, roast them lightly to remove moisture, then store in the freezer for up to 6 months. Note: Avoid consuming moldy pods—save them strictly for compost or soil amendments.
Are kale seed pods edible, or just for seeds?
While pods themselves aren’t typically eaten, their young, tender shoots (before pods harden) can be harvested like microgreens! Blanch and sauté them for a peppery, kale-like bite. Just skip the woody, mature pods—they’re tough and bitter. Bonus: Save seeds for next year’s garden!
Wrapping up and next steps
Harvesting kale seed pods isn’t just a clever way to reduce waste—it’s a rewarding step toward year-round sustainability in your garden!
By saving seeds from mature pods, you unlock the potential for fresh, homegrown kale even in colder months, all while embracing a zero-waste mindset. 🌱 Whether you’re a seasoned gardener or just starting, this simple practice connects you deeper to the cycle of growth and renewal.
Ready to take the next step? Start small—try harvesting a few pods this season, experiment with storage methods, and watch your skills (and harvests!) flourish. Who knows? You might just inspire others to join the movement. Happy growing! 🌿