
Lawn
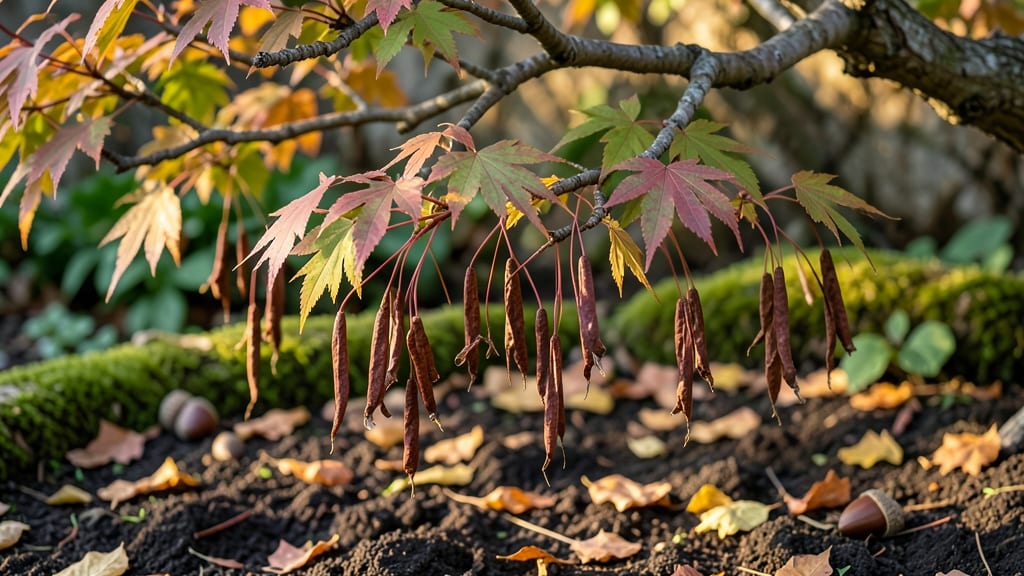
Cold-stratifying Japanese maple seed pods unlocks the secret to growing your own stunning trees. 🌿 Those papery wings aren't just for show—they hold the potential for next year's vibrant foliage. I've struggled with store-bought saplings that never quite match the beauty of their parents, so I turned to seed-growing instead.
The process mimics nature's timing perfectly: collect pods in fall, clean them carefully, then store them in a cold, moist environment for 60-90 days. This mimics winter's natural dormancy period, breaking the seeds' stubborn resistance to sprouting.
You'll need a simple mix of sand and peat moss, plus patience—true germination takes 2-3 months even after stratification.
What you end up with are delicate seedlings that develop the signature lace-like leaves and brilliant fall colors of Japanese maples. The first year focuses on root development, but by year two, you'll see those iconic leaves unfurling with shockingly lush detail.
The real payoff comes in 5-7 years when your tree starts flowering—something you can't get from a nursery-bought plant.
Works best in zones 5-8 where winters are cold enough for natural stratification, but container growing lets you adapt to warmer climates. The key is consistency—don't rush the cold period, and keep seedlings protected from strong winds until they're established. Here's how to make it work without the guesswork.
📚 In This Guide
- What you need
- Instructions
- Tips and common mistakes
- Wrapping up and next steps
What you need
- ● Japanese maple seed pods: Freshly harvested (or stored in a cool, dry place for up to 6 months). Aim for at least 10 pods for better success rates.
- ● Cold-stratification medium: Option 1: Moistened peat moss or coconut coir (2–3 cups).
- ● Option 2: Damp paper towels (folded to hold seeds snugly).
- ● Sealed plastic bag or airtight container: A quart-sized ziplock bag or small Tupperware with ventilation holes (use a toothpick to poke tiny holes).
- ● Refrigerator: A standard home fridge (35–40°F) for 60–90 days.
- ● Planting pots: Small 4-inch diameter pots with drainage holes (2–3 pots). Use a well-draining seed-starting mix (e.g., 50% perlite + 50% peat moss).
- ● Spray bottle: For gentle watering (avoid over-saturating!).
- ● Grow lights or sunny windowsill: A 12–16 hour daylight setup post-stratification.
- ○ Humidity dome or plastic wrap: To retain moisture during germination (optional but helpful).
- ● Seed germination mat: Keeps soil warm (70–75°F) for faster sprouting.
- ● pH test kit: Ensure your soil mix is slightly acidic (6.0–6.5)—Japanese maples prefer it!
- ● Fungicide (e.g., hydrogen peroxide 3%): Lightly spray soil to prevent mold.
- ● Label maker: Tag your pots to track germination dates (trust us, it’s a game-changer!).
Step-by-step guide for cold-stratifying Japanese maple seed pods
Here’s how to break dormancy and coax those delicate seedlings into life—just like the pros do.
🌱 Step 1: Harvest and Prepare the Seed Pods
Collect mature seed pods from your Japanese maple in late fall when they’ve turned brown and papery. They should release seeds easily when gently squeezed. Remove any damaged or shriveled pods—they won’t germinate. Store the viable pods in a paper bag in a cool, dry place until you’re ready to stratify.
Before stratification, soak the pods in lukewarm water for 12 hours to soften the outer husk. This mimics natural winter moisture and helps the seed break through faster. Drain well afterward—excess water during stratification invites rot. I like to place them on a paper towel to air-dry slightly before moving to the next step.
❄️ Step 2: Cold-Stratify for 60-90 Days
Fill a sealed plastic bag with a damp mix of equal parts peat moss and perlite—this keeps moisture consistent without suffocating the seeds. Place the pods inside, ensuring they’re surrounded but not packed tightly. Seal the bag and place it in your refrigerator’s crispier drawer (around 35-40°F).
Check the bag every 2 weeks—the mix should stay damp like a wrung-out sponge. If the pods look shriveled, add a few drops of water. Cold stratification mimics winter’s slow thaw, breaking dormancy. After 90 days, you’ll see tiny roots peeking through the husk—that’s your cue they’re ready for planting.
🪴 Step 3: Plant Stratified Seed Pods in Growing Medium
Fill small 2-inch pots with a sterile seed-starting mix (never garden soil—it’s too dense). Plant each pod ½ inch deep, leaving the pointed end up. Gently press the soil around it to ensure good contact. Label each pot with the variety and date—Japanese maples can take 2-3 years to bloom, so patience is key.
Place the pots in a shady spot (indirect light only) and keep the soil evenly moist—not soggy, not dry. A humidity dome helps retain moisture while preventing fungal issues. Within 4-6 weeks, you’ll see the first true leaves emerge. This is the moment you’ve been waiting for—proof the stratification worked.
☀️ Step 4: Transition to Outdoor Conditions
Once seedlings show 3-4 sets of leaves, they’re ready for their first taste of outdoor life. Start by placing them in a sheltered, shaded spot for 2 hours daily, gradually increasing exposure over 2 weeks. This process, called hardening off, toughens their stems and leaves for full sun.
After 14 days, transplant them into the ground or larger pots in a location with dappled shade (morning sun, afternoon shade). Japanese maples are slow growers—expect 6-12 inches of growth in their first year. Mulch around the base to retain moisture and protect roots from temperature swings.
⏰ Step 5: Maintain Through the First Growing Season
Water deeply once a week (or when the top 1 inch of soil feels dry). Overwatering is the #1 killer of young maples—always check before watering. Fertilize lightly in spring with a balanced 10-10-10 formula, but skip heavy feeding. These seedlings need time to establish roots before they can handle rich soil.
Watch for aphids or spider mites—common pests on tender new growth. Spray with neem oil if you spot clusters. By autumn, your seedlings will look like miniature maples, ready to overwinter. With proper care, they’ll reward you with vibrant foliage and eventual blooms in just a few years.
Tips & tricks for perfect Japanese maple seed pod germination
Here's what I learned after years of trial and error—these small details make all the difference with delicate Japanese maple seeds.
Pod Selection: The quality of your seed pods determines your success rate. Look for pods that are fully brown and papery, with no cracks or mold. The best pods will release seeds easily when gently squeezed—if they feel hard or shriveled, they won't germinate. I've found that pods collected from trees with vibrant foliage produce the most vigorous seedlings. Store them in a paper bag in your fridge until ready to stratify, which preserves their viability for up to 6 months.
Stratification Medium: The peat moss and perlite mix is crucial for proper moisture balance. I recommend using coarse perlite rather than fine—it prevents compaction and allows better airflow. Before mixing, sterilize both components by baking at 200°F for 30 minutes to eliminate any pathogens. This prevents fungal issues during the 60-90 day stratification period. The mix should feel like a wrung-out sponge—never soggy, as this can cause rot.
Temperature Consistency: While the refrigerator's crispier drawer maintains around 35-40°F, I've noticed that some models have hot spots. Place your bag on the middle shelf rather than the door where temperatures fluctuate. If your fridge runs warmer, consider using a seed stratification fridge or even a garage refrigerator if you have one. The key is maintaining that steady 35-40°F range throughout the entire 90-day period.
Germination Timing: After the full 90 days, you might not see immediate results—sometimes it takes an extra 1-2 weeks for roots to emerge. Don't be tempted to open the bag early to check! The moment you see tiny white roots peeking through the husk, that's your cue to plant. I've had batches where germination took 95 days rather than the standard 90, and they still produced healthy seedlings. Patience is absolutely key with these delicate seeds.
Pro Tips for Japanese Maple Seed Pods
- Here's what I learned after years of trial and error—these small details make all the difference with delicate Japanese maple seeds.
- Pod Selection: The quality of your seed pods determines your success rate.
- Stratification Medium: The peat moss and perlite mix is crucial for proper moisture balance.
Frequently asked questions
about Japanese maple seed pods—because growing these beauties from seed can feel like solving a puzzle! Here are answers to the most common queries to help you navigate the process with confidence.Do Japanese maple seed pods always produce viable seeds?
Not always! Viability depends on the tree’s health, age, and pollination success. Mature trees (10+ years) yield the best seeds. Look for plump, brown pods—they’re more likely to contain seeds. If pods are shriveled or empty, try collecting from a different tree or wait for next season.
How long does cold stratification take for these seeds?
Japanese maple seeds need 60–90 days of cold, moist stratification (40–50°F). Start in late fall or use a refrigerator with damp peat moss. Pro tip: Label your containers and check moisture weekly—too wet = mold; too dry = failed germination.
Can I plant Japanese maple seeds directly outside in fall?
Yes, but success rates drop without controlled stratification. If planting outdoors, sow seeds in well-draining soil (like a raised bed) in late fall, cover lightly with mulch, and protect from pests. For higher reliability, stratify indoors first—it mimics nature’s timing more accurately.
What if my seeds won’t germinate after stratification?
Don’t panic! Try these fixes:
- Check moisture: Seeds need consistent dampness (not soggy). Use a spray bottle to mist.
- Test viability: Cut open a seed—if it’s firm and greenish, it’s good; mushy = discard.
- Adjust warmth: Germination speeds up at 65–75°F. Move pots to a sunny windowsill or use a heat mat.
- Be patient: Some seeds take 3–6 months to sprout—wait it out!
Are there alternatives to growing from seed pods?
If seed germination feels too slow or risky, consider:
- Grafted saplings: Nurseries sell disease-resistant cultivars (e.g., ‘Bloodgood’ or ‘Emperor I’).
- Layering: Bend a low branch to the ground, cover with soil, and wait for roots to form.
- Air layering: Wrap a branch with damp moss and plastic—great for mature trees.
Wrapping up and next steps
Japanese maple seed pods may seem delicate, but with the right cold-stratification technique, you can unlock next year’s stunning blooms with confidence! 🌱 Whether you’re a seasoned gardener or just starting out, this method ensures higher germination rates and healthier saplings. Ready to take the next step?
🌟 Your Next Move
Now that you’re equipped with the know-how, gather your supplies and start stratifying those pods this fall. Keep a journal to track progress—you’ll be amazed at how rewarding it is to watch tiny seeds transform into vibrant trees. Happy gardening!