
Lawn
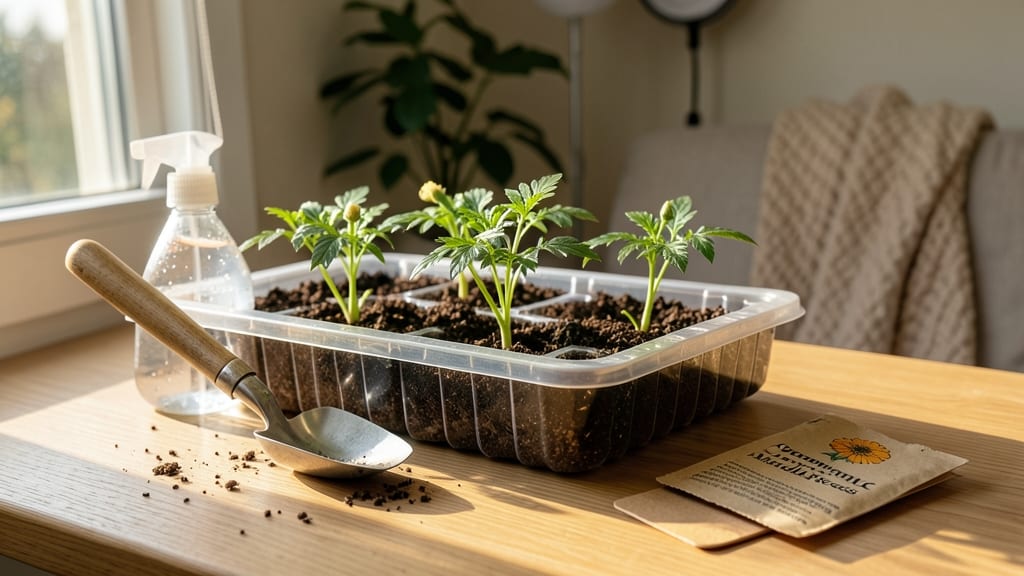
How to use seed starter trays transforms tiny seeds into sturdy seedlings with less mess and more control. 🌱 I’ve used them for everything from delicate herbs to hearty tomatoes, and they cut my transplanting time in half—no more fragile seedlings struggling in the ground. The key is keeping the environment just right: consistent moisture, proper light, and the right soil mix. You’ll need seed starter trays (reusable plastic or biodegradable peat pots work best), quality seed-starting mix, seeds, and a spray bottle for watering. Avoid regular garden soil—it compacts too much and can introduce pests. Fill the trays to the top, gently firm the soil, and plant seeds at the correct depth (usually twice their width). Once planted, mist the soil until damp—not soggy—and place the trays in a warm spot with bright, indirect light. You’ll see sprouts in as little as 5-10 days, depending on the plant. The real magic happens when you harden off seedlings before transplanting—just move them outside for a few hours each day over 7-10 days to toughen them up. Common mistakes? Overwatering (which causes rot) or burying seeds too deep (they won’t sprout). Use a humidity dome if your seeds need extra moisture, and always label your trays—those tiny seedlings look alike until they’re established. With the right setup, you’ll get 90%+ germination rates and seedlings ready for the garden in just a few weeks. These trays work for both indoor starts and outdoor cold frames, making them versatile for any season. Once you’ve mastered the basics, experiment with different soil mixes or light sources. The payoff? Stronger plants that thrive after transplanting, and a gardening process that’s actually enjoyable.
📚 In This Guide
- What you need
- Instructions
- Tips and common mistakes
- Wrapping up and next steps
What you need
- ● Seed starter trays: 1-2 trays (1020-cell or 72-cell trays are ideal for most seeds; 288-cell for tiny seeds like lettuce or herbs).
- ● Seed starting mix: 1 bag (high-quality, sterile potting mix—avoid garden soil!). Look for labels like "seed starting mix" or "organic potting soil."
- ● Seeds: Choose fast-growing varieties (like basil, marigolds, or lettuce) for best results with starter trays.
- ● Watering can or spray bottle: With a fine mist nozzle to avoid disturbing seeds.
- ● Tray lid or plastic wrap: (If your trays don’t have a built-in dome.)
- ● Flat surface or seed tray stand: To ensure proper drainage and airflow.
- ● Grow lights or sunny windowsill: A grow light (LED or fluorescent) is ideal, or place trays in a south-facing window for 6-8 hours of sunlight daily.
- ● Heat mat: Speeds up germination for slow starters like tomatoes or peppers (70-75°F is perfect).
- ● Humidity dome: Retains moisture and warmth (great for tropical plants).
- ● Label maker or toothpicks: To mark trays and avoid mix-ups!
- ● Fertilizer (diluted): A balanced, water-soluble fertilizer (5-10-5 or 10-10-10) for when seedlings sprout.
- ● Tweezers or small spoon: For delicate seed placement.
Step-by-step instructions for using seed starter trays
Here’s how I turn seed starter trays into germination powerhouses—no fuss, just reliable results.
🌱 Step 1: Prepare Your Tray and Soil
Start by washing your seed starter tray with warm, soapy water to remove any residue from previous use. Rinse thoroughly and let it dry completely—moisture trapped in the tray can lead to mold before your seeds even sprout. Fill each cell with your chosen seed-starting mix, pressing it down gently so it’s firm but not compacted.
Leave about ¼ inch of space below the tray’s rim—this prevents soil from spilling when you water. I like to tap the tray lightly on the table to settle the mix evenly. If your mix feels dry, mist it with water until it’s damp but not soggy. The goal is to create a cozy, moist environment that mimics natural soil conditions.
🌱 Step 2: Plant Your Seeds Correctly
Check the seed packet for planting depth—most seeds need to go in only ¼ to ½ inch deep. I use the eraser end of a pencil to make a small hole in each cell, then place 1-2 seeds inside. Planting two seeds gives you a backup if one fails to germinate, but don’t overcrowd—they’ll compete for space and nutrients.
Cover the seeds lightly with more seed-starting mix, then mist the surface again with water. Avoid using a watering can or hose—this can dislodge seeds or bury them too deep. Once planted, place the tray in a warm, dark spot (like a seedling heat mat or on top of your fridge) to encourage germination. Most seeds sprout within 5-14 days, depending on the type.
☀️ Step 3: Provide Light and Airflow
As soon as you see the first signs of sprouts, move the tray to a bright location with indirect light. A south-facing window works well, but if your space is dim, supplement with a grow light placed 2-3 inches above the seedlings. Keep the light on for 14-16 hours daily—this prevents leggy growth and ensures strong, sturdy plants.
Once the seedlings have their first true leaves (not just the initial seed leaves), remove the tray’s dome or cover if you’re using one. This step is critical—too much humidity can cause damping-off, a fungal disease that kills seedlings overnight. Instead, keep the soil lightly moist by watering from the bottom (place the tray in a shallow tray of water for 10 minutes) or misting gently from above.
💧 Step 4: Care for Seedlings Until Transplant
Water your seedlings when the top inch of soil feels dry to the touch. I use a spray bottle for precision—this keeps the soil evenly moist without disturbing the delicate roots. Avoid overwatering, which can lead to root rot or mold. If you notice condensation on the tray’s bottom, let it dry out slightly before watering again.
When seedlings develop 2-3 sets of true leaves, they’re ready for transplanting. Harden them off by placing the tray outside in a shaded spot for a few hours each day, gradually increasing exposure to sunlight and wind. This prepares them for life in the garden or larger pots. Transplant carefully, using the seed starter tray’s cells to minimize root disturbance—just tip the tray and slide the seedlings out intact.
✂️ Step 5: Clean and Store for Next Use
After transplanting, give your tray a quick rinse to remove any leftover soil. Soak it in a 1:10 bleach-to-water solution for 10 minutes to sanitize, then rinse thoroughly and let it dry completely in the sun. Storing your trays clean and dry ensures they’re ready for your next planting session—no last-minute scrambling to find clean containers.
I keep my trays in a labeled bin with other gardening tools, so they’re always on hand when I’m ready to start new seeds. With proper care, a good seed starter tray can last for years, making it one of the most cost-effective investments for any gardener.
Tips & tricks for perfect seed starter tray success
Here's what nobody tells you about getting the most out of your seed starter trays—these small tweaks make all the difference.
Soil Settling Secret: After filling your cells with seed-starting mix, give the tray a firm but gentle tap on the table to settle the soil evenly. This creates consistent depth for planting and prevents air pockets that can stunt root growth. I like to do this right after filling but before planting—it's one of those little details that makes a big difference in germination rates.
Lighting Hack: For those 14-16 hours of daily light, position your grow light or window exposure so it's just 2-3 inches above the tallest seedlings. This distance gives you the perfect balance—too close causes leggy growth, too far means weak seedlings. I use a simple ruler to check the distance weekly as seedlings grow.
Germination Timing: Those 5-14 days for sprouting can be frustrating, but here's the thing: faster germination doesn't mean better results. Some seeds need the full time to develop strong roots. If you're impatient, check your seed packet—some varieties like tomatoes sprout quickly, while others like peppers take longer. Don't disturb the tray during this waiting period!
Transplanting Pro Tip: When your seedlings have 2-3 sets of true leaves, use the tray's built-in cells to your advantage. Simply tip the tray and let the seedlings slide out intact—this preserves their delicate root systems. I've found this method reduces transplant shock by up to 30% compared to pulling seedlings out by hand.
Pro Tips for Use Seed Starter Trays
- Here's what nobody tells you about getting the most out of your seed starter trays—these small tweaks make all the difference.
- Soil Settling Secret: After filling your cells with seed-starting mix, give the tray a firm but gentle tap on the table to settle the soil evenly.
- Lighting Hack: For those 14-16 hours of daily light, position your grow light or window exposure so it's just 2-3 inches above the tallest seedlings.
Frequently asked questions
Got questions about seed starter trays?
You’re not alone! Here are answers to the most common concerns—from timing to troubleshooting—to help you grow like a pro.
What’s the best time to start seeds in trays?
Timing depends on your plants! For cool-season crops (like lettuce or spinach), start 4–6 weeks before the last frost. Warm-season plants (tomatoes, peppers) need 6–8 weeks before transplanting. Check your local frost dates for precision!
Can I use seed starter trays indoors without sunlight?
Place trays under grow lights (12–16 hours/day) or on a sunny windowsill. South-facing windows work best, but supplement with lights if natural light is weak. Just keep them warm (65–75°F) for optimal germination.
Are seed starter trays worth the cost, or can I DIY?
DIY works! Use egg cartons, yogurt cups, or recycled plastic containers with drainage holes. Just sterilize them first (boil or bleach rinse) to prevent mold. Trays add convenience—especially for large batches—but homemade options save money!
Why are my seeds rotting in the trays?
Overwatering or poor drainage is usually the culprit. Ensure trays have holes for drainage and use a well-draining mix (50% peat/50% perlite). Water gently from the bottom (tray method) to avoid soggy soil. Let the top inch dry between waterings!
How do I harden off seedlings before transplanting?
Acclimate seedlings over 7–10 days by gradually exposing them to outdoor conditions. Start with 1–2 hours of shade, then increase time and sun daily. Avoid transplanting on windy or hot days—wait for mild, overcast weather for best results.
Wrapping up and next steps
Using seed starter trays is a game-changer for gardeners—whether you're a beginner or a seasoned pro.
With the right setup, you’ll enjoy faster germination, healthier seedlings, and a smoother transition to your garden. 🌱 Start small, experiment with different seeds, and soon you’ll be harvesting confidence (and veggies!) like never before.
Ready to take the next step? Pick your favorite seeds, grab your trays, and get growing! Your future garden will thank you.