
Size
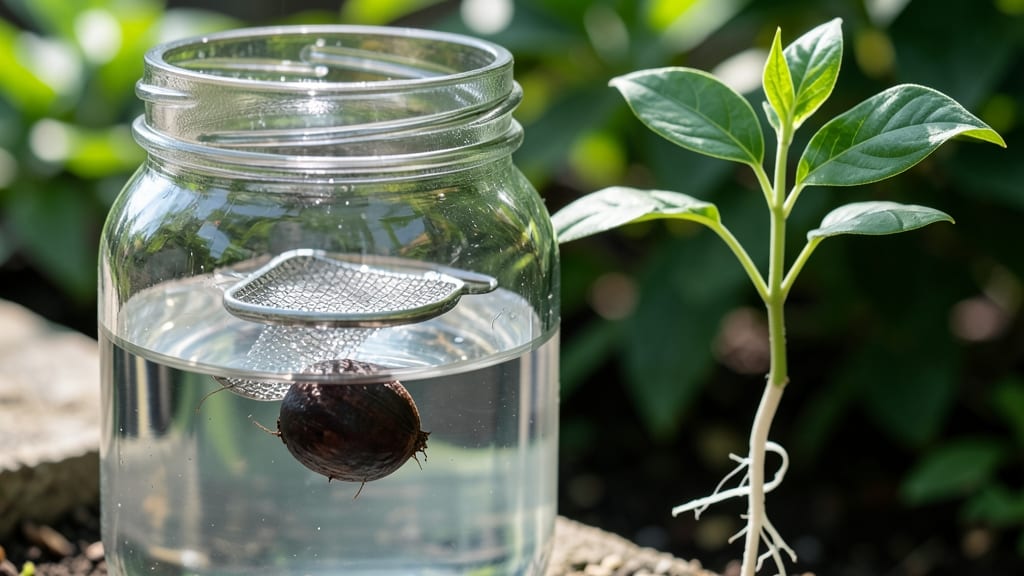
Growing a mango seed in water is one of those magical gardening projects that feels like watching a tiny miracle unfold. 🌱 The best part? You’ll see roots sprout in just 2-3 weeks—no soil required.
I tried this with a seed from a grocery-store mango, and within weeks, I had a thriving little tree that’s now over a year old (and still growing!).
You only need a few simple supplies: a mango seed, a glass jar, water, and a little patience. The process is foolproof for beginners, though I’ll warn you—it’s easy to overwater or forget to change the water.
Keeping the seed moist (not soggy) and in bright, indirect light is key to avoiding mold or root rot.
By the time those first roots reach 2-3 inches, you’ll be ready to transplant into soil. The seedling will grow slowly at first, but with consistent care, it’ll develop into a sturdy young tree.
Just don’t expect fruit anytime soon—mango trees from seed can take 5-10 years to bear, but the journey is half the fun.
This method works for any mango seed, whether from a store-bought fruit or a homegrown harvest. Just be prepared for a long-term project—your little tree might outlive you, but that’s the beauty of growing something from scratch. Ready to give it a try?
📚 In This Guide
- What you need
- Instructions
- Tips and common mistakes
- Wrapping up and next steps
What you need
- ● Fresh mango seed: Choose a seed from a ripe, organic mango (avoid treated or hybrid seeds). Quantity: 1 per container.
- ● Clean glass or jar: A clear glass (8–16 oz) with a wide mouth works best for visibility. Tip: Sterilize with warm, soapy water to prevent mold.
- ● Filtered or distilled water: Tap water may contain chlorine or chemicals that hinder root growth. Quantity: Enough to cover 1–2 inches of the seed.
- ● Small plate or saucer: To stabilize the glass and catch spills.
- ● Toothpick or skewer: For gently prodding the seed to encourage sprouting.
- ○ Hydroponic nutrient solution (optional): A pinch of cinnamon or activated charcoal can prevent bacterial growth.
- ● Grow light or sunny windowsill: If your space lacks natural light (6+ hours/day).
- ● Notebook or app: To track root growth and water changes.
Step-by-step instructions for growing a mango seed in water
Here's how to watch roots sprout in just a few weeks—no soil required.
🌱 Step 1: Select and Prepare the Seed
Start with a fresh, plump mango seed—older seeds germinate slower. Rinse it under running water to remove any fruit residue, then let it dry completely for an hour. I like to soak the seed in warm water for 12 hours first; this softens the tough outer shell and speeds up germination. Place the seed between two paper towels, dampen them, and fold the towels around the seed. Store it in a sealed plastic bag overnight.
Check the seed the next morning. If it's slightly wrinkled or cracked, it's ready. If not, repeat the soaking process for another 12 hours. The goal is to weaken the seed coat so water can penetrate easily. I've found that seeds with a small crack along one side germinate fastest—nature's way of telling you it's ready to grow.
💧 Step 2: Set Up the Water Container
Use a clear glass or jar with a wide mouth—this lets you see root growth clearly and prevents the seed from tipping over. Fill it with room-temperature water (around 70-75°F) to a depth of 1-2 inches. Too much water drowns the seed; too little leaves it exposed and dry. I like to use a mason jar because it's stable and easy to clean.
Place the seed on top of the water, with the cracked side facing down. The seed should float slightly but stay mostly submerged. If it sinks completely, it's too heavy—add a tiny bit more water until it floats just right. Cover the jar loosely with plastic wrap or a lid to retain moisture while still allowing a little airflow. This creates a mini greenhouse effect that encourages faster root growth.
☀️ Step 3: Position for Optimal Growth
Find a spot with bright, indirect light—direct sunlight heats the water and can bake the seed, while too little light slows germination. A kitchen windowsill or under a grow light works well. You'll know the light is right when the water stays warm to the touch but doesn't feel hot. I keep mine near a south-facing window but not in direct rays; the roots grow best in consistent, gentle light.
Change the water every 2-3 days to prevent bacteria or mold from forming. Fresh water keeps the seed healthy and speeds up root development. Watch for the first signs of growth—a tiny white root pushing out from the bottom of the seed. This usually happens within 7-14 days, but some seeds take up to 3 weeks, especially if they're older or the water was too cold.
🌿 Step 4: Monitor and Encourage Root Development
Once roots appear, they'll grow quickly—sometimes ½ inch per day if conditions are ideal. Keep the water level at 1-2 inches to support the roots without submerging them completely. If roots start to curl or turn brown, the water's either too hot or too cold. Adjust the light or move the jar to a cooler spot if needed.
When roots reach 3-4 inches, it's time to transition to soil. Don't wait too long—roots this size are strong enough to support a seedling but still delicate. I like to plant them in a small pot with well-draining soil and keep it lightly moist until the first leaves appear. The key is patience; rushing this step can shock the seedling and stunt its growth.
⏰ Step 5: Transition to Soil and Care for the Seedling
Fill a 4-inch pot with a mix of potting soil and perlite (half and half) to improve drainage. Make a small hole in the center and gently place the rooted seed inside, covering it with ½ inch of soil. Press lightly to secure it, but don't pack the soil too tightly—you want air pockets for roots to spread.
Water the soil until it's damp but not soggy, then place the pot in bright, indirect light for a week. Keep the soil consistently moist but not waterlogged; overwatering at this stage is the fastest way to kill a young seedling. You'll see the first true leaves (not the seed leaves) in 2-4 weeks. This is your signal that the plant is thriving and ready for more sunlight.
Tips & tricks for growing a mango seed in water
Here's what I learned after watching dozens of mango seeds transform—these tricks make all the difference in your success rate.
Seed Selection Tip: Look for seeds that are plump and heavy for their size—these have the highest germination potential. I always tap two seeds together: the one that makes a hollow sound is ripe and ready, while a dull thud means it's past its prime. The 12-hour soak is non-negotiable for breaking dormancy, but don't skip the drying step afterward. Damp seeds develop mold faster, and you want that outer shell to soften just enough to crack naturally.
Container Stability Trick: The 1-2 inch water level is perfect for root development, but stability matters just as much. I've seen seeds tip over and drown when using narrow jars—opt for containers at least 3 inches wide at the top. A mason jar with a wide mouth works best because it gives roots room to grow downward without crowding. If your container is too small, roots will curl unnaturally, which stresses the seedling.
Light Positioning Secret: That bright, indirect light requirement is crucial, but most people place their jars too close to windows. I test light intensity by holding my hand near the water—if it feels warm after 5 minutes, the seed is getting too much direct heat. For consistent results, position the jar 6-12 inches from the window. South-facing windows work best in the Northern Hemisphere, but rotate the jar daily if you notice uneven root growth on one side.
Root Transition Strategy: When roots hit 3-4 inches, don't rush the soil transition. I've seen seedlings collapse when planted too soon because their roots weren't strong enough to anchor. Before planting, gently swirl the jar to loosen roots, then place them in the soil at the same depth they were growing in water. The ½ inch soil coverage is ideal—any deeper and the seedling struggles to breathe through the soil.
Pro Tips for Grow A Mango Seed In Water
- Here's what I learned after watching dozens of mango seeds transform—these tricks make all the difference in your success rate.
- Seed Selection Tip: Look for seeds that are plump and heavy for their size—these have the highest germination potential.
- Container Stability Trick: The 1-2 inch water level is perfect for root development, but stability matters just as much.
Frequently asked questions
Got questions about growing a mango seed in water?
You’re not alone! Here are answers to the most common concerns—from speed to troubleshooting—to help your little sapling thrive.
How long does it take for a mango seed to sprout roots in water?
With patience and the right conditions, you’ll typically see tiny root hairs in 7–14 days and 1–3 inch roots in 2–3 weeks. Keep the water warm (70–85°F) and change it every 2–3 days to speed things up. Pro tip: If roots stall after 4 weeks, try adding a splash of diluted hydrogen peroxide (1 tsp per cup) to prevent mold.
Can I reuse the same water for my mango seed?
Nope! Stagnant water breeds bacteria and fungus, which can rot your seed or roots. Replace the water every 2–3 days to keep it fresh. Use room-temperature, filtered water (chlorine-free) for best results. If you’re short on time, a quick rinse with fresh water daily works too!
What if my mango seed just sits there and doesn’t grow?
Don’t panic! Some seeds take up to 6 weeks to show signs of life. If yours is still dormant:
- Check viability: Drop it in water—if it sinks, it’s alive!
- Warm it up: Place the jar in a sunny spot (indirect light) or near a heater.
- Scratch the seed: Gently file the hard outer shell with sandpaper to help moisture penetrate.
If nothing happens after 8 weeks, it may be non-viable. Start fresh with another seed!
When should I transplant my mango seedling to soil?
Wait until you see 2–3 healthy roots (1–2 inches long) and a tiny sprout (1–2 inches tall)—usually 4–6 weeks in. Use a small pot with drainage holes and a mix of 50% potting soil + 50% perlite/sand. Water lightly and keep it in bright, indirect light. Pro tip: Trim roots longer than 3 inches to encourage bushier growth!
Can I grow a mango tree from a seed in water if I live in a cold climate?
Water propagation is climate-independent—just keep the jar in a warm spot (like a sunny windowsill or under a grow light). Once roots form, transplant to a pot and move it indoors near a sunny window. Mango trees are tropical, so they’ll need year-round warmth (65°F+) and humidity to thrive long-term. Consider a greenhouse or grow light setup for winter!
What if my seed starts to smell bad or gets mold?
That’s a red flag! A sour or rotten smell means bacteria or mold is setting in. Act fast:
- Rinse the seed and jar with vinegar or hydrogen peroxide (1:10 ratio).
- Replace the water and let it dry for 10 minutes before re-submerging.
- If mold appears, discard the seed and try again with a fresh one.
Prevent this by changing water regularly and using clean jars.
Wrapping up and next steps
Growing a mango seed in water is a simple, rewarding way to nurture new life right on your windowsill! 🌱 With just a few supplies and patience, you can watch roots sprout in just 2-3 weeks—no soil required.
Whether you’re a beginner gardener or a curious kid, this project is a fun, low-pressure way to explore plant growth and even transplant your seedling later.
Once your mango seedling has strong roots, the next exciting step is transplanting it into soil. Research the best potting mix and light conditions to keep your little tree thriving—your future mango tree is just a few weeks away! 🌳