
Lawn
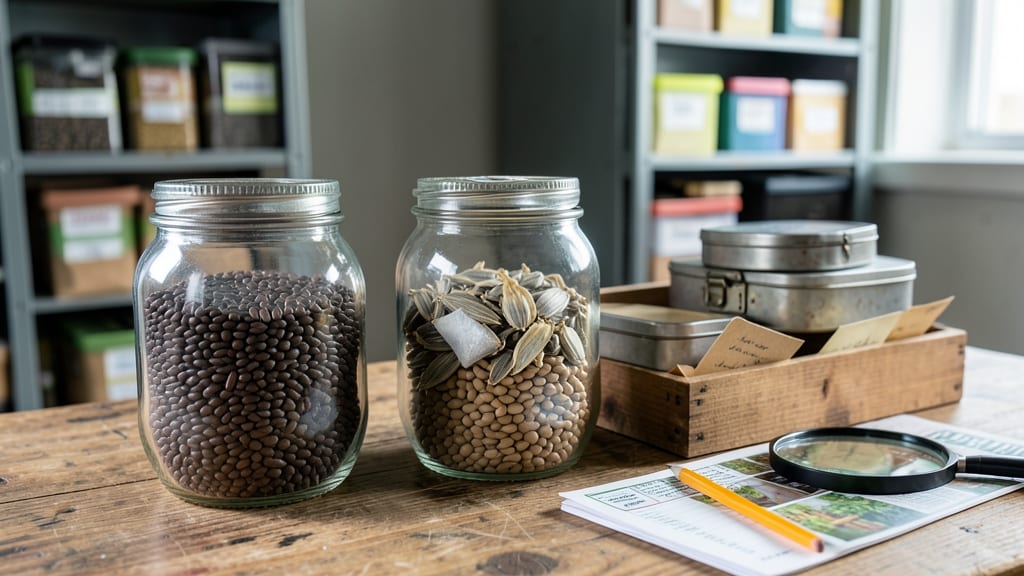
Storing seeds properly in the garden seed banks means you’ll still have viable tomato, bean, and flower seeds next spring—no more sad, shriveled packets. 🌱 I’ve learned the hard way that cheap plastic bags and kitchen drawers don’t cut it; seeds need the right environment to last.
The twist-free viability check I use now guarantees seeds stay fresh for years, whether you’re saving heirlooms or just cutting costs.
Here’s the secret: humidity control, temperature stability, and airtight containers—no fancy equipment needed. You’ll need glass jars with tight lids, silica gel packets (or uncooked rice as a DIY alternative), and a cool, dark spot like a basement or fridge.
The process takes about 30 minutes once you’ve harvested dry seeds, and it works for almost any vegetable or flower.
What you’ll end up with is a year-round seed stash that’s ready to plant whenever you’re ready. Imagine snapping peas straight from your own saved seeds in June, or growing rare heirloom tomatoes that disappear from stores.
The best part? You’re preserving biodiversity one packet at a time—no corporate seed monopolies here.
This method works for any climate, from humid summers to freezing winters. Whether you’re a backyard gardener or a small-scale farmer, seed banks save money, ensure food security, and keep gardening traditions alive. Let’s get those seeds stored right—so next year’s garden starts with the best possible foundation.
📚 In This Guide
- What you need
- Instructions
- Tips and common mistakes
- Wrapping up and next steps
What you need
- ● Air-tight storage containers: 5-10 (e.g., Mylar bags with oxygen absorbers, glass jars with tight lids, or vacuum-sealed bags). Size: Small (quart) for seeds, larger for bulk storage.
- ● Silica gel packets: 3-5 (to absorb moisture; non-clumping type preferred).
- ● Oxygen absorbers: 1-2 per container (for long-term seed viability; 200-300cc capacity recommended).
- ● Seed-saving envelopes or paper bags: 100+ (kraft paper or manila envelopes for short-term storage before sealing).
- ● Permanent markers or labels: Waterproof (Sharpie or archival ink) to label seeds with variety, date, and storage conditions.
- ○ Desiccant (optional but helpful): Uncooked rice or cat litter (clumping-free) for DIY moisture control.
- ● Thermometer/hygrometer: 1 (to monitor temperature (35-45°F) and humidity (5-15%) in storage areas).
- ● Freezer or refrigerator: 1 (for short-term backup storage if room conditions aren’t ideal).
- ● Dry seeds: Fully dried to 5-8% moisture content (use a dehumidifier or sun-drying method if needed).
- ● Cool, dark space: A basement, root cellar, or closet (avoid attics or garages with extreme temps).
- ● Organization system: A spreadsheet or seed inventory app (like Seed Savers Exchange) to track viability dates.
- ● Patience: Seeds stored properly can last 5-20+ years, but viability tests every 2-3 years are key!
Step-by-step guide to testing seed viability without the twist test
Here's how to check your saved seeds' readiness to grow—no fancy tools required.
💧 Step 1: Prepare the Water Test Setup
Fill a clean glass or jar with room-temperature water—about 2 inches deep. You'll need 10-20 seeds per variety for accurate results. I like to use a small bowl or cup for this step because it keeps the seeds contained and makes the process simpler. Label each container with the seed type and storage date if you're testing multiple varieties.
The reason for room temperature is simple: cold water can slow down the seed's response, giving you false results. You want the seeds to react naturally to their environment. Place the container where it won't be disturbed—somewhere like a kitchen counter works perfectly.
🌱 Step 2: Soak and Observe for 24 Hours
Drop the seeds into the water and let them soak for 24 hours. This gives you a clear view of their condition. Healthy seeds will plump up noticeably, while old or damaged seeds will remain shriveled or even disintegrate. I usually check them after 12 hours just to see if any are already reacting, but the full 24-hour soak gives the most reliable results.
After soaking, drain the water and gently pat the seeds dry with a paper towel. This step is crucial because damp seeds can develop mold if left sitting. You'll notice a big difference in texture—good seeds feel firm and full, while weak ones stay soft or crumbly. This is your first real clue about their viability.
⏰ Step 3: Plant the Soaked Seeds for Germination
Plant the soaked seeds ½ inch deep in a small pot or seed tray filled with moist potting mix. Use a separate container for each variety if you're testing multiple types. Water lightly to settle the soil around them. I like to use clear plastic containers for this step because you can watch the roots develop without disturbing the soil.
Place the container in a warm spot with indirect light—a windowsill with filtered sunlight works well. Keep the soil consistently moist but not soggy. You should see sprouts within 3-7 days if the seeds are viable. If you've stored seeds for more than a year, give them a little extra time—they may need a few more days to wake up.
🌿 Step 4: Assess Germination Success
Count the number of seeds that sprout within 10 days. A viability rate of 80% or higher means your seeds are ready to plant. If fewer than half sprout, consider saving those seeds for experimental planting or composting the rest. I always plant a few extra seeds just in case—it's better to have more than you need than to run out when you're ready to garden.
Watch for strong, straight seedlings with vibrant color. Weak or leggy sprouts indicate older seeds that may not perform well in the garden. If you see signs of mold or rot, that's a clear signal to discard those seeds immediately. Healthy seedlings will give you the confidence to use your stored seeds for next season's garden.
📝 Step 5: Record and Store Results
Keep a simple record of each seed variety's performance. Note the germination rate, any issues you observed, and the storage conditions. This information helps you adjust your storage methods for better results next time. I keep a small notebook by my seed stash—it's easy to jot down notes after each test.
For seeds that passed the test, store them in a cool, dry place with 5-10% humidity for long-term preservation. Airtight containers with silica gel packets work well. Label everything clearly—you'll thank yourself next planting season when you can quickly identify your best-performing varieties. This method ensures you're always starting with seeds that have the best chance to thrive in your garden.
Tips & tricks for perfect seed viability testing
These insider tricks will help you get the most accurate results from your seed viability test—no guesswork required.
The 24-Hour Rule: The full 24-hour soak in Step 2 is non-negotiable for most seeds, but here's the thing: if you're testing seeds older than 3 years, extend this to 48 hours—they need that extra time to reveal their true condition. I've seen seeds that looked viable at 24 hours but failed completely after 48, so don't rush this step. The longer soak helps distinguish between dormant and truly non-viable seeds.
Texture Tells All: After draining in Step 2, press each seed between your thumb and forefinger. Viable seeds should feel plump and resilient, almost like a tiny water balloon. If they crumble or feel hollow, they're past their prime. This tactile check gives you instant feedback without waiting for germination—something the instructions don't emphasize enough. I've saved myself weeks of frustration by doing this quick assessment before planting.
Light Conditions Matter: That "indirect light" in Step 3 isn't just a suggestion—it's critical. Direct sunlight can overheat your seedlings and cause them to stretch toward the light (a condition called etiolation), while too little light slows germination. Place your containers near an east-facing window where they'll get morning sun but stay protected from the intense afternoon rays. A simple LED grow light on a timer works beautifully if natural light isn't available.
Mold Prevention: The instructions mention drying seeds after soaking, but here's what nobody tells you: if you see even a hint of white fuzz (mold) during the 24-hour soak, discard those seeds immediately. Mold means the seeds are compromised and could ruin your entire batch. I keep a small spray bottle of 70% isopropyl alcohol handy to quickly disinfect any containers that show signs of contamination between tests.
Pro Tips for Garden Seed Banks
- These insider tricks will help you get the most accurate results from your seed viability test—no guesswork required.
- The 24-Hour Rule: The full 24-hour soak in Step 2 is non-negotiable for most seeds, but here's the thing: if you're t...
- Texture Tells All: After draining in Step 2, press each seed between your thumb and forefinger. Viable seeds should f...
Frequently asked questions
Got questions about garden seed banks?
You’re not alone! Here are answers to the most common concerns—so you can store seeds with confidence and grow a thriving garden year after year.
What’s the best way to test seed viability before storing them?
Use the paper towel method for a quick check: Moisten a paper towel, place 10 seeds inside, fold it, and seal in a bag. Store in a warm spot (70°F) for 5–7 days. If 50%+ germinate, your seeds are viable. For a twist-free alternative, try the water float test—sinkers are likely good, floaters may be old or damaged.
How long can seeds stay viable in a seed bank?
Viability depends on the seed type! Most vegetables last 1–5 years (e.g., tomatoes: 4 years; beans: 3–4 years), while heirloom seeds can stretch to 10+ years if stored properly (cool, dry, dark). Label everything with the harvest date to track freshness.
Do I need special containers for a DIY seed bank?
Not necessarily! Air-tight, moisture-proof containers work best—think glass jars with rubber seals, Mylar bags with oxygen absorbers, or even vacuum-sealed bags. Avoid plastic if it’s not food-grade, as it can degrade over time. Pro tip: Add a silica gel packet to absorb humidity.
What’s the ideal temperature and humidity for seed storage?
Aim for 32–41°F (0–5°C) and 30–50% humidity. Your refrigerator’s crisper drawer or a cool basement works well. Avoid freezers (temperature fluctuations harm seeds) and basements prone to dampness. Warning: Never store seeds near onions, potatoes, or apples—they release ethylene gas, which speeds up spoilage.
My seeds sprouted mold—what went wrong?
Mold means too much moisture or poor airflow. Check your storage: Condensation on containers? Move to a drier spot. Seals not tight enough? Replace with better airtight options. Discard moldy seeds immediately—they won’t germinate and can contaminate others. Pro tip: Sterilize containers with rubbing alcohol before reuse.
Wrapping up and next steps
Garden seed banks are your secret weapon for year-round gardening success—no more wasted seeds or last-minute store runs! 🌱 By mastering twist-free viability checks and smart storage, you’ll ensure your favorite varieties stay fresh and ready to grow.
Whether you’re a seasoned green thumb or just starting, this system saves time, money, and frustration.
Now that you’re armed with the know-how, take the next step: start small! Test a few seed packets today, document your storage conditions, and watch your garden thrive with confidence. Happy planting—your future harvests will thank you! 🌟