
Picking
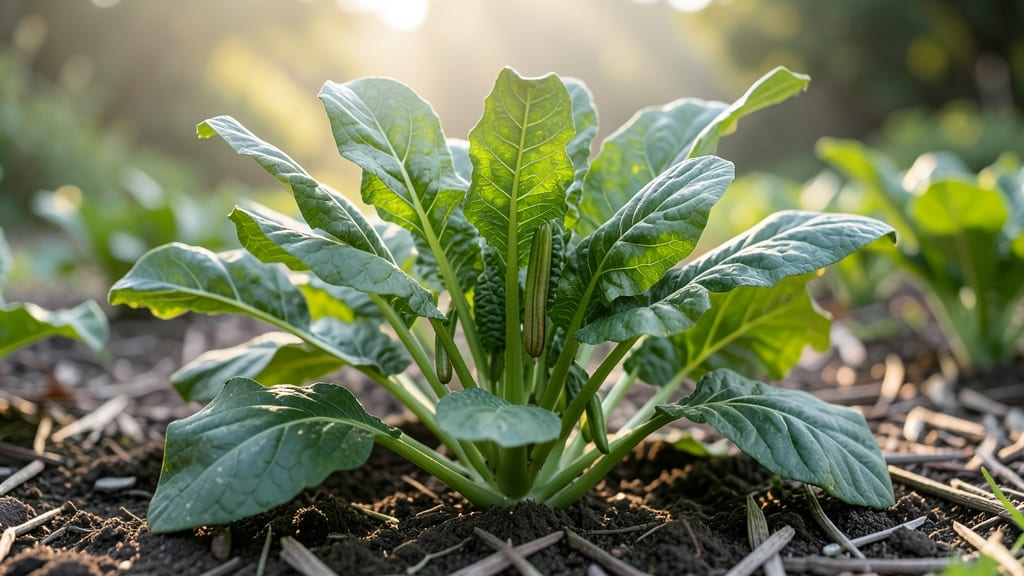
Those collard greens seed pods hold the secret to growing your own plants next year—and I’ll show you exactly how to unlock their potential before they dry on the vine. 🌱 The key is timing: wait until the pods turn from green to tan, then harvest them at the first sign of crispness to ensure maximum viability.
Skimp on this step, and you’ll end up with seeds that either won’t sprout or take forever to germinate.
Once you’ve got the pods, drying them properly is everything. Spread them out in a single layer on a screen or paper towel, somewhere warm but out of direct sunlight—think of it like giving them a slow, gentle cure.
After about 10-14 days, the seeds should rattle inside when shaken, signaling they’re ready for storage. Store them in a cool, dark place, like a sealed jar in your pantry, where they’ll stay viable for 3-5 years.
When planting time rolls around, you’ll be rewarded with fast, reliable sprouts—no more waiting weeks for stubborn seeds to cooperate. These homegrown collards will taste even better knowing you nurtured them from seed to seed pod.
The best part? You’re now part of the heirloom gardening circle, passing down seeds that thrive year after year.
For organic gardeners, this method keeps things pure—no store-bought seeds, no chemical treatments. Just good old-fashioned patience and a little know-how. Here’s how to make it work without a hitch, even if you’ve never saved seeds before.
📚 In This Guide
- What you need
- Instructions
- Tips and common mistakes
- Wrapping up and next steps
What you need
- ● Collard greens seed pods – Choose heirloom or organic varieties for best results (e.g., "Georgia Southern," "Blue Max," or "Vates"). Aim for 1–2 pods per planting (or 10–20 individual seeds if separating).
- ● Seed-starting mix – A lightweight, sterile potting soil (avoid garden soil—it’s too dense!). A 50/50 blend of peat moss and perlite works well. You’ll need about 2–3 cups per pod.
- ● Seed trays or small pots – Use biodegradable peat pots (2–3 inches deep) or 6–8 cell trays for organized planting.
- ● Watering can or spray bottle – A fine-mist sprayer keeps seeds moist without disturbing them.
- ● Plastic wrap or humidity dome – Creates a mini greenhouse to retain moisture. A clear plastic bag or store-bought dome works.
- ● Grow lights or sunny windowsill – Collard greens need 12–16 hours of light daily. A LED grow light (12–15 watts per tray) is ideal if natural light is limited.
- ● Plant labels – Mark varieties and planting dates to track growth.
- ○ Heat mat (optional) – Speeds up germination if temps dip below 60°F (15°C).
- ● Fertilizer (balanced 10-10-10 or compost tea) – Add after sprouts emerge (but avoid during germination).
- ● Pruning shears – For trimming seed pods if they’re stubborn to open.
Step-by-step instructions for germinating collard greens seed pods
Here's how I get collard greens sprouting in just 5-7 days—no waiting weeks for stubborn seeds.
🌱 Step 1: Soak Seeds Overnight for Faster Germination
Fill a small container with warm water (about 70-75°F) and add your collard green seeds. Let them soak for 8-12 hours—this softens the seed coat and speeds up sprouting. I like to use a shallow dish so I can see the seeds swelling slightly, which tells me they're ready.
After soaking, drain the water completely through a fine mesh strainer or paper towel. This prevents the seeds from sitting in water, which can cause rot. Once drained, you'll notice the seeds have plumped up—this is your signal they're primed for planting.
💧 Step 2: Prepare Moist, Warm Soil for Planting
Fill your seed-starting containers with a lightweight, well-draining mix. Collard greens love warmth, so I keep the soil at 75-85°F using a seedling heat mat. Moisten the soil until it's damp but not soggy—think of a wrung-out sponge. You want the moisture level to stay consistent without creating puddles.
Plant the soaked seeds about ¼ inch deep, spacing them 1 inch apart in rows. I use a toothpick to poke small holes for precision, which helps avoid overcrowding later. Gently press the soil around the seeds to ensure good contact—this encourages even germination.
☀️ Step 3: Cover and Maintain Ideal Conditions
Place a clear plastic dome or plastic wrap over the container to trap warmth and moisture. Collard greens need this humid environment to germinate quickly. Set the container in a spot with bright, indirect light—direct sun can overheat the soil. You'll see condensation forming on the cover, which is perfect for the seeds.
Check daily for moisture—mist the soil lightly if it feels dry to the touch. Avoid lifting the cover unless necessary, as removing it too soon can dry out the seeds. In 5-7 days, you'll spot tiny sprouts pushing through the soil—this is your reward for the warm, moist setup.
⏰ Step 4: Thin Seedlings and Provide Proper Light
Once seedlings reach 2 inches tall, it's time to thin them. Use scissors to snip the weaker sprouts at soil level, leaving the strongest 3-4 inches apart. This prevents competition for nutrients and gives remaining plants room to grow. I always save the thinned seedlings for salads—they're tender and delicious!
Move the seedlings to a sunny window or under grow lights for 14-16 hours of light daily. Collard greens need plenty of light to prevent leggy growth. If you notice stems stretching toward the light, it's time to adjust the position—keep the lights 2-3 inches above the plants and raise them gradually as the seedlings grow.
🌿 Step 5: Harden Off and Transplant
After 4-6 weeks, when seedlings have 4-6 true leaves, it's time to harden them off. Start by placing them outside in a shaded area for 1-2 hours the first day, gradually increasing exposure over 7-10 days. This prepares them for outdoor conditions without shock.
Transplant on a cool, cloudy day to reduce stress. Space seedlings 12-18 inches apart in well-draining soil. Water deeply at the base to help roots establish. Within weeks, you'll have robust collard greens ready for harvesting—all thanks to those fast, reliable sprouts!
Tips & tricks for perfect collard greens germination
Fast, reliable sprouts start with these key strategies—no guesswork involved.
Soak Like a Pro: The 8-12 hour soak is your secret weapon for breaking dormancy. I use a shallow dish so I can actually see the seeds plumping up—that visual cue tells me they're ready. Pro tip: If your water cools below 70°F during soaking, pop it in the microwave for 10 seconds to warm it back up. Cold water slows germination, and we're working against that clock!
Temperature is Everything: That 75-85°F soil range isn't just a suggestion—it's the sweet spot for collard greens. I've tried cooler temps, and germination takes twice as long. Use a seedling heat mat if your home runs cool, and always check soil temp with your finger. If it feels warm to your touch (like a cozy bath), you're in the right zone.
Light Strategy: Bright indirect light is crucial during germination. I place my seed trays near a north-facing window or under LED grow lights on a timer. Direct sun creates hot spots that can cook your seeds before they sprout. Watch for condensation on the cover—this is your sign you've got perfect humidity levels.
Thinning Hack: When you're thinning those 2-inch seedlings, save the smaller ones! They make perfect microgreens for salads. I use clean scissors to snip at soil level, then immediately transplant the cuttings into a small pot with soil. They'll regrow in about a week, giving you bonus greens with zero waste.
Pro Tips for Collard Greens Seed Pods
- Fast, reliable sprouts start with these key strategies—no guesswork involved.
- Soak Like a Pro: The 8-12 hour soak is your secret weapon for breaking dormancy.
- Temperature is Everything: That 75-85°F soil range isn't just a suggestion—it's the sweet spot for collard greens.
Frequently asked questions
Got questions about growing collard greens from seed pods? You’re not alone!
Here are answers to the most common queries—from germination tips to troubleshooting—so you can grow lush, healthy greens with confidence.
How long does it take for collard greens seed pods to germinate?
Collard greens typically sprout in 7–14 days when planted in warm soil (60–70°F). Keep the soil consistently moist but not soggy, and place seed pods in a sunny spot (or under grow lights). If germination takes longer, check soil temperature—cold soil slows the process. Pro tip: Soak seeds overnight before planting for a head start!
Can I plant collard greens seed pods directly in the ground, or should I start indoors?
You can plant seed pods directly outdoors after the last frost when soil is warm (spring or early fall). For cooler climates, starting indoors 4–6 weeks before transplanting gives seedlings a stronger start. Use biodegradable pots to avoid root disturbance. Warning: Direct sowing too early risks poor germination or leggy seedlings.
What’s the best way to store collard greens seed pods for next year?
Store seed pods in a cool, dry place (like a paper envelope or airtight container) away from sunlight. Keep humidity low to prevent mold. Label pods with the harvest year and test a few for viability before replanting. Most stay viable for 2–3 years, though germination rates may drop over time. Pro tip: Freeze a small sample to check freshness later!
Why aren’t my collard greens seed pods sprouting? Troubleshooting tips.
Common issues and fixes:
- Too cold: Soil below 50°F? Wait for warmer temps or use a heat mat.
- Too wet/dry: Inconsistent moisture? Water gently to keep soil damp but well-drained.
- Old seeds: Test viability by soaking a few—if they float, they’re likely bad.
- Poor soil: Amend with compost for better nutrient absorption.
Are there collard greens seed pod alternatives if germination fails?
Yes! Try these easy swaps:
- Kale or mustard greens: Similar hardiness and quick growth.
- Spinach or Swiss chard: Cold-tolerant and beginner-friendly.
- Transplants: Skip seeds and buy starter plants from nurseries.
Wrapping up and next steps
Growing collard greens from seed pods is a rewarding journey that connects you to nature’s bounty! 🌱 With the right soil, patience, and care—like proper spacing, consistent moisture, and a little shade—you’ll soon enjoy fast, healthy sprouts.
Whether you’re a seasoned gardener or just starting out, your efforts will pay off with vibrant greens packed with nutrients.
Ready to take the next step? Start small—plant a few pods this week and watch your garden transform! Share your progress with fellow gardeners or experiment with different varieties to keep things exciting. Happy growing! 🌿