
Planting
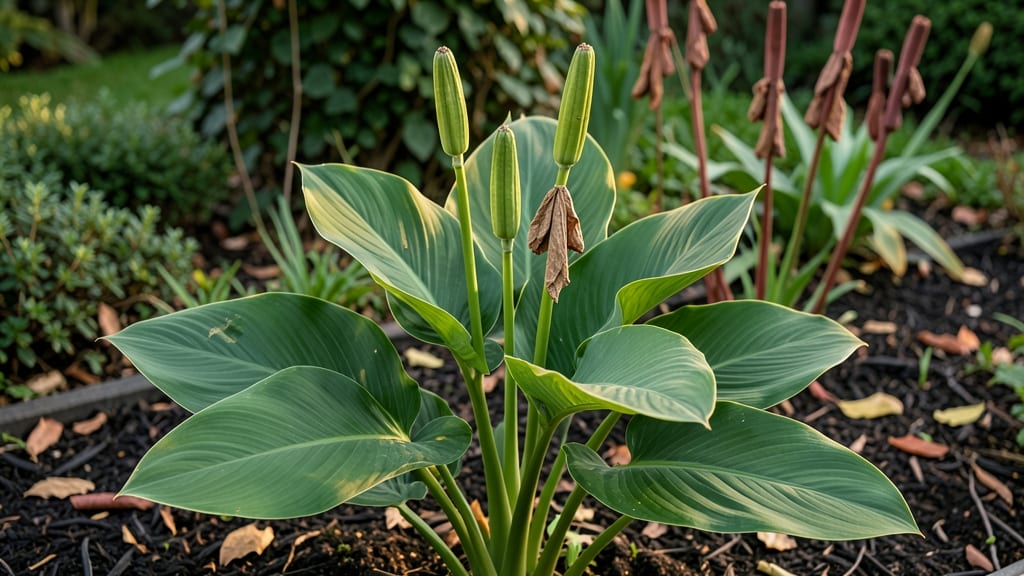
Harvesting canna plant seed pods opens a world of year-round growing possibilities beyond traditional tubers. 🌱 After my first batch of homegrown cannas bloomed in July—from seeds I saved last fall—I never bought tubers again.
The secret lies in timing: those leathery pods turn from green to brown when they're ready, and proper handling ensures seeds that sprout reliably.
You'll need just a few simple supplies: sharp pruning shears, paper towels, plastic bags, and a warm spot with bright light. The process takes less than 30 minutes from harvest to storage, and with the right germination setup, you'll see sprouts within 2-4 weeks.
Even if some seeds take longer, patience pays off—healthy seedlings reward your effort.
What you end up with are vibrant, disease-resistant cannas that thrive in containers or garden beds. Unlike tubers that can rot or lose vigor over time, seeds let you grow rare varieties and experiment with colors.
The first blooms arrive 6-8 weeks after transplanting, and the plants grow taller and bushier than store-bought tubers.
Works for both beginners and experienced gardeners—just adjust light and warmth based on your climate. Here's how to make it work without the guesswork.
📚 In This Guide
- What you need
- Instructions
- Tips and common mistakes
- Wrapping up and next steps
What you need
- ● Mature canna plants – Ensure they’ve produced seed pods (typically late summer/fall). Look for brown, papery pods on the stems.
- ● Sharp pruning shears or scissors – A clean, sterilized pair (7–9" blade) to avoid damaging the plant or spreading disease.
- ● Brown paper bags or breathable mesh sacks – 2–3 medium-sized bags (12"x15") to collect pods and allow airflow.
- ● Labeling tags & permanent marker – To note varieties (e.g., "Canna ‘Striata’ – Fall 2023").
- ○ Gloves (optional but recommended) – Nitrile or leather to protect hands from thorns or sap.
- ● Drying tray or screen – A flat, elevated surface (like a wire rack) for seed pods to dry undisturbed.
- ○ Fan or dehumidifier (optional) – Speeds up drying in humid climates (place on low setting).
- ● Dry, warm conditions – Aim for 70–80°F and 40–50% humidity for optimal drying (3–4 weeks).
- ● Patience – Seed pods must fully dry before storing to prevent mold.
- ● Sunny workspace – A well-ventilated area with indirect sunlight (direct sun can overheat pods).
Step-by-Step guide to harvesting canna plant seed pods
Here's how to collect and store canna seed pods with minimal fuss—no fancy tools or complicated steps.
🌿 Step 1: Identify and Locate Mature Seed Pods
Canna seed pods develop after flowering, typically appearing as small, round, green bulbs at the base of spent blooms. Wait until they turn a dull brown and feel firm to the touch—this signals full maturity. I like to check pods weekly after the flowering season ends, usually in late summer or early fall. Gently squeeze the pod; if it doesn't dent easily, it's ready for harvest.
Harvesting too early results in immature seeds that won't germinate. If you miss the window, pods may split open naturally, scattering seeds—so stay vigilant. Use clean, sharp pruning shears to snip the pod from its stem, leaving a small portion attached to avoid damaging the plant.
🪴 Step 2: Clean and Dry the Seed Pods
Once harvested, lay the pods on a paper towel in a well-ventilated, dry area for 7-10 days. This drying period prevents mold and ensures the seeds inside remain viable. I place mine in a shaded spot where airflow circulates naturally—no need for heat or direct sunlight, which can dry them too quickly.
During drying, gently brush away any debris or loose soil with a soft brush. Avoid washing pods, as moisture can trigger rot. You'll know they're fully dry when the outer shell feels lightweight and papery, and the seeds inside rattle when shaken. Store them in a paper envelope or breathable fabric bag to maintain airflow.
☀️ Step 3: Store Seeds for Long-Term Viability
Place the dried pods in an airtight container (like a glass jar) with a moisture absorber such as silica gel or a small packet of rice. Seal the container and store it in a cool, dark place—a pantry or basement works perfectly. Canna seeds stay viable for 1-2 years under these conditions, though germination rates drop slightly after the first year.
Label the container with the harvest date and canna variety to track freshness. Before planting, I test a few seeds by soaking them overnight in lukewarm water—if they swell slightly, they're still good to go. This simple check saves time and avoids disappointment come spring.
⏰ Step 4: Plant Stored Seeds for Next Season
Start seeds indoors 8-10 weeks before your last frost date. Soak the seeds in warm water for 12 hours to soften the outer coating and speed up germination. Plant them ½ inch deep in a well-draining seed-starting mix, keeping the soil consistently moist but not soggy. Place the container in a warm spot (70-75°F) with indirect light until sprouts appear in 2-4 weeks.
Once seedlings develop 2-3 true leaves, transplant them into larger pots or directly into the garden after the soil warms to 60°F. Cannas thrive in full sun and rich soil, so choose a spot with at least 6 hours of sunlight daily. Mulch around the base to retain moisture and protect roots during temperature swings.
Tips & tricks for perfect canna plant seed pod harvesting
Common pitfalls—and how to sidestep every one—when working with canna seed pods.
Timing Secret: In Step 1, when checking for maturity, I've found that pods harvested in the morning after dew has dried are easier to handle. The cooler morning temperatures also prevent premature splitting. If you're unsure about a pod's readiness, leave it on the plant for another 2-3 days—better to wait than risk immature seeds that won't germinate.
Drying Technique: For Step 2's drying process, I recommend using a mesh laundry bag instead of paper towels. The bag allows for even better airflow while preventing pods from rolling away. Place the bag in a spot where air circulates naturally—like near an open window with a fan on low—this cuts the drying time from 10 days to about 7 days. Just be sure to check daily for any signs of mold or soft spots.
Storage Wisdom: When moving pods to long-term storage in Step 3, I add a small piece of chalk to the airtight container along with the moisture absorber. The chalk helps neutralize any residual moisture that might escape from the seeds, extending their viability beyond the standard 1-2 years. Label the container with both the harvest date and variety—this simple habit saved me from planting the wrong canna variety twice!
Germination Test: The overnight soak test in Step 4 is my favorite trick for verifying seed viability. I always test 2-3 seeds from each batch—if they swell noticeably, I know the rest are good to plant. For extra insurance, I soak them in a mix of warm water and a few drops of hydrogen peroxide (1 teaspoon per cup of water), which helps prevent fungal issues during germination.
Pro Tips for Canna Plant Seed Pods
- Common pitfalls—and how to sidestep every one—when working with canna seed pods.
- Timing Secret: In Step 1, when checking for maturity, I've found that pods harvested in the morning after dew has dried are easier to handle.
- Drying Technique: For Step 2's drying process, I recommend using a mesh laundry bag instead of paper towels.
Frequently asked questions
Got questions about harvesting and storing canna plant seed pods?
You’re not alone! Here are answers to the most common queries to help you navigate the process like a pro.
When is the best time to harvest canna seed pods?
Harvest canna seed pods once they turn dry and papery (usually 4–6 weeks after flowering). Wait too long, and they may crack open or lose viability. Aim for late summer to early fall in most climates—just before the first frost if growing outdoors.
How long do harvested seed pods stay viable?
Properly dried and stored canna seed pods can remain viable for 1–3 years if kept in a cool, dark, and dry place (like a sealed container with silica gel). For best results, label them with the harvest date to track freshness.
Can I save seeds from store-bought canna plants?
Yes, but check if the plant is open-pollinated (not hybrid). Store-bought cannas may produce seeds, but they might not match the parent plant’s traits. For consistent results, source seeds from trusted growers or nurseries specializing in heirloom varieties.
What do I do if my seed pods mold or rot?
Mold or rot usually signals high humidity or poor airflow during drying. To fix it, spread pods in a single layer in a well-ventilated area (like a mesh bag) and avoid damp conditions. If already contaminated, discard them—mold can compromise seed viability.
Do I need to refrigerate canna seed pods for long-term storage?
Refrigeration isn’t required but can extend viability for 3+ years if stored in an airtight container with a moisture absorber. For short-term storage (under a year), a dark pantry or basement works fine—just keep them away from heat sources.
Wrapping up and next steps
Harvesting canna plant seed pods is a rewarding way to ensure year-round viability and expand your garden with ease! By following the right timing, techniques, and storage methods, you’ll keep your canna plants thriving for seasons to come.
Whether you’re a seasoned gardener or just starting out, these stress-free steps make the process simple and enjoyable.
Ready to take the next step? Grab your gloves, find a sunny spot, and start collecting those pods today! Your future garden will thank you—happy harvesting! 🌱✨