
Lawn
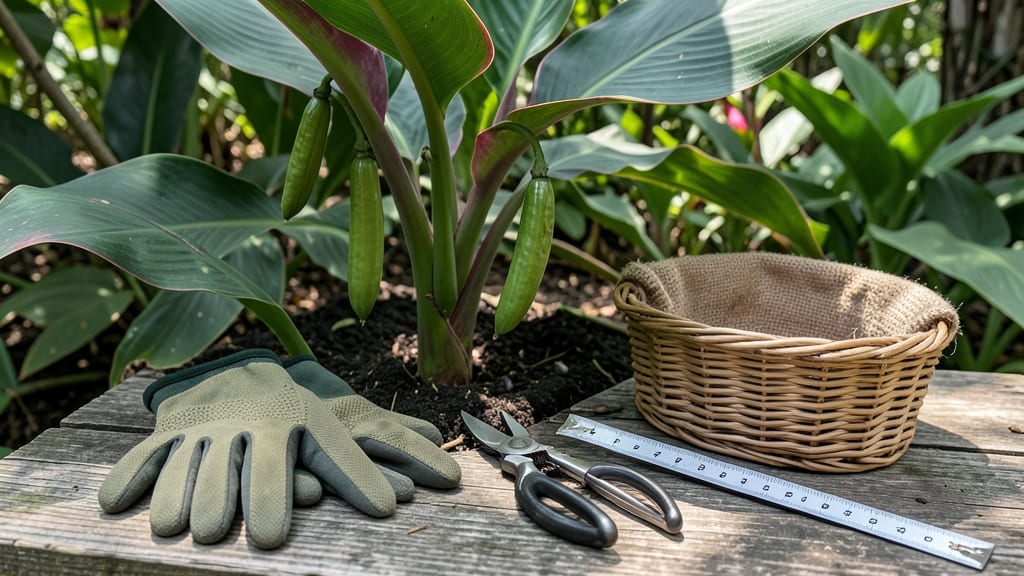
Those orange oblong seed pods on your canna lilies hold the secret to next year’s boldest blooms. 🌺 I’ve saved seeds from my own plants for years, and the process is simpler than you’d think—just a little patience and the right timing.
The key is knowing when to harvest, how to dry them properly, and a trick to break dormancy so they’ll sprout reliably.
First, let’s talk harvest timing: wait until the pods turn completely brown and papery, usually 6-8 weeks after flowering. Twist them gently off the stem—they’ll pop open easily when ready.
Inside, you’ll find flat, dark seeds that look like tiny beans. These are your future plants, but they need a little help before they’ll germinate.
After harvesting, let the pods dry in a shady, well-ventilated spot for about a week. Once completely dry, crack them open to remove the seeds. Store them in a paper envelope in a cool, dark place until spring.
When ready to plant, give them a light cold treatment (stratification) by mixing with slightly damp sand and refrigerating for 4-6 weeks—this mimics winter and tricks them into thinking it’s time to grow.
The payoff? Healthy seedlings that’ll produce larger, more vibrant blooms than store-bought tubers. Plus, you’ll save money and get exactly the colors you love. Ready to try it? Here’s how to do it step by step without any guesswork.
📚 In This Guide
- What you need
- Instructions
- Tips and common mistakes
- Wrapping up and next steps
What you need
- ● Mature canna lily seed pods: Harvest fully dried pods (brown, papery texture) from healthy plants in late fall or early winter.
- ● Paper towels or newspaper: 2–3 sheets per batch of pods (for drying).
- ● Plastic storage bags: 1–2 quart-sized, resealable (e.g., Ziploc).
- ○ Moisture-absorbing packets: 1–2 (optional but recommended for long-term storage).
- ● Permanent marker: For labeling pods with the harvest date and variety (if applicable).
- ○ Small mesh bag or breathable fabric: (Optional) For airflow during initial drying.
- ● Pruning shears or sharp scissors: For cleanly cutting pods from stems.
- ○ Fine-mesh strainer or colander: (Optional) To separate seeds from dried pod debris.
- ● Refrigerator or cool, dark space: (40–50°F) for stratification (e.g., garage, basement).
- ○ Ruler or measuring tape: (Optional) To track pod dimensions if saving heirloom varieties.
- ● Wait until pods are completely dry and brown (typically 2–4 weeks post-harvest).
- ● Ensure pods are free of mold, pests, or soft spots before processing.
- ● Work in a well-ventilated area to avoid inhaling dried plant debris.
Step-by-step guide to harvesting and saving canna lily seed pods
Here’s how to turn those vibrant seed pods into next year’s stunning canna lilies—no fancy tools needed.
🌿 Step 1: Identify and Harvest Mature Seed Pods
Wait until the pods turn a deep brown and feel slightly papery to the touch—this signals full maturity. I like to harvest on a dry morning when the pods are firm but not brittle. Use clean, sharp pruning shears to snip the pods from the stem, leaving a small portion of the stalk attached.
Don’t rush this step. Green pods won’t yield viable seeds, and overripe pods may split open, scattering seeds prematurely. If you’re unsure, tap the pod gently—if seeds rattle inside, it’s ready. Collect pods in a paper bag to prevent moisture buildup.
💧 Step 2: Dry the Seed Pods Thoroughly
Spread the harvested pods in a single layer on a mesh screen or paper towel in a warm, dry location with good airflow. I place mine on a windowsill away from direct sunlight—just enough light to see what you’re doing. Let them dry for 7-10 days until the pods feel completely brittle and the seeds inside rattle loudly when shaken.
Check daily for any pods that may have split open. If you find a few, remove the seeds immediately and add them to your drying batch. Avoid using a fan or heat source—slow, even drying prevents cracking and ensures seed viability.
⏰ Step 3: Stratify Seeds for Better Germination
Once dry, open the pods by gently squeezing them with your fingers or tapping them on a hard surface. Remove the seeds and place them in a small paper bag with a handful of slightly damp peat moss or coconut coir (just enough to keep the moss moist, not soggy). Seal the bag loosely and refrigerate for 4-6 weeks—this mimics winter conditions and breaks seed dormancy.
I like to label the bag with the date and variety (if known) so I don’t forget. After stratification, the seeds will look plump and firm. This step is critical—skipping it often results in slow or uneven germination.
🌱 Step 4: Plant Stratified Seeds Indoors
Fill small pots with well-draining seed-starting mix and plant the seeds ½ inch deep, spacing them 2 inches apart. I use biodegradable pots to avoid disturbing roots later. Water gently until the soil is moist but not waterlogged, then place the pots in a warm spot (70-75°F) under a grow light or in bright, indirect sunlight.
Keep the soil consistently moist—never soggy. Germination takes 2-4 weeks, and you’ll know it’s working when the first true leaves appear. Thin seedlings to the strongest one per pot if you planted multiple seeds.
☀️ Step 5: Harden Off and Transplant Outdoors
Once seedlings have 3-4 true leaves and nighttime temperatures stay above 55°F, it’s time to harden them off. Start by placing them outside in a sheltered spot for 1-2 hours the first day, gradually increasing their time outdoors over 7-10 days. This helps them adjust to sun and wind without shock.
After hardening, transplant seedlings into the garden after the last frost, spacing them 18-24 inches apart in well-draining soil with plenty of organic matter. Canna lilies love heat and thrive in full sun to partial shade, so choose a spot where they’ll get at least 6 hours of sunlight daily. Mulch around the base to retain moisture and protect roots.
Tips & tricks for perfect canna lily seed pod preservation
Mastering these simple tricks will ensure your seed pods yield the healthiest, most vibrant canna lilies next season.
Harvesting Timing: I can't stress enough how important it is to harvest when pods are deep brown and papery—not before, not after. The 1-2 hour window between perfect maturity and overripeness is critical. If you're unsure, harvest a few pods early and keep checking daily until you find that perfect texture. The seeds inside should rattle when shaken, but the pod itself should still hold together when gently squeezed.
Drying Strategy: The 7-10 day drying period in Step 2 is your best friend for seed viability. I like to place my pods on a mesh screen over a baking rack in my kitchen—this allows airflow from all sides. If you notice any pods splitting open during drying, remove those seeds immediately and add them to your drying batch. The key is slow, even drying—never rush it with heat sources, as that can crack the pods and ruin the seeds inside.
Stratification Hack: When you're ready to stratify in Step 3, don't just eyeball the moisture level of your peat moss or coconut coir. It should be damp enough to feel slightly moist when squeezed, but not dripping wet. I like to wring out the moss first, then add it to the bag with the seeds. The goal is to mimic natural winter conditions—just enough moisture to simulate rainfall, but not enough to create a soggy environment that could rot your seeds.
Planting Depth Tip: That ½ inch planting depth in Step 4 might seem shallow, but it's perfect for canna lily seeds. Planting too deep can delay germination or even prevent it altogether. I use a toothpick to make small holes in the soil, then place each seed gently in its own hole. This ensures proper spacing and makes thinning easier later. After planting, give the soil a light misting with water—just enough to moisten the top inch without creating puddles.
Pro Tips for Canna Lily Seed Pods
- Mastering these simple tricks will ensure your seed pods yield the healthiest, most vibrant canna lilies next season.
- Harvesting Timing: I can't stress enough how important it is to harvest when pods are deep brown and papery—not before, not after.
- Drying Strategy: The 7-10 day drying period in Step 2 is your best friend for seed viability.
Frequently asked questions
Got questions about saving and growing canna lily seed pods? You’re not alone! Here are answers to the most common queries—from timing to troubleshooting—to help you master the process and enjoy next year’s vibrant blooms.
When is the best time to harvest canna lily seed pods?
Harvest seed pods when they turn tan or brown and begin to dry out—usually late summer to early fall. Wait too long, and they’ll split open, scattering seeds prematurely. Aim for 4–6 weeks after flowering for optimal viability.
How long do canna lily seed pods need to dry before planting?
Let pods dry indoors for 2–4 weeks in a cool, dry place (like a paper bag with airflow). Over-drying can reduce germination, while under-drying risks mold. Test readiness: Gently squeeze a pod—if it crumbles easily, it’s ready!
Do canna lily seeds need stratification, and how do I do it?
Yes! Stratification mimics winter conditions to break dormancy. Mix seeds with moist sand or peat in a sealed bag, then refrigerate for 6–8 weeks at 35–40°F. Check moisture weekly—seeds should stay damp but not soggy.
What if my canna lily seed pods won’t open or release seeds?
If pods stay closed, try one of these fixes:
- Freeze them overnight (mimics cold stress).
- Soak in warm water for 24 hours to soften stubborn pods.
- Gently crack them open with a clean knife if they’re rock-hard.
If seeds are still stuck inside, they may need more drying time.
Can I plant canna lily seeds directly outdoors, or should I start indoors?
For best results, start seeds indoors 8–10 weeks before your last frost in warm soil (70–75°F). Canna lilies thrive in heat, so transplant seedlings only after nighttime temps stay above 55°F. Direct sowing outdoors is riskier—seeds may rot in cool soil.
What’s the best way to store canna lily seeds long-term?
Store seeds in a cool, dark, dry place (like a sealed envelope in the fridge) for up to 2 years. Add a desiccant packet to prevent moisture buildup. Label with the variety and harvest date to track freshness!
Wrapping up and next steps
Canna lily seed pods are a gardener’s secret weapon for bold, vibrant blooms year after year! With the right techniques—like proper drying, stratification, and storage—you’ll unlock a treasure trove of free, organic seeds to expand your garden effortlessly. 🌱✨
Now that you’re armed with the know-how, roll up your sleeves and get growing! Start by harvesting those pods before they burst, then follow the steps to save them for next season. Your future garden will thank you! Ready to dive in?
Grab your supplies and let’s make next year’s blooms even more stunning.