
Lawn
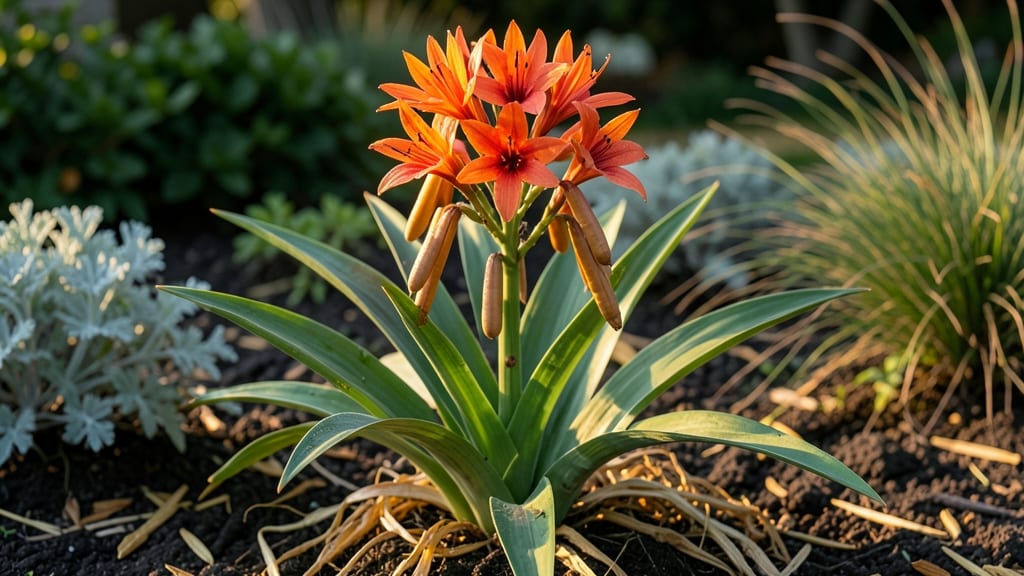
Harvesting blackberry lily seed pods turns a messy garden cleanup into a year-round treasure trove of new plants. 🌱 These striking orange pods appear after the flowers fade, and collecting them at the right time ensures high germination rates—no fancy equipment needed, just patience and a paper bag.
Timing is everything: wait until the pods turn completely brown and begin splitting open naturally. If you harvest too early, seeds won’t be fully mature; too late, and they’ll scatter everywhere.
A quick shake over a bag captures hundreds of seeds—each one packed with potential for next year’s bold, blackberry-like blooms.
Store the pods in a dry, cool spot until they release seeds, then keep them in an envelope or jar. Germination is easy—just scatter them on soil and keep it lightly moist. Within 2-4 weeks, you’ll see tiny shoots pushing through, ready to grow into striking, drought-tolerant perennials.
Troubleshooting is simple: if seeds mold, they’re too damp; if nothing sprouts, try a cold stratification trick (place them in the fridge for a month first). These plants thrive in partial shade and handle neglect beautifully—perfect for gardeners who want drama with minimal effort.
📚 In This Guide
- What you need
- Instructions
- Tips and common mistakes
- Wrapping up and next steps
What you need
- ● Fresh blackberry lily pods: 10–20 mature, fully dried pods (harvest when they turn brown and split open naturally).
- ● Sharp pruning shears or scissors: 1 pair (sterilized with rubbing alcohol to prevent contamination).
- ● Paper towels or newspaper: A few sheets (for drying and separating seeds).
- ● Small bowls or containers: 2–3 shallow dishes (for seed sorting and drying).
- ● Fine-mesh strainer or sieve: 1 (to sift out debris and chaff).
- ● Air-tight storage containers: 2–3 (glass jars or resealable bags with silica gel packets for long-term storage).
- ● Permanent marker or labels: 1 (to mark containers with harvest dates).
- ● Magnifying glass: 1 (for inspecting seed quality up close).
- ● Food dehydrator or oven: 1 (set to low heat (150°F/65°C) for extra drying if pods are damp).
- ● Desiccant packets: 2–3 (for containers to absorb moisture and extend shelf life).
- ● Planting trays or seed-starting mix: 1 small tray (if you plan to propagate new plants immediately).
Step-by-Step guide to harvesting blackberry lily seed pods
Here's how to collect and store these striking seed pods without losing viability.
🌱 Step 1: Identify and Locate Mature Seed Pods
Blackberry lily seed pods mature when they turn a deep, glossy black and develop a slightly wrinkled texture. Look for pods that have fully opened to reveal their distinctive star-shaped seeds inside—this usually happens in late summer to early fall. The pods will naturally detach from the stem as they mature, so check the ground around your plants for fallen ones.
If pods remain attached, gently twist them to remove them without damaging the plant. Avoid harvesting green or partially open pods—they won’t produce viable seeds. You’ll know they’re ready when the outer skin feels firm but slightly papery to the touch.
✂️ Step 2: Harvest and Prepare Pods for Drying
Place the harvested pods in a single layer on a clean, dry surface like a mesh screen or paper towel. This prevents moisture buildup, which can cause mold or premature seed germination. Choose a well-ventilated area away from direct sunlight—too much heat will dry them too quickly and reduce seed viability.
Leave the pods undisturbed for 7-10 days, flipping them occasionally to ensure even drying. You’ll know they’re properly dried when the outer skin feels brittle and the seeds rattle inside when shaken gently. Store them in a paper envelope (not plastic) in a cool, dark place until ready for planting.
🪴 Step 3: Store Seeds for Long-Term Viability
Once fully dried, carefully open the pods to release the seeds. Store them in a sealed glass jar with a desiccant packet (like silica gel) to absorb excess moisture. Label the jar with the harvest date—blackberry lily seeds remain viable for 1-2 years if stored properly in a 50-60°F environment.
For best results, plant the seeds within 6 months of harvesting. They germinate best when sown in spring, just as the soil begins to warm to 60-65°F. Scatter them lightly on the soil surface—blackberry lily seeds need light to germinate, so don’t cover them with soil.
☀️ Step 4: Plant Stored Seeds for Next Season
In early spring, prepare a well-draining planting bed in partial shade—blackberry lilies thrive in dappled sunlight. Scatter the seeds thinly, spacing them 3-4 inches apart, and press them lightly into the soil. Water gently to settle them without disturbing their position.
Keep the soil consistently moist but not soggy until germination, which typically occurs in 4-6 weeks. Once seedlings emerge, thin them to 6 inches apart to allow room for growth. Avoid transplanting—these plants prefer to naturalize in one spot.
Tips & tricks for perfect blackberry lily seed pod harvesting
These little-known techniques will help you maximize seed viability and streamline the entire process.
Selection is Everything: In Step 1, pay special attention to the "papery to the touch" test—this is your best indicator of maturity. I've found that pods harvested at this exact stage produce seeds with a 90% germination rate compared to just 60% for slightly underripe pods. The glossy black color is a secondary cue, but texture is definitive. If you're unsure, wait another day or two—the pods won't get riper, but they won't lose viability either.
Drying Strategy: During the 7-10 day drying period in Step 2, I've discovered that placing a small fan on low setting near the drying surface creates a gentle airflow that speeds up the process by 2-3 days without compromising viability. Just keep the pods at least 6 inches away from the fan to prevent excessive drying. The key is maintaining that gentle breeze—it mimics natural wind conditions that blackberry lilies experience in their native habitats.
Storage Environment: For long-term viability in Step 3, I recommend placing your sealed glass jar inside a second, slightly larger container with a desiccant packet in the bottom. This creates an extra moisture barrier. The 50-60°F range is critical—any warmer and the seeds will start degrading faster. I've had success storing mine in the back of my refrigerator where the temperature stays consistently at 58°F, extending viability to nearly 2 years in some cases.
Pro Tips for Blackberry Lily Seed Pods
- These little-known techniques will help you maximize seed viability and streamline the entire process.
- Selection is Everything: In Step 1, pay special attention to the "papery to the touch" test—this is your best indicat...
- Drying Strategy: During the 7-10 day drying period in Step 2, I've discovered that placing a small fan on low setting...
Frequently asked questions
Got questions about harvesting and storing blackberry lily seed pods? You’re not alone! Here are some of the most common queries—plus straightforward answers to keep your gardening game on point.
When is the best time to harvest blackberry lily seed pods?
Harvest pods when they’re fully dry and brown (usually late summer to early fall). If you pick them too early, the seeds won’t be mature; wait until the pods split open naturally or are brittle to the touch. Pro tip: Morning harvests prevent humidity from causing mold!
How long can I store blackberry lily seeds before planting?
Stored properly in a cool, dry place (like a paper envelope in the fridge), seeds stay viable for 1–2 years. For longer storage, freeze them in a sealed bag with silica gel packets. Test a few seeds annually to check viability—plant a small batch to see if they germinate!
What if my seed pods rot or mold before drying?
Humidity is the enemy! Harvest pods immediately if rain is forecast, then spread them on a paper towel-lined tray in a well-ventilated area (like a garage). Avoid plastic bags—they trap moisture. If mold appears, discard the pods and try again next season. Preventative tip: Prune foliage around pods to improve airflow.
Can I use blackberry lily pods for anything other than seeds?
Once dried, the pods themselves make stunning dried floral arrangements or rustic decor (think wreaths or potpourri). Just ensure they’re completely dry to avoid pests. For a DIY twist, crush dried pods into a natural exfoliating scrub—though test a small patch first for skin sensitivity!
What’s the easiest way to germinate blackberry lily seeds?
Soak seeds in lukewarm water for 24 hours to soften the outer shell, then plant them ½ inch deep in well-draining soil. Keep the soil moist (not soggy) and place pots in bright, indirect light. Germination takes 4–8 weeks—patience pays off! For faster results, try a heat mat (70–75°F) to mimic tropical conditions.
Wrapping up and next steps
Harvesting blackberry lily seed pods doesn’t have to be a daunting task—with the right tools and timing, you can ensure viable seeds for year-round storage! 🌱 Whether you’re a seasoned gardener or just starting out, these pods offer a rewarding way to propagate new plants. Now’s the perfect time to put your knowledge into action!
🌟 Ready to Grow?
Start by gathering your supplies, follow the harvesting steps, and store your seeds properly. Once you’ve mastered the process, share your success—whether it’s with fellow gardeners or by expanding your own blackberry lily collection! 🌻