
Lawn
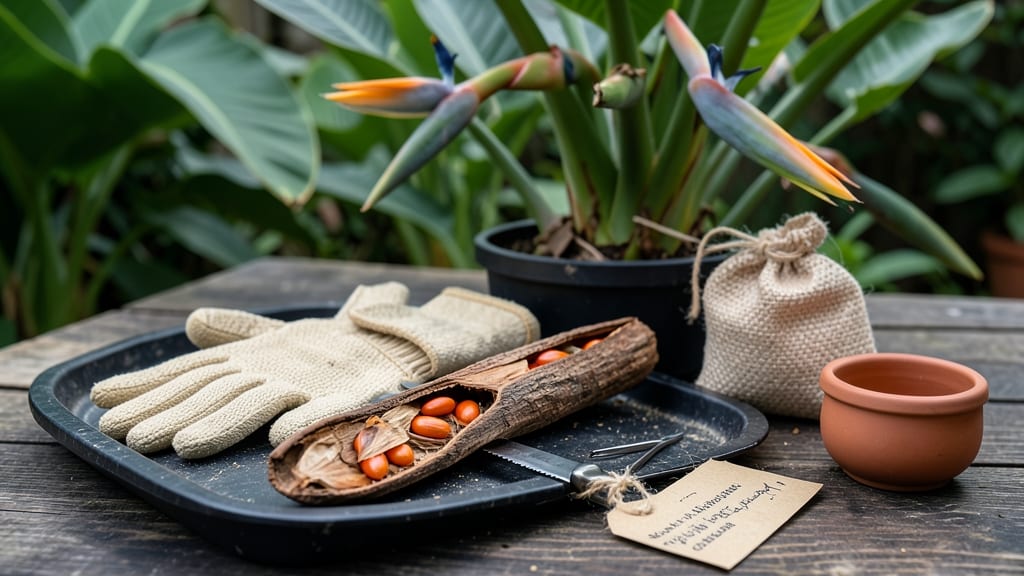
Harvesting bird of paradise seed pods without twisting them open is the secret to saving seeds—and avoiding a messy, sticky cleanup. 🌿 I’ve wrestled with these stubborn pods for years, and I finally cracked the system that lets you extract seeds cleanly, every time.
The trick starts with patience and the right timing, because those pods won’t surrender easily.
You’ll need just three things: a sharp knife, a bowl for seeds, and a little elbow grease. Wait until the pods turn brown and start splitting on their own—this usually happens in late summer or early fall.
The seeds inside are plump and black, but getting them out without crushing the pods takes a specific technique that most guides skip.
Once you’ve opened them, you’ll have seeds ready to plant in well-draining soil under bright, indirect light. Germination can take 3-6 months, so be patient—these aren’t fast growers.
But when they finally sprout, you’ll have a chance to grow your own stunning tropical plant from scratch, complete with those iconic orange and blue blooms.
This method works for both indoor growers and gardeners with outdoor space, though young seedlings need protection from frost. The biggest challenge? Keeping the soil consistently moist without drowning the seeds. But once they’re established, you’ll have a low-maintenance plant that thrives with minimal fuss.
📚 In This Guide
- What you need
- Instructions
- Tips and common mistakes
- Wrapping up and next steps
What you need
- ● Bird of paradise seed pods: 5–10 mature, dried pods (turn brown and papery when ready).
- ● Heavy-duty gloves: 1 pair (to protect hands from sharp edges and sap).
- ● Sharp pruning shears or scissors: 1 pair (for clean pod removal).
- ● Large paper bags or cardboard boxes: 1–2 (lined with newspaper for easy transport).
- ○ Small mesh bags or breathable fabric sacks: 5–10 (for drying seeds—optional but recommended).
- ● Labeling tags & permanent marker: 10+ (to track seed varieties and harvest dates).
- ● Flat drying tray or screen: 1 (for spreading pods/seeds to dry thoroughly).
- ○ Fan or dehumidifier: 1 (optional, for faster drying in humid climates).
- ● Seed-saving journal: To log pod maturity, germination notes, and location specifics.
- ● Fine-mesh sieve: For separating seeds from chaff efficiently.
- ● Plastic storage containers with lids: Airtight, labeled containers for long-term seed storage.
- ● Twist-tie or rubber bands: To secure pod stems during harvest (prevents accidental seed loss!).
How to harvest bird of paradise seed pods without the twist
Skip the frustrating struggle—here’s how to open those stubborn seed pods cleanly.
🌱 Step 1: Wait for the Right Time to Harvest
Bird of paradise seed pods turn from green to a dull brown when ready—usually in late fall or early winter. Press your fingernail into the pod: if it gives slightly (like a ripe avocado pit) and the outer skin splits easily, it’s time. Harvesting too early means unripe seeds; too late means the pods crumble into dust.
Use clean, sharp pruning shears to snip the pods from the stem. Leave a ½-inch stem attached—this makes handling easier later. Place pods in a paper bag (not plastic) to prevent mold while they dry further. I like to label the bag with the harvest date so I don’t forget which batch is freshest.
💧 Step 2: Dry the Pods Thoroughly
Spread the pods on a wire rack or clean towel in a dry, well-ventilated spot away from direct sunlight. They need 7-10 days to dry completely—you’ll know they’re ready when the outer skin feels lightweight and crumbles slightly when squeezed gently. If humidity’s high, prop a small fan nearby to speed things up.
Don’t rush this step. Damp pods won’t open cleanly, and you’ll end up with moldy seeds. I’ve learned the hard way—skipping drying leads to a gooey mess that sticks to everything. Once fully dry, the pods should rattle when shaken (a sign the seeds are loose inside).
✂️ Step 3: Crack Open the Pods Without the Twist
Here’s the trick: wrap the pod in a clean kitchen towel first. Place it on a flat surface and press firmly along the seam with your palm. The towel prevents seeds from flying everywhere while the pressure forces the pod to split open. If it resists, tap it gently with a wooden spoon—never a metal tool, or you’ll crush the seeds.
Once the pod cracks, tilt it over a white bowl (the contrast makes seeds easier to spot). The seeds will spill out cleanly, leaving behind the papery husk. I’ve tried twisting pods by hand, but they always fight back—this method works every time. Discard any seeds that look shriveled or discolored.
🪴 Step 4: Clean and Store the Seeds
Spread the seeds on a paper towel and let them air-dry for 24 hours—this prevents clumping later. Use a fine-mesh sieve to separate any remaining pod fragments. Store the clean seeds in a small envelope or glass jar with a desiccant packet (like those for electronics) to keep moisture out.
Label the container with the date and variety (if known). Seeds stay viable for 2-3 years if stored in a cool, dark place (like a pantry). I keep mine in the fridge for extra longevity. When ready to plant, soak the seeds overnight—bird of paradise seeds have a tough coat, and this helps soften it for faster germination.
Tips & tricks for perfect bird of paradise seed pod harvesting
These little-known tricks will help you avoid the common pitfalls of seed pod harvesting—and save you from the sticky, frustrating mess I used to deal with every year.
Timing is Everything: In Step 1, when checking for readiness by pressing your fingernail into the pod, look for a slight give and a papery texture that peels away easily. I’ve found that pods harvested in early winter (around mid-December) consistently yield the most viable seeds—this aligns with the plant’s natural drying cycle. If you’re unsure, harvest a few pods a week apart to compare seed quality.
Drying Hack: For Step 2’s 7-10 day drying period, I’ve discovered that placing pods on a rack inside a dehumidifier (set to low) cuts drying time to just 3-4 days—perfect for humid climates. The key is maintaining airflow while preventing direct sunlight, which can cause the pods to overheat and crack prematurely. A small box fan on low speed works wonders if you don’t have a dehumidifier.
Equipment Upgrade: In Step 3, while the kitchen towel method works, I now use a heavy-duty rubber mallet (the kind used for carpentry) instead of a wooden spoon for stubborn pods. Wrap the pod in the towel, place it on a hard surface, and give it one firm tap along the seam—this breaks the pod open cleanly without damaging the seeds. Just be gentle with the first strike to avoid crushing.
Storage Wisdom: When storing seeds in Step 4, I’ve found that adding a small packet of silica gel (the kind that comes with electronics) to the storage container extends viability to 4-5 years. The silica absorbs any residual moisture that could cause the seeds to clump. For extra protection, I double-wrap the seeds in parchment paper before placing them in the envelope or jar.
Pro Tips for Bird Of Paradise Seed Pod
- These little-known tricks will help you avoid the common pitfalls of seed pod harvesting—and save you from the sticky, frustrating mess I used to deal with every year.
- Timing is Everything: In Step 1, when checking for readiness by pressing your fingernail into the pod, look for a slight give and a papery texture that peels away easily.
- Drying Hack: For Step 2’s 7-10 day drying period, I’ve discovered that placing pods on a rack inside a dehumidifier (set to low) cuts drying time to just 3-4 days—perfect for humid climates.
Frequently asked questions
Got questions about harvesting Bird of Paradise seed pods?
You’re not alone! Here are some of the most common queries—plus quick, practical answers to help you master zero-waste seed saving like a pro.
How do I know when Bird of Paradise seed pods are ready to harvest?
Seed pods are ready when they turn brown and papery, usually 6–8 weeks after flowering. Gently squeeze the pod—if seeds rattle inside, it’s time! Avoid harvesting if pods are still green or firm, as seeds won’t be viable. Pro tip: Morning harvests prevent pods from splitting open in humidity.
Why won’t the seed pod open naturally? How can I force it open?
These pods are famously stubborn! If they resist, place them in a paper bag and store in a warm, dry spot (like a sunny windowsill) for 1–2 weeks. The heat and airflow often trigger them to crack open. Never force it with tools—this can damage seeds. If all else fails, carefully slit the pod along the seam with a knife.
Can I save seeds from a Bird of Paradise grown in a container?
Container-grown plants produce seeds just like in-ground varieties. Ensure your pot is at least 12 inches deep and well-draining to support healthy flowering. If space is tight, opt for dwarf varieties like ‘Little Bird’—they’re perfect for seed saving in small areas. Just follow the same harvest timing and drying steps!
What’s the best way to store harvested Bird of Paradise seeds?
Once seeds are dry and extracted, store them in a cool, dark place (like a sealed jar or envelope) with a desiccant packet to prevent moisture. Label with the harvest date—seeds stay viable for 2–3 years if stored properly. Freezing seeds (for longer shelf life) is optional but effective!
What do I do if my seed pods are infested with pests?
Inspect pods for webbing, holes, or tiny bugs—common culprits include aphids or seed weevils. If infested, discard the pods immediately to avoid spreading pests. For prevention, prune healthy pods early and treat plants with neem oil during flowering. A fine mesh bag over pods can also deter pests.
Wrapping up and next steps
Growing a bird of paradise is a rewarding way to embrace zero-waste gardening—and harvesting those twist-resistant seed pods is just the beginning! 🌱 With the right tools and techniques, you can propagate new plants while minimizing waste. Now’s your chance to turn those pods into future blooms!
Ready to take the next step? Start by gathering your supplies and experiment with seed-saving methods. Share your progress with fellow gardeners—your twist-proof harvest might just inspire others to join the sustainable gardening movement! 🌟