
Lawn
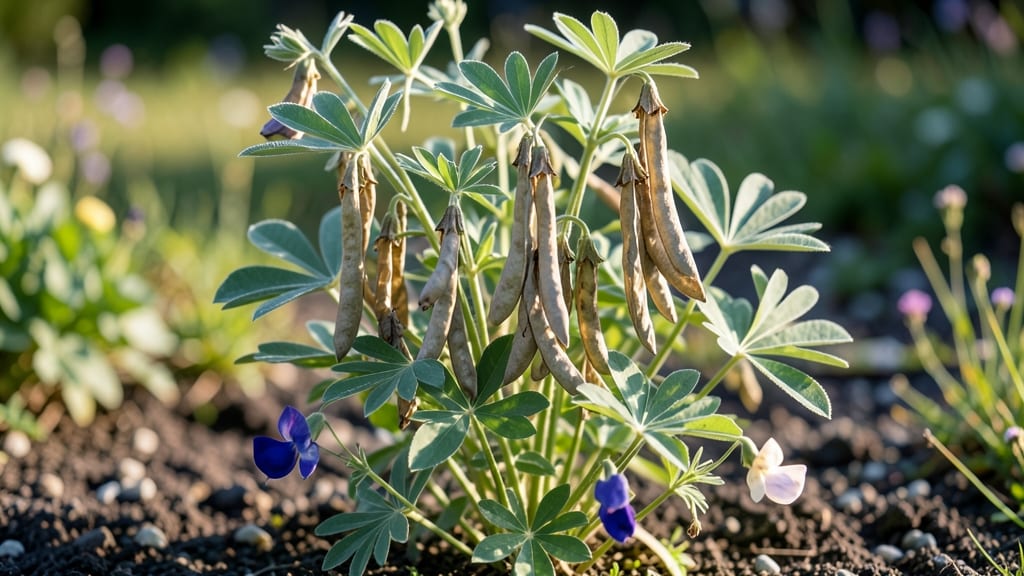
Harvesting flower seed pods turns last year’s blooms into next season’s garden stars—no extra cost, just free seeds from your own plants. 🌱 The moment I realized how easy this was, I never bought seeds again for my snapdragons, foxgloves, or cosmos.
Those dried pods hold the potential for a whole new season of color, and the process is simpler than you’d think.
First, wait until pods turn brown and crispy—this means seeds are fully mature and ready to collect. Snapdragons and foxgloves develop long, papery pods, while cosmos and marigolds form round, papery cases.
Gently twist or cut them off the stem, then lay them on a tray to dry completely before opening. This step prevents mold and ensures seeds stay viable for years.
Once dry, crack open the pods and sift out the seeds—some, like poppies, scatter easily, while others, like delphiniums, need careful scooping. Store them in labeled envelopes in a cool, dry place, and you’ll have fresh starts without ever visiting a nursery.
The first time you see those familiar blooms return from your own saved seeds, you’ll understand why gardeners swear by this zero-waste trick.
Works for annuals and perennials alike, and even saves heirloom varieties you’d hate to lose. Here’s how to do it right—no green thumb required.
📚 In This Guide
- What you need
- Instructions
- Tips and common mistakes
- Wrapping up and next steps
What you need
- ● Mature flower seed pods: Choose healthy pods from plants like cleome, lupine, dill, or foxglove. Aim for 10–20 pods (depending on size) for a small harvest.
- ● Sharp scissors or pruning shears: A pair with bypass blades (for clean cuts) to snip pods without crushing them.
- ● Paper bags (brown lunch bags or seed-saving envelopes): 1–2 bags per plant type to prevent moisture buildup. Poke small holes in the bottom for airflow!
- ● Labeling tags or masking tape + marker: Essential for tracking plant names, harvest dates, and locations.
- ● Drying surface: A clean, dry tray (like a baking sheet) or a well-ventilated mesh screen.
- ○ Air-tight containers: Small glass jars or paper envelopes with silica gel packets (optional but recommended for long-term storage).
- ● Magnifying glass: Helps spot tiny seeds in intricate pods (like poppies or snapdragons).
- ● Fine-tip tweezers: For delicate seeds that stick to pods (e.g., lobelia or salvia).
- ● Fan or dehumidifier: Speeds up drying in humid climates.
- ○ Seed viability test kit: Optional but handy for checking if your seeds are still good after storage.
- ● Notebook: Jot down growing conditions (sunlight, soil type) for next season’s success!
How to harvest flower seed pods for next year’s garden
Here’s how I collect seeds from spent blooms—no waste, just future blooms.
🌿 Step 1: Identify Mature Seed Pods
Wait until flower heads dry completely and turn brown or papery. For example, coneflowers form dry seed heads that look like tiny baskets, while zinnias develop flat, papery disks. Gently squeeze a pod—if it crumbles easily, it’s ready. Harvest too early, and seeds won’t mature; too late, and they’ll scatter before you collect them.
I like to work on a dry morning after dew has evaporated. The pods will be stiff and easier to handle. If rain is forecast, harvest immediately—wet pods can rot or mold if left on the plant.
✂️ Step 2: Cut or Twist Off Seed Pods
Use clean pruners or sharp scissors to snip the stem just below the pod. For delicate stems like cosmos, twist gently until the pod detaches. Avoid pulling—this can damage the plant or leave stems behind. Place pods in a paper bag or envelope to catch any loose seeds that might fall during transport.
Label each bag with the flower type and harvest date. I use a small piece of masking tape and a marker—this prevents mix-ups when storing seeds for months. Real talk: I’ve lost entire seed varieties before because I didn’t label properly.
🪴 Step 3: Dry and Store Seed Pods Properly
Spread pods on a wire rack or flat surface in a warm, dry, well-ventilated area for 1-2 weeks. Avoid direct sunlight—it can overheat the seeds and reduce viability. Check daily for signs of moisture or mold. If pods feel damp, spread them out again until fully dry.
Once completely dry, store pods in a sealed container with a desiccant packet to absorb excess moisture. I use small glass jars with tight lids, stored in a cool, dark place like a pantry. Most flower seeds stay viable for 1-3 years, but some, like poppies, lose viability after just 1 year. Always check seed-packet guidelines if you’re unsure.
🌱 Step 4: Extract and Test Seed Viability
Open dried pods carefully—some, like milkweed, release seeds easily, while others, like lavender, require gentle shaking over paper. For stubborn pods, place them in a paper bag and shake vigorously. Empty the contents onto a clean sheet of paper to sort seeds from chaff.
Test a few seeds by placing them between damp paper towels in a sealed plastic bag. Store the bag in a warm spot and check daily. Within 5-7 days, viable seeds will sprout. If fewer than 50% sprout, store the remaining seeds in the freezer for another 1-2 months—this can break seed dormancy and improve germination rates.
⏰ Step 5: Plan for Next Season’s Planting
Organize seeds by type and label each container with the flower name, harvest year, and germination instructions. I use small envelopes tucked inside the jar lid for easy reference. When spring arrives, test a few seeds indoors 6-8 weeks before the last frost to ensure strong, healthy starts.
Here’s the thing—some flowers, like cleome or hollyhocks, produce seeds that take 2-3 years to fully mature. If you’re impatient, buy fresh seeds for those varieties while saving others for future seasons. This way, you’re always building your garden’s diversity.
Tips & tricks for perfect flower seed pod harvesting
Between us, these little details make all the difference between viable seeds and wasted effort.
Timing is Everything: In Step 1, that "crumbles easily" test is your golden rule. I learned this the hard way after trying to harvest coneflower seeds too early—they were still green and wouldn't release properly. For stubborn pods like milkweed, wait until they're completely brown and papery. If you're unsure, do the squeeze test on a few pods first. The right timing ensures you capture fully mature seeds ready for planting.
Tool Selection Matters: For Step 2, I can't stress enough how important clean tools are. I've ruined batches of seeds by using dirty pruners that introduced mold. Use sterilized scissors or pruners, and for delicate stems like cosmos, twisting works better than cutting—it preserves the plant's integrity. Pro tip: Wrap your tools in rubbing alcohol before starting if you're harvesting multiple varieties to prevent cross-contamination.
Drying Strategy: In Step 3, that 1-2 week drying period is non-negotiable for most seeds, but here's what nobody tells you—humidity is your enemy. If you live in a damp climate, consider using a small fan on low setting to circulate air around your drying pods. I've had seeds develop mold when humidity crept above 60%. Place a hygrometer near your drying area to monitor levels—aim for 40-50% humidity for optimal drying conditions.
Viability Testing: For Step 4, that 5-7 day germination test is your quality control. I've saved myself from planting poor seeds by doing this test first. If you're short on time, try the "float test" as a quick alternative: Place seeds in a bowl of water. Viable seeds will sink while empty ones float. This gives you instant feedback without waiting for sprouts. Just remember this only works for seeds with hard outer shells—soft seeds like poppies won't respond the same way.
Pro Tips for Flower Seed Pods
- Between us, these little details make all the difference between viable seeds and wasted effort.
- Timing is Everything: In Step 1, that "crumbles easily" test is your golden rule. I learned this the hard way after t...
- Tool Selection Matters: For Step 2, I can't stress enough how important clean tools are. I've ruined batches of seeds...
Frequently asked questions
Got questions about harvesting and saving flower seed pods?
You’re not alone! Here are some of the most common queries—and practical answers—to help you master zero-waste gardening with ease.
When is the best time to harvest flower seed pods?
Harvest seed pods when they’re fully mature but before they split open or scatter seeds naturally. For most annuals (like zinnias or cosmos), this is when the pods turn brown or papery. Perennials (like coneflowers) may take longer—wait until late fall or early winter for best results.
How do I know if my seed pods are still viable?
Viable seeds should feel firm and plump inside the pod. If they’re shriveled, hollow, or crumbling, they’ve likely lost potency. For extra assurance, conduct a float test: Drop a few seeds in water—sinkers are good; floaters are duds.
Can I save seeds from hybrid flowers?
Probably not! Hybrid flowers (like many store-bought varieties) won’t produce true-to-type seeds. If you want reliable blooms next season, opt for heirloom or open-pollinated varieties labeled as seed-saving friendly. Check seed packets for icons like a flower with seeds or “O.P.”
What’s the best way to store harvested seed pods?
Keep pods in a cool, dry place (like a paper envelope or breathable bag) with a silica gel packet to absorb moisture. Label them with the plant name and harvest date! Most seeds stay viable for 1–5 years, depending on the species.Why are bugs eating my seed pods before I can harvest them?
Pests like beetles, weevils, or even birds love fresh seed pods. To protect them, harvest pods as soon as they’re mature and store them indoors. If infestations persist, try row covers or neem oil sprays on plants before pods form.
Still stumped? Drop your question in the comments—we’re happy to help!
Wrapping up and next steps
From okra to hollyhocks, flower seed pods offer a zero-waste, rewarding way to cultivate next season’s garden with minimal effort.
By mastering the art of harvesting, drying, and storing these natural treasures, you’re not just saving money—you’re fostering a deeper connection to the cycle of growth in your own backyard. 🌱
Ready to turn this season’s blooms into next year’s bounty? Start small—pick just one or two pods from your favorite flowers—and watch your garden thrive with homegrown, heirloom-quality seeds. Happy harvesting! 🌸