
Lawn
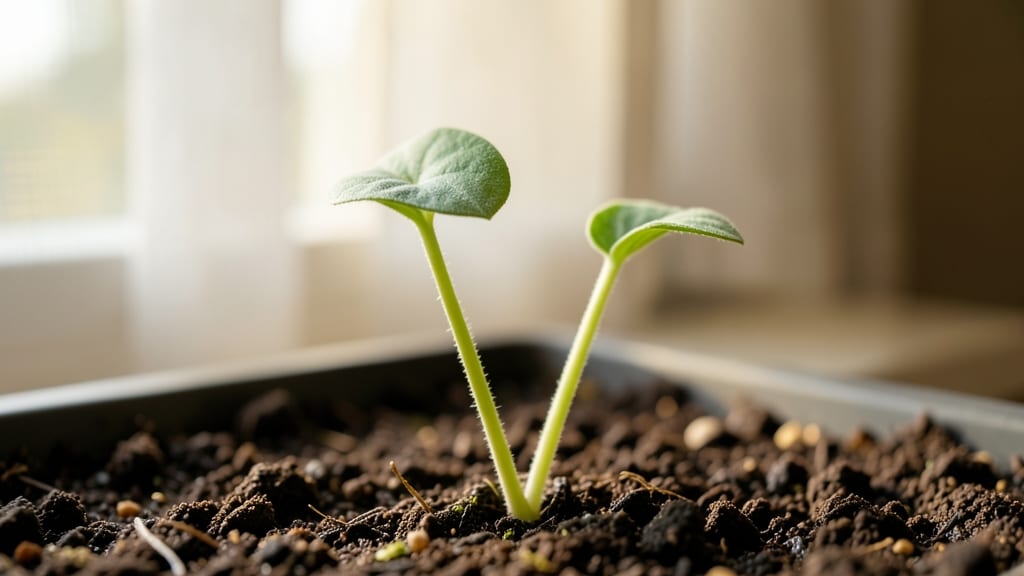
Your zinnia seeds could sprout in just 3-5 days with the right warmth and moisture—no more waiting weeks for those bright blooms to begin. 🌱 The secret isn’t fancy equipment but a cozy, damp environment that mimics their natural tropical roots.
I’ve learned that zinnia seed sprouts thrive when soil stays consistently warm (around 70°F) and lightly moist, not soggy. Most beginners overwater, which leads to moldy soil or damping-off.
Instead, keep the surface damp like a wrung-out sponge, and you’ll see those first tiny green hooks break through in record time. The key is patience—just a sprinkle of water daily keeps things perfect without drowning delicate sprouts.
Once they’ve got two true leaves (not the initial seed leaves), they’re ready to harden off for transplanting. You’ll be pinching back leggy stems and watching them grow into 3-foot-tall giants by summer. The payoff? A garden bursting with color that hummingbirds can’t resist.
This method works for both direct sowing in warm soil and starting indoors. Just adjust timing based on your last frost date—early May for most zones means you’ll have blooms by July! Let’s get those seeds sprouting right.
📚 In This Guide
- What you need
- Instructions
- Tips and common mistakes
- Wrapping up and next steps
What you need
- ● Zinnia seeds: Choose heirloom or hybrid varieties (e.g., 'Benary’s Giant' or 'Profusion'). Aim for 10–20 seeds per pot or 1–2 lbs for direct sowing in a garden bed.
- ● Seed-starting trays or biodegradable pots: 2–4 inch deep cells or pots (6–12 per tray). Opt for peat or coconut coir pots for easy transplanting.
- ● Seed-starting mix: A lightweight, sterile mix (e.g., Pro-Mix or Black Gold Seedling Mix). Avoid garden soil—it’s too dense!
- ● Watering can or spray bottle: With a fine mist nozzle to avoid disturbing seeds.
- ● Grow lights or sunny windowsill: Zinnias need 6–8 hours of light daily. A LED grow light (12–16 inches above seedlings) works best.
- ○ Heat mat (optional but helpful): Maintains 70–75°F soil temps for faster germination.
- ● Trowel or small shovel: For transplanting seedlings into the garden.
- ● Plant labels: Write seed varieties to avoid mix-ups!
- ● Fertilizer (balanced, water-soluble): 5-10-5 or 10-10-10 ratio. Dilute to half-strength for seedlings.
- ● Mulch (straw or shredded leaves): Helps retain moisture post-transplant.
- ● Garden gloves: Protects hands from soil and thorns (some varieties have them!).
Step-by-Step instructions for germinating zinnia seeds
Here's how to coax those tiny zinnia seeds into quick, healthy sprouts—no waiting weeks in the cold.
🌱 Step 1: Prepare the Seed Starting Mix
Fill your seed trays with a light, well-draining mix designed for annuals. I like to blend equal parts potting soil and perlite to keep roots from sitting in soggy conditions. Moisten the mix until it feels like a wrung-out sponge—damp but not dripping. Press it down gently so the surface is firm but not compacted.
Zinnia seeds are tiny, so I use a flat, shallow tray to keep them from getting buried too deep. Smooth the surface with your fingers to create a fine, even layer. This prevents water from pooling and drowning the seeds once you plant them.
💧 Step 2: Plant the Seeds Correctly
Sprinkle the seeds evenly across the surface, spacing them about ¼ inch apart. Don't press them in—just let them rest on top. Zinnia seeds need light to germinate, so covering them with soil will delay sprouting. I tap the tray gently on the table to settle them into the grooves of the soil surface.
Mist the surface with a spray bottle until the soil looks uniformly damp. Avoid soaking the seeds—they'll rot before they sprout. Place the tray in a warm spot (around 70-75°F) where they won’t dry out, like on top of your fridge or near a sunny window.
☀️ Step 3: Provide Warmth and Wait for Sprouts
Keep the soil consistently moist but never soggy. You’ll know it’s right when the surface feels damp to the touch but doesn’t leave puddles. A clear plastic dome or sealed plastic bag creates a mini greenhouse effect, trapping warmth and humidity. Check daily for condensation—if it’s heavy, lift the cover for 10 minutes to air it out.
Germination usually happens in 7-14 days, but you’ll see the first tiny green shoots in as little as 5 days if conditions are perfect. Watch for the seeds to split open—this is your signal that roots are pushing through. Once sprouts appear, remove the dome immediately to prevent fungal issues.
🌿 Step 4: Care for New Seedlings
The moment you see those first true leaves (the second set after the initial seed leaves), it’s time to thin. Use small scissors to snip the weaker seedlings at soil level, leaving the strongest one in each spot. This prevents overcrowding, which leads to leggy, weak plants. Space remaining seedlings 2-3 inches apart.
Move the tray to a bright, indirect light spot. Zinnia seedlings need plenty of light to stay sturdy, but direct sun can scorch them at this stage. If they start stretching toward the light (a sign of insufficient brightness), add a grow light 2-3 inches above the plants for 12-14 hours daily.
⏰ Step 5: Harden Off Before Transplanting
Two weeks before your last frost date, begin hardening off the seedlings. Start by placing them outside in a sheltered spot for 1-2 hours the first day. Gradually increase their time outdoors over 7-10 days, until they’re getting full sun exposure for a full day. This toughens their stems and leaves for the garden.
Watch for wilting—if it happens, bring them back inside for another day. Once they’re thriving outside, transplant them into the garden or larger pots, burying them to the same depth they were in the tray. Water deeply right after planting to help them settle in.
Tips & tricks for perfect zinnia seed germination
These little tricks will help you turn those tiny zinnia seeds into strong, vibrant sprouts in record time.
Soil Mix Matters: The perfect blend of equal parts potting soil and perlite isn't just about drainage—it's about creating the right environment for those delicate roots. If you don't have perlite, you can substitute with coarse sand or even small gravel, but make sure it's clean and sterile. The goal is to prevent waterlogging while still keeping moisture available. That wrung-out sponge texture is key—it should hold just enough water to keep seeds happy without drowning them.
Planting Precision: When you're planting those ¼-inch-apart seeds in Step 2, think of them like tiny sprinkles on a cake—even distribution is everything. I've found that using a toothpick or chopstick helps me space them perfectly without accidentally pressing them too deep. Remember, these seeds need light to germinate, so resist the urge to cover them with soil. If you accidentally bury them, just gently rake the surface to expose them again.
Warmth is Non-Negotiable: That 70-75°F temperature range in Step 2 is crucial—it's the sweet spot for zinnia seeds to wake up and start growing. If your home runs cooler, place the tray on top of your fridge or near a sunny window. For extra warmth, you can even use a heating mat set to low (around 70°F) under the tray. Just be careful not to overheat—the seeds will rot if they get too warm.
Condensation Control: When you're using that plastic dome in Step 3, think of it like a tiny greenhouse. It's great for trapping warmth and humidity, but you need to monitor it closely. Those 10-minute ventilation breaks are essential—heavy condensation can lead to mold. I like to check the dome every morning and evening, especially if I see water droplets forming on the inside. This simple habit prevents fungal issues that could kill your sprouts before they even get started.
Pro Tips for Zinnia Seed Sprouts
- These little tricks will help you turn those tiny zinnia seeds into strong, vibrant sprouts in record time.
- Soil Mix Matters: The perfect blend of equal parts potting soil and perlite isn't just about drainage—it's about crea...
- Planting Precision: When you're planting those ¼-inch-apart seeds in Step 2, think of them like tiny sprinkles on a c...
Frequently asked questions
Got questions about growing zinnia seed sprouts?
You’re not alone! Here are answers to the most common queries to help you nurture vibrant blooms from the start.
How long does it take for zinnia seeds to sprout?
Zinnia seeds typically sprout within 5–14 days after planting, depending on temperature and moisture. Warm soil (70–75°F) speeds up germination—keep seeds consistently moist but avoid overwatering. If you don’t see sprouts in 2 weeks, gently check for mold or replant.
What’s the best time to plant zinnia seeds for fast sprouts?
Plant zinnia seeds after the last frost when soil is at least 60°F. For a head start, sow indoors 6–8 weeks before the last frost date using seed-starting mix. Direct-sow outdoors in spring for quicker outdoor adaptation, but wait until nighttime temps stay above 50°F.
Why aren’t my zinnia seeds sprouting? Troubleshooting tips
Common culprits include:
- Cold soil: Zinnia seeds need warmth—use a heat mat or wait for ideal temps.
- Too much moisture: Overwatering can cause rot; keep soil damp, not soggy.
- Old seeds: Store-bought seeds last 1–2 years; test viability by soaking in water (floating seeds may be dead).
- Poor soil contact: Press seeds lightly into soil (¼ inch deep) for better rooting.
Can I grow zinnias from store-bought flowers?
Unfortunately, no—store-bought zinnias are usually hybrids and won’t produce viable seeds. For sprouts, stick to fresh, untreated seeds from a garden center or online. Save seeds from open-pollinated varieties (like ‘Benary’s Giant’) for future planting!
Do zinnias need full sun to sprout?
While zinnias thrive in full sun (6+ hours/day), they’ll still sprout in partial shade (4–6 hours). However, seedlings may grow leggy or weak. If starting indoors, use a grow light until transplanting. Once outdoors, gradually acclimate seedlings to sunlight to avoid shock.
Wrapping up and next steps
Growing zinnia seed sprouts is a rewarding journey that brings vibrant blooms to your garden with minimal effort—especially when you harness the power of warm, moist soil. Whether you're a seasoned gardener or just starting out, these cheerful flowers prove that patience and the right conditions yield beautiful results.
Now that you’re armed with the best practices, why not take the next step? Grab those seeds, prep your soil, and watch your garden transform into a burst of color! 🌸
Pro Tip: Keep a gardening journal to track your sprouting progress—it’s a fun way to refine your technique for future plantings! ✨