
Lawn
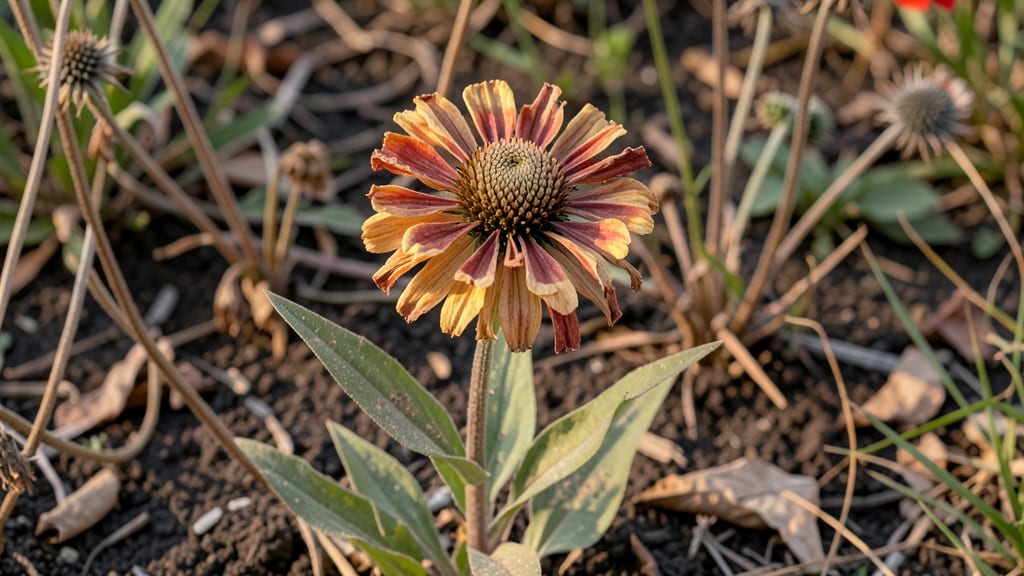
Those papery zinnia seed heads are nature’s way of ensuring next year’s bold blooms—and they’re easier to save than you’d think. 🌻 I used to toss them, but now I harvest them to grow my own vibrant zinnias every spring, cutting costs and ensuring the exact colors I love.
The process turns a fading summer flower into a promise for next season’s garden.
Start by waiting until the seed heads turn completely brown and dry, usually by late fall after the first frost. Snip them off with clean scissors, then spread them in a dry, well-ventilated spot for 2-3 weeks to finish drying.
Store the dried heads in a paper envelope until spring planting—no fancy equipment needed, just patience. These seeds stay viable for 2-3 years, so you’ll have extra to share with friends.
You’ll end up with a stash of seeds ready for next spring’s planting, plus the option to leave some seed heads on the stems for winter interest or dried arrangements.
The dried blooms add rustic charm to bouquets, while the seeds feed birds and bees. It’s a win-win: more flowers for you and a little extra for wildlife.
For best results, avoid harvesting seed heads from hybrid zinnias if you want true-to-type blooms—they may revert to their wild ancestors. But if you’re growing heirloom varieties, you’ll have a steady supply of seeds for years to come. Happy harvesting!
📚 In This Guide
- What you need
- Instructions
- Tips and common mistakes
- Wrapping up and next steps
What you need
- ● Zinnia seed heads: 5–10 mature, fully dried heads (harvest when petals fall off naturally and seed pods turn brown).
- ● Paper bags: 5–10 brown kraft paper lunch bags (1-gallon size) or breathable mesh bags.
- ● Scissors or pruning shears: Sharp pair for clean cutting.
- ● Labeling tags or masking tape: To mark varieties (e.g., "Profusion Red" or "Benary’s Giant").
- ● Permanent marker: For writing labels.
- ● Drying location: A dry, well-ventilated spot (e.g., garage shelf, basement, or indoor drying rack).
- ● Drying rack or screen: Elevates seed heads for better airflow (e.g., a wooden frame with chicken wire).
- ● Fan: Speeds up drying in humid climates.
- ● Glass jars or envelopes: For long-term seed storage (add silica gel packets for extra dryness).
- ● Magnifying glass: Helps inspect seeds for pests or damage before storage.
- ● Humidity monitor: Ideal for tracking drying conditions (target: <30% humidity).
Step-by-step guide to harvesting and preserving zinnia seed heads
Here's how I save zinnia seeds year after year—simple, foolproof, and ready for next spring's garden.
🌿 Step 1: Identify and Harvest Mature Seed Heads
Wait until the blooms have fully faded and the seed heads turn a dry, papery brown. You'll see the petals shrivel completely and the center fluff out—this is your cue. Use clean, sharp scissors or fingers to snip the entire seed head from the stem, leaving about 1 inch of stem attached. I do this on a dry morning after the dew has evaporated to prevent moisture from sticking to the seeds.
Don't rush—harvesting too early means immature seeds that won't germinate. If you miss the perfect window, the seed heads will eventually crumble in the garden, scattering seeds everywhere. That's why I check my zinnias weekly once they start fading.
🪴 Step 2: Remove Seeds from the Heads
Once home, place the dried seed heads in a clean paper bag and gently crush them with your hands. The seeds will fall out while the chaff remains in the bag. I like to do this over a tray or newspaper to catch any seeds that might escape. Shake the bag occasionally to release all the seeds—you'll hear them rattling inside when they're ready.
Separate the seeds from the chaff by pouring them onto a clean, dry surface. A piece of cardboard or baking sheet works perfectly. Use a fan on low speed to blow away the lighter chaff, leaving the heavier seeds behind. This step takes just a few minutes but saves hours of cleaning later.
☀️ Step 3: Dry and Store Seeds Properly
Spread the cleaned seeds in a single layer on a paper towel or coffee filter. Place them in a warm, dry spot away from direct sunlight for 3-5 days to ensure they're completely dry. You'll know they're ready when they feel brittle and no longer stick together. I store mine in an airtight container like a small glass jar with a tight-fitting lid.
Label the container with the zinnia variety and the year. Seeds stay viable for 2-3 years when stored in a cool, dark place. I keep mine in the fridge for extra longevity. Don't skip the labeling—you'll forget which vibrant red or sunny yellow zinnias you saved after a year!
⏰ Step 4: Test Viability Before Next Season
Before planting, test a few seeds to ensure they're still good. Place 5-10 seeds in a small container with damp paper towels and seal it in a plastic bag. Keep them in a warm spot for 5-7 days. If most seeds sprout, they're ready to plant. If fewer than half sprout, consider buying fresh seeds for better results.
This simple test gives you peace of mind and helps you plan your garden layout. I always test a few seeds from each variety I saved, so I know exactly what to expect when I plant them in spring. It's a small step that saves time and frustration later.
Tips & tricks for perfect zinnia seed preservation
Here's what I learned after years of saving zinnia seeds—these little tricks make all the difference between seeds that sprout and ones that disappoint.
Harvesting Timing: I can't stress enough how important it is to wait until the seed heads are completely dry and papery brown. The petals should be fully shrunken, and the center should look fluffy like a dandelion. If you harvest too early, the seeds won't be fully developed. I check my zinnias every few days once they start fading—this is the only way to catch them at the perfect moment.
Seed Separation Hack: When separating seeds from chaff, I've found that using a clean white paper bag works better than plastic. The seeds show up clearly against the white background, making it easier to spot any that might have fallen outside the bag. Also, place a cookie sheet under the bag to catch any seeds that escape when you shake it—you'll be surprised how many seeds you'd otherwise lose!
Drying Strategy: For the 3-5 days of drying time, I place my seeds on a paper towel inside a cardboard box with small holes poked in the sides. This creates airflow without letting in dust or pests. I keep the box in a warm, dry spot—like on top of my fridge—where the seeds get gentle warmth without direct sunlight. This method ensures even drying while preventing mold.
Storage Wisdom: I've discovered that using small glass jars with tight lids works best for storing seeds long-term. The glass protects against moisture better than plastic containers. For extra protection, I add a small packet of silica gel to each jar. This keeps seeds viable for the full 2-3 years. Labeling each jar with the variety and year is non-negotiable—I've learned this the hard way after forgetting what was in a jar!
Pro Tips for Zinnia Seed Heads
- Here's what I learned after years of saving zinnia seeds—these little tricks make all the difference between seeds th...
- Harvesting Timing: I can't stress enough how important it is to wait until the seed heads are completely dry and pape...
- Seed Separation Hack: When separating seeds from chaff, I've found that using a clean white paper bag works better th...
Frequently asked questions
Got questions about saving zinnia seed heads?
You’re not alone! Here are answers to the most common queries—from timing to troubleshooting—to help you master the art of preserving these cheerful blooms for next year’s garden.
When is the best time to harvest zinnia seed heads?
Harvest seed heads after the flowers fade but before they turn fully brown or split open—typically 4–6 weeks post-bloom. Aim for late summer to early fall when pods are plump but still dry. Wait too long, and seeds may scatter or lose viability. Pro tip: Use a pair of clean scissors to snip stems just above a leaf node for easier drying.
How long does it take for zinnia seeds to dry indoors?
With proper airflow, zinnia seed heads dry in 1–2 weeks indoors. Hang them upside-down in a paper bag (not plastic!) or lay them on a mesh screen in a warm, dry spot (60–70°F). Check weekly—seeds are ready when pods crumble easily and seeds rattle inside. Troubleshooting: If mold appears, increase airflow or shorten drying time.
Can I save seeds from hybrid zinnias?
Most store-bought hybrids (like ‘Benary’s Giant’ or ‘Crystal’) won’t grow true-to-type from seed—they’re bred for specific traits and may produce weak or unpredictable offspring. For reliable seeds, opt for heirloom varieties labeled “open-pollinated” or “non-hybrid.” Alternative idea: Swap seeds with fellow gardeners or buy from seed savers!
Why are my zinnia seed heads attracting pests?
Seed heads may draw spider mites, aphids, or even squirrels if left too long in the garden. To deter pests:
- Harvest promptly after flowers fade.
- Store dried heads in airtight containers (like glass jars) with a silica gel packet.
- Freeze seed heads for 48 hours before drying to kill eggs.
How should I store zinnia seeds long-term?
For maximum viability (up to 3–4 years), store seeds in:
- A cool, dark place (like a fridge or seed vault).
- An airtight, moisture-proof container (mason jars or vacuum-sealed bags work well).
- Include a silica gel packet or rice grains to absorb humidity.
Wrapping up and next steps
Preserving zinnia seed heads is a simple yet rewarding way to ensure next season’s garden bursts with color—while adding a charming, eco-friendly touch to your space! 🌸 Whether you’re saving seeds for resilience or crafting dried arrangements, every step connects you closer to nature’s cycle. Ready to try? Start small this weekend: pick a few seed heads, follow the drying process, and watch your garden thrive with homegrown blooms year after year.
🌱 Next Steps:
- Experiment! Try different drying methods (air-dry, oven, or silica gel) to see what works best for your climate.
- Share the joy. Gift dried zinnia arrangements or seed packets to fellow gardeners—spread the beauty!
- Plan ahead. Mark your calendar for next year’s planting season to maximize your saved seeds.