
Propagation
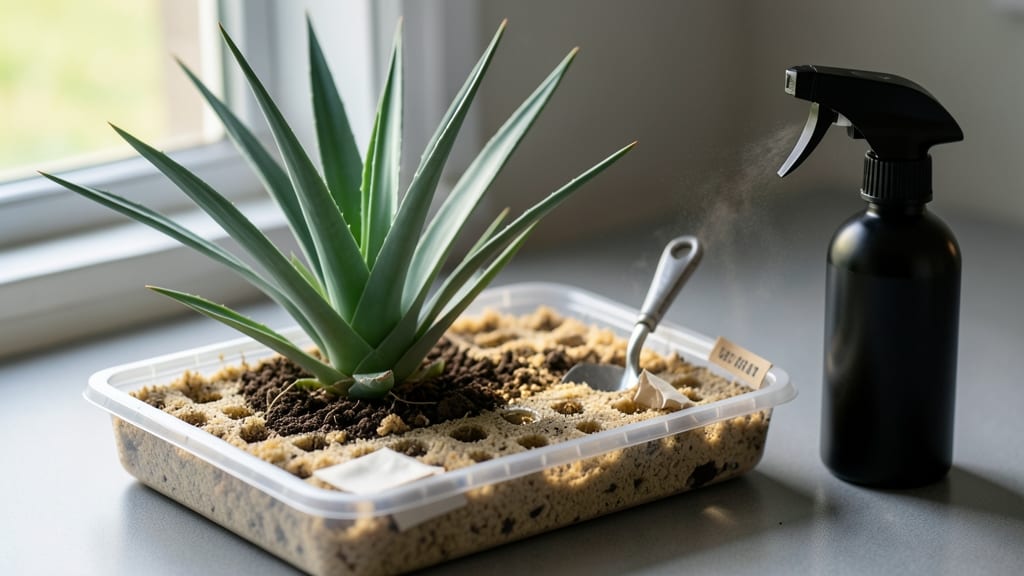
Yucca seed propagation can grow into striking architectural plants with the right patience and setup. 🌱 The key to stress-free germination lies in mimicking their desert origins—warm soil, bright light, and minimal fuss. I’ve propagated dozens of yuccas from seed, and the secret isn’t complicated: it’s about timing, soil, and a little extra warmth. Most seeds need 60-90 days to sprout, but consistency is everything. Start indoors in late winter when days lengthen, using a well-draining mix of cactus soil and perlite. Plant seeds just ¼ inch deep—too deep, and they’ll take forever (or never) to break through. A heat mat set to 80°F speeds things up dramatically, cutting germination time nearly in half. Once sprouts appear, keep them in bright, indirect light until they’re sturdy enough for direct sun. Thin seedlings to 3-4 inches apart to prevent overcrowding, and you’ll have small yucca pups ready for transplanting in 3-4 months. The first true leaves signal it’s time to harden them off before moving outdoors. This method works for all yucca varieties, but if you’re impatient, division is faster—just separate offsets in spring when the soil is workable. Either way, you’ll end up with plants that thrive with almost no care once established.
📚 In This Guide
- What you need
- Instructions
- Tips and common mistakes
- Wrapping up and next steps
What you need
- ● Yucca seeds – Fresh or stored (ensure they’re viable; test by floating—sinkers are good!)
- ● Seed-starting mix – Well-draining, sterile mix (e.g., 50% perlite + 50% coco coir or a cactus/succulent blend)
- ● Small pots or seed trays – 2–3 inch pots (or a tray with drainage holes) per seed
- ● Growing containers – 4–6 inch pots (for transplanting seedlings)
- ● Spray bottle – For gentle watering (avoid soaking the mix!)
- ● Grow lights or sunny windowsill – 12–16 hours of light daily (south-facing window or LED grow lights work best)
- ○ Heat mat (optional but helpful) – Maintains 75–85°F soil temp for faster germination
- ● Humidity dome or plastic wrap – Keeps moisture high until sprouts appear
- ● Fertilizer (low-nitrogen) – Diluted fish emulsion or seaweed extract (use after germination)
- ● Seed scarifier – Lightly nick seeds to speed up germination (if they have hard coats)
- ● pH test kit – Ensure soil pH is 6.0–7.0 (yuccas prefer slightly acidic to neutral)
- ● Thermometer – Monitors soil temperature for optimal growth
- ● Label markers – Track seed varieties and planting dates
- ● Compost or worm castings – Boosts nutrients after transplanting
Step-by-step instructions for yucca seed propagation
Here's how to coax those stubborn yucca seeds into strong, healthy seedlings without the guesswork.
🌱 Step 1: Stratify Seeds for Faster Germination
Yucca seeds need a cold period to break dormancy. Place them in a sealed plastic bag with a damp paper towel—just enough moisture to keep it damp, not soggy. Refrigerate for 4-6 weeks at 35-40°F. Check weekly; if the towel dries, mist it lightly. This mimics winter conditions and tricks seeds into thinking spring has arrived.
I like to label the bag with the date so I don’t forget. After the cold treatment, you’ll see tiny cracks in the seed coats—your signal that germination is about to begin. If seeds stay hard after 6 weeks, extend the stratification by another 2 weeks. Patience here prevents rot later.
🪴 Step 2: Prepare Containers and Soil Mix
Use small pots (2-3 inches deep) with drainage holes—yucca roots need air, not waterlogged soil. Fill with a sandy, gritty mix (equal parts potting soil, perlite, and coarse sand). Sterilize the mix by baking it at 200°F for 30 minutes to kill fungi that cause damping-off. Tap the pot gently after filling to settle the mix without compacting it.
Yucca seeds are tiny, so I plant them in groups of 3-4 per pot to ensure at least one sprouts. Scatter seeds on the surface—don’t bury them. Press lightly so they make contact with the soil. Cover the pot with a clear plastic dome or wrap to retain humidity, but leave it slightly ajar for airflow.
☀️ Step 3: Provide Warmth and Indirect Light
Place pots in a warm spot (75-80°F)—a seedling heat mat works wonders. Keep the soil consistently moist but never soggy; bottom-watering (placing pots in an inch of water for 10 minutes) prevents fungal issues. You’ll see first sprouts in 2-4 weeks, though some stubborn seeds take up to 8 weeks. Don’t rush—yucca seeds germinate on their own timeline.
Once seedlings emerge, remove the dome immediately. Too much humidity invites damping-off, where seedlings collapse overnight. Move pots to bright, indirect light (east or west window) for the first 2 weeks. Direct sun now will scorch delicate leaves. Watch for first true leaves—these look like miniature yucca blades and signal it’s time to introduce morning sun only.
✂️ Step 4: Thin and Harden Off Seedlings
When seedlings reach 2 inches tall, thin to the strongest one per pot. Snip the others at the base with clean scissors—yucca roots are sensitive, so avoid pulling. After thinning, reduce watering to every 7-10 days, letting the top inch of soil dry between waterings. Overwatering at this stage stunts root growth.
Start hardening off 4-6 weeks after germination by placing pots outside in partial shade for 1 hour daily. Gradually increase time and sun exposure over 2 weeks. You’ll know they’re ready for the garden when they tolerate full sun for 4 hours without wilting. Transplant on a cloudy day to reduce shock, burying the root ball to the same depth as in the pot.
💧 Step 5: Maintain Drought-Tolerant Habits
Yucca seedlings thrive on neglect once established. Water deeply every 2-3 weeks in summer, letting the soil dry completely between waterings. In winter, reduce to monthly watering. Fertilize lightly with a balanced 10-10-10 mix every 6 months—yucca hates rich soil and grows best when slightly starved.
Watch for pale, leggy growth—a sign of insufficient light. Move seedlings to a sunnier spot immediately. By 6 months, they’ll resemble miniature adult yuccas. At this point, you can transplant them to the ground or larger containers. Patience pays off: these seedlings will reward you with drought-resistant, low-maintenance plants for decades.
Tips & tricks for perfect yucca seed germination
These practical insights will help you avoid the most common pitfalls when growing yucca from seed.
Cold Treatment Precision: The 4-6 week stratification at 35-40°F is non-negotiable for breaking dormancy. I use a refrigerator's crisper drawer for consistent temperatures—it's cooler than the main compartment. If your fridge runs warmer, place a thermometer inside to monitor. For seeds that remain hard after 6 weeks, extend the cold treatment by exactly 2 weeks, but no longer, to prevent mold. The tiny cracks you'll see in seed coats are your only confirmation that stratification worked.
Soil Sterilization Secret: That 200°F for 30 minutes sterilization step isn't just about damping-off prevention—it also kills weed seeds that might compete with your yucca. I sterilize my soil mix in batches using a baking sheet in the oven. For larger quantities, use a microwave-safe container with small holes poked in the lid, heating in 5-minute intervals until the soil reaches 200°F throughout. Let it cool completely before using.
Light Transition Strategy: The shift from bright indirect light to morning sun only happens at a very specific stage—when you see those first true leaves resembling miniature yucca blades. This gradual introduction prevents sunburn on delicate seedlings. I use a sheer curtain over my south-facing window to filter light during this critical 2-week period. Watch for leaves that look pale or translucent—they're begging for more light, but move them slowly to avoid shock.
Thinning Technique: When thinning to the strongest seedling at 2 inches tall, I use sterilized scissors to snip at the base rather than pulling. Yucca roots are extremely sensitive, and any damage can set back growth for weeks. After thinning, I mark each pot with a permanent marker to track individual seedlings' progress. This helps me remember which ones need special attention during the hardening-off process.
Pro Tips for Yucca Seed Propagation
- These practical insights will help you avoid the most common pitfalls when growing yucca from seed.
- Cold Treatment Precision: The 4-6 week stratification at 35-40°F is non-negotiable for breaking dormancy.
- Soil Sterilization Secret: That 200°F for 30 minutes sterilization step isn't just about damping-off prevention—it also kills weed seeds that might compete with your yucca.
Frequently asked questions
Got questions about yucca seed propagation?
You’re not alone! Here are answers to the most common concerns—so you can grow confidently and avoid pitfalls.
How long does it take for yucca seeds to germinate?
Yucca seeds typically germinate in 2–6 weeks under ideal conditions (warmth, moisture, and light). Patience is key—some stubborn seeds may take up to 8 weeks. If nothing sprouts after 2 months, check moisture levels or seed viability. Pro tip: Keep soil consistently damp (not soggy) to speed up germination!
Can I speed up germination with scarification or soaking?
Yes! Yucca seeds have hard coats, so scarification (lightly sanding or nicking the seed) or soaking in warm water for 24–48 hours can break dormancy and trigger faster sprouting. Skip this step only if seeds are fresh (<1 year old). For older seeds, scarification works best. Timing tip: Soak seeds overnight before planting for a head start!
What’s the best temperature for germinating yucca seeds?
Yucca seeds thrive in 70–85°F (21–29°C)—mimic their native desert climate! Use a seedling heat mat (70°F+) or place pots in a sunny windowsill. Avoid cold drafts or temps below 60°F (15°C), which can stall germination. Troubleshooting: If seeds sit too long in cool soil, they may rot. Adjust your setup if sprouts lag.
What if my yucca seeds won’t germinate at all?
Don’t panic! Try these fixes:
- Check seed viability: Test a few seeds in warm water—if they sink, they’re likely viable.
- Adjust moisture: Overwatering suffocates seeds; underwatering dries them out. Aim for consistently damp (not wet) soil.
- Light exposure: Yucca seeds need bright, indirect light (a south-facing window or grow light helps).
- Fresh seeds: Older seeds (>2 years) may lose viability. Source new seeds if possible.
Can I grow yucca from cuttings instead of seeds?
While seeds take time, yucca cuttings (from mature pups or stem segments) root faster (4–8 weeks). Dip the cut end in rooting hormone, plant in cactus mix, and keep soil lightly moist. Cuttings are ideal for cloning your favorite variety—just ensure the parent plant is healthy and disease-free. Bonus: Cuttings preserve the exact traits of the mother plant!
Wrapping up and next steps
Yucca seed propagation is a rewarding journey that unlocks the potential to grow your own stunning, drought-resistant plants from scratch!
With the right materials, patience, and a few simple steps, you can watch tiny seeds transform into thriving yuccas in just 60 days. 🌱✨ Don’t let challenges discourage you—every gardener faces them, and your persistence will pay off with lush, hardy greenery.
Now that you’re armed with knowledge, take the next step: gather your supplies, follow the germination guide, and start your yucca adventure today. Happy growing—your future garden awaits! 🌿💚