
Vegetables
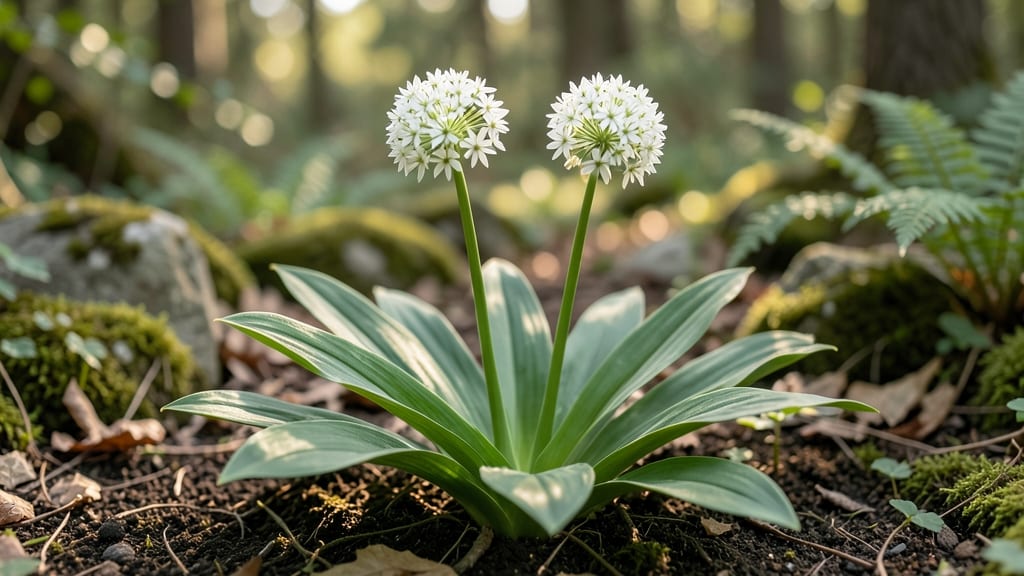
Wild garlic seed heads let you grow your own forest-floor flavor for years to come. 🌱 The trick is collecting them at the right moment—when they turn from green to brown but before they shatter—and then giving those tiny seeds a taste of winter to break their dormancy.
I’ve turned wild garlic into a garden staple this way, and the first true leaves appear in just 60 days after planting.
You’ll need mature seed heads from healthy plants, a paper bag for drying, and a cold, dark spot for stratification. The seeds themselves are tiny—think poppy seeds—but they pack a punch when they sprout.
Most people skip the cold treatment, which is why their seeds take months to germinate (or never do at all). A few weeks in the fridge mimics nature’s timing perfectly.
By spring, you’ll have lush, arrow-shaped leaves ready to multiply your wild garlic patch. The plants spread aggressively once established, so start small if you’re new to this. The first harvest of scallions and flowers arrives the following year, and you’ll never need to buy wild garlic again.
Works best in partial shade where the soil stays moist, just like their forest habitat. Here’s how to do it without losing a single seed to dormancy or impatience—guaranteed to turn you into a wild garlic evangelist.
📚 In This Guide
- What you need
- Instructions
- Tips and common mistakes
- Wrapping up and next steps
What you need
- ● Wild garlic seed heads: 1–2 mature, fully dried heads (harvested in late spring/summer). Ensure they’re completely dry (no moisture) to prevent mold.
- ● Paper towels or coffee filters: 2–3 sheets (for moisture control). Opt for unbleached, seedling-safe options.
- ● Ziploc bags or resealable containers: 1–2 quart-sized bags with a breathable seal (small holes work if needed).
- ● Spray bottle: 1 (with water) for gentle misting—avoid soaking!
- ● Refrigerator: A standard fridge set to 34–40°F (1–4°C) for cold stratification.
- ● Small pots or trays: 2–4 (3–4" diameter) with drainage holes, filled with seed-starting mix (sterile, peat-free preferred).
- ● Grow lights or sunny windowsill: A south-facing spot or LED grow lights (12–16 hrs/day) for post-stratification.
- ● Humidity dome: 1 (to retain moisture during early sprouting).
- ● Label markers: 1–2 (to track seed head varieties if experimenting).
- ○ Heating mat: 1 (optional for faster germination post-stratification).
- ● Fine-mesh sieve: 1 (to separate tiny seeds from debris after drying).
- ● Journal/notebook: 1 (to log stratification progress and sprouting dates!).
How to cold-stratify wild garlic seed heads for reliable sprouting
Here's my go-to method for breaking dormancy and getting wild garlic growing strong in just two months.
🌱 Step 1: Harvest and Dry the Seed Heads Properly
Collect mature seed heads when they've turned brown and papery but before they shatter. I like to hang them upside down in a paper bag for 2-3 weeks in a dry, well-ventilated spot. This lets the seeds finish drying naturally while preventing mold.
Gently rub the dried heads between your fingers to release the seeds. Wild garlic seeds are tiny—think poppy seeds—so I use a fine-mesh strainer to catch any that fall through. Store them in a sealed envelope in the fridge until stratification.
❄️ Step 2: Stratify Seeds in Moist Sand or Peat Moss
Mix equal parts coarse sand or peat moss with water until it feels like a damp sponge. Spread the seeds thinly over the surface—I use about 1 teaspoon of seeds per quart container—then cover them with ½ inch of the moist medium.
Place the container in a sealed plastic bag and refrigerate at 35-45°F for 60 days. Check monthly to ensure the medium stays moist but not soggy. This cold period mimics winter conditions and breaks the seed's natural dormancy.
🌱 Step 3: Plant Stratified Seeds in Well-Draining Soil
After stratification, sow seeds ¼ inch deep in pots filled with a mix of 50% potting soil and 50% perlite. Wild garlic thrives in loose, airy soil that prevents rot. Water gently until the soil surface looks damp but not wet.
Place the pots in a bright spot with indirect light—like a north-facing window—and keep the soil consistently moist. Germination takes 2-4 weeks, but be patient. You'll see tiny green shoots first, followed by the first true leaves.
☀️ Step 4: Transplant Seedlings to Outdoor Garden Beds
Once seedlings have 3-4 true leaves and are about 2 inches tall, they're ready for outdoor planting. Choose a spot with partial shade and moist, well-draining soil. Wild garlic spreads easily, so space plants 6 inches apart.
Water deeply after transplanting to help roots establish. Mulch with 1 inch of compost to retain moisture and suppress weeds. You'll notice new growth within a week—that's your signal everything is working.
⏰ Step 5: Maintain Through First Growing Season
Keep the soil consistently moist but not waterlogged—wild garlic hates soggy roots. Feed with a balanced 10-10-10 fertilizer every 4-6 weeks during the growing season. You'll see the first arrow-shaped leaves emerge in early spring.
In fall, let the plants mature fully before harvesting. The first year is about establishing strong roots, so resist the urge to dig up bulbs. Next season, you'll have a thriving patch ready for regular harvests.
Tips & tricks for perfect wild garlic sprouting
Real talk: The difference between struggling with stubborn wild garlic seeds and having a thriving patch comes down to these small but critical details.
Timing is Everything: In Step 1, that 2-3 week drying period is non-negotiable. If you rush it, seeds won't finish maturing properly. I've seen people try to speed this up by using a dehydrator—don't! The natural air drying prevents mold while letting seeds complete their maturation cycle. For extra insurance, place a small fan near the hanging bags to improve airflow without disturbing the seeds.
Stratification Secrets: The 60-day cold period in Step 2 is where dormancy breaks, but consistency matters. I use a small refrigerator drawer set to 35-45°F rather than the main fridge where temps fluctuate. Mark your calendar 60 days from when you start—this mimics winter conditions perfectly. If you forget to check monthly, set a phone reminder; soggy medium leads to mold, while bone-dry medium prevents germination.
Soil Science: The 50-50 soil-perlite mix in Step 3 is crucial for preventing rot. Wild garlic roots need oxygen, and perlite creates that airy environment. When planting, use a toothpick to make small holes—this prevents compacting the soil around delicate seeds. Pro tip: Add a handful of worm castings to the mix for extra nutrients without overwhelming the tiny seedlings.
Transplanting Trick: When moving seedlings outdoors in Step 4, do it on an overcast day or in late afternoon. The shock of direct sun can stress young plants. I water the pots thoroughly before transplanting so the root ball stays intact. The 6-inch spacing might seem generous, but wild garlic spreads aggressively—this gives roots room to establish without competing.
Pro Tips for Wild Garlic Seed Heads
- Real talk: The difference between struggling with stubborn wild garlic seeds and having a thriving patch comes down t...
- Timing is Everything: In Step 1, that 2-3 week drying period is non-negotiable. If you rush it, seeds won't finish ma...
- Stratification Secrets: The 60-day cold period in Step 2 is where dormancy breaks, but consistency matters. I use a s...
Frequently asked questions
Got questions about growing wild garlic from seed heads?
You’re not alone! Here are answers to the most common queries—so you can confidently start your cold-stratified sprouts in just 60 days.
Can I use wild garlic seed heads straight from the plant?
Not quite! Wild garlic seed heads (Allium ursinum) need cold stratification to break dormancy. Simply collect mature seed pods, dry them, and refrigerate for 4–6 weeks before planting. Skipping this step may result in slow or uneven germination.
How long does it take for wild garlic seeds to sprout after cold stratification?
With proper cold treatment, expect sprouts in 10–30 days after planting. Keep soil consistently moist (not soggy) and warm (60–70°F) for best results. Patience pays off—some seeds may take up to 60 days to emerge!
What’s the best way to harvest wild garlic seed heads in the wild?
Harvest seed heads when they’re brown and dry (late spring to early summer). Gently twist or cut the stems to avoid damaging the plant. Store seeds in a paper envelope in a cool, dry place until stratification. Avoid damp conditions to prevent mold.
Can I substitute wild garlic seeds with regular garlic or onion seeds?
Nope! Wild garlic (Allium ursinum) is a different species than culinary garlic (Allium sativum) or onions. While they’re related, their growth habits and flavors vary. Stick with wild garlic seeds for authentic results—or try wild onion seeds (Allium vineale) as a close alternative.
Why aren’t my wild garlic seeds germinating after cold stratification?
Check these troubleshooters:
- Stratification time: Ensure seeds got 4+ weeks in the fridge (not freezer!).
- Moisture: Soil should stay damp, not waterlogged.
- Temperature: Ideal sprouting range is 60–70°F.
- Depth: Plant seeds ¼ inch deep—too deep = slower germination.
Wrapping up and next steps
Harnessing the power of wild garlic seed heads through cold stratification is a rewarding way to grow this flavorful herb with minimal effort! By mimicking nature’s timing, you’ll unlock faster, healthier sprouts in just 60 days—perfect for gardeners eager to expand their green thumb.
Whether you’re a seasoned grower or a curious beginner, this method proves that patience (and a little fridge magic) pays off.
Ready to dive in? Grab your seeds, prep your supplies, and start stratifying today! Your future wild garlic harvest—and a kitchen bursting with garlicky goodness—awaits. 🌱