
Lawn
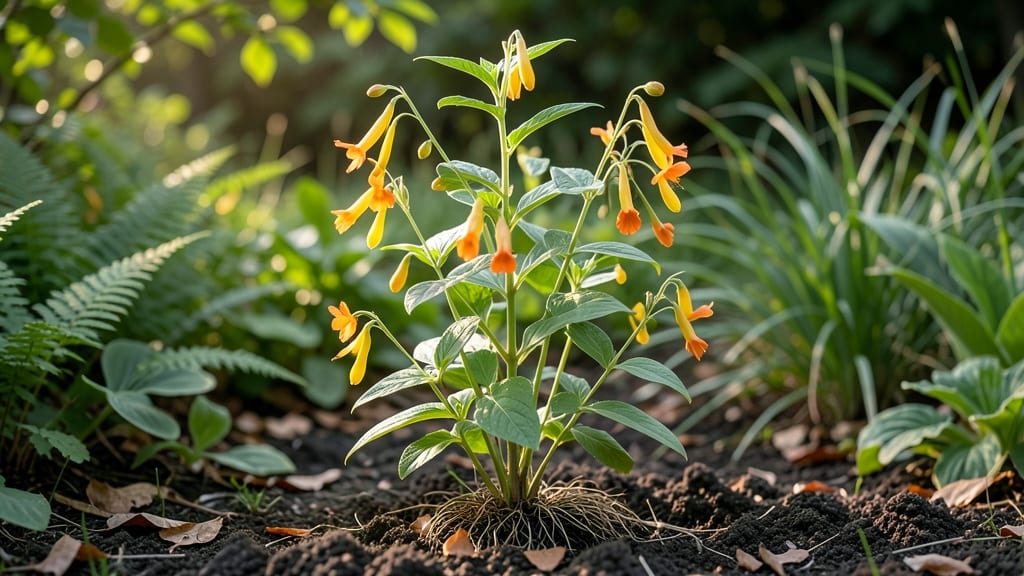
Those explosive touch-me-not seed pods are nature’s way of saying "grow me next year" — but only if you handle them right. 🌱 I’ve learned the hard way that skipping cold stratification means waiting months for seeds that may never sprout, or worse, watching them rot in damp soil.
The secret to reliable blooms lies in mimicking winter’s chill, and once you master it, you’ll have impatiens popping up like clockwork every spring.
Start by harvesting pods when they’re fully ripe but just before they split open—usually late summer to early fall. Let them dry completely on paper towels for a week, then crack them open to release the tiny, jelly-like seeds.
These need 6-8 weeks of cold stratification (40°F) in a damp paper towel before planting, which tricks them into thinking winter’s passed. Skip this step, and you’ll be waiting forever for germination.
By the time spring rolls around, you’ll have vibrant green seedlings pushing through soil, ready to become the showstopper of your shady garden beds. The best part? These plants thrive in containers too, so even balcony gardeners can enjoy their signature pink and orange blooms all season.
Just remember: patience with the seeds pays off in months of effortless color.
If you’re in a warmer climate, you can even plant stratified seeds in late fall for winter blooms—though they’ll need protection from frost. The key is consistency: keep soil moist but not soggy, and avoid overcrowding seedlings.
Once established, these plants spread like wildfire (literally, in their native habitats), giving you years of free plants from your original harvest.
📚 In This Guide
- What you need
- Instructions
- Tips and common mistakes
- Wrapping up and next steps
What you need
- ● Touch Me Not seeds: 1 packet (50–100 seeds) – Ensure they’re fresh (less than 1 year old) for best germination rates.
- ● Cold stratification supplies: 1 small plastic bag (resealable, quart-sized) or a paper towel.
- ● 1 cup distilled water (or tap water if filtered).
- ● 1 refrigerator (set to 35–40°F / 2–4°C).
- ● Germination setup: 1 seed-starting tray or small pots (2–3 inch diameter).
- ● Potting mix: 1 bag (1–2 quarts) of sterile, seed-starting mix (or coco coir + perlite blend).
- ● Spray bottle (for gentle watering).
- ● Growing environment: 1 grow light or sunny windowsill (south-facing, 6+ hours of light).
- ○ 1 humidity dome or plastic wrap (optional, for moisture retention).
- ● Transplanting tools: 1 small trowel or spoon.
- ● 1 garden fork (for outdoor planting, if applicable).
- ● Seedling heat mat (to speed up germination in cooler climates).
- ● pH test kit (to check soil pH—ideal range: 6.0–7.0).
- ● Fertilizer (balanced 10-10-10 or fish emulsion for young seedlings).
- ● Label markers (to track stratification dates and varieties).
- ● Outdoor shade cloth (if transplanting seedlings outside in hot climates).
Step-by-Step instructions for cold-stratifying Touch Me Not seed pods
Here’s the foolproof method I’ve used to break dormancy and get these finicky pods sprouting reliably.
🌱 Step 1: Harvest and Prepare the Seed Pods
Collect mature, dry Touch Me Not seed pods from the garden in late fall or early winter—look for pods that have turned brown and feel crispy to the touch. Avoid any that are still green or show signs of mold. Place them in a paper bag and store in a cool, dry spot for 2-4 weeks to ensure full dryness before stratification.
Once dry, gently open the pods to release the seeds. The seeds are tiny and attached to a fibrous membrane—don’t force them loose, as this can damage the seed coat. I like to lay the pods on a clean sheet of paper and tap them lightly with a spoon to release the seeds naturally. Spread them out to dry for another 24 hours to prevent clumping during stratification.
❄️ Step 2: Cold-Stratify the Seeds
Place the dried seeds in a sealed plastic bag with a damp paper towel—just enough moisture to keep the towel damp, not soggy. The goal is to mimic winter conditions. Store the bag in your refrigerator’s crisper drawer, where temperatures hover around 35-40°F. This cold treatment breaks dormancy and signals the seeds it’s time to grow.
Check the seeds after 4 weeks—if they haven’t sprouted, give them another 2-4 weeks in the fridge. You’ll know stratification is working when the seeds start to swell slightly or develop a tiny white root. If mold appears, remove the seeds immediately and start fresh with a new batch.
🌱 Step 3: Plant the Stratified Seeds
Once the seeds have been cold-stratified for 6-8 weeks, fill small pots with a light, well-draining seed-starting mix. Plant the seeds ¼ inch deep, spacing them ½ inch apart in the pot. Gently press the soil around them to ensure good contact but don’t compact it too tightly—you want the soil to remain loose for easy root penetration.
Place the pots in a warm spot with indirect light, like a sunny windowsill shielded from direct afternoon sun. Keep the soil consistently moist but never waterlogged—you’ll know it’s right when the top inch feels damp to the touch. Germination should begin in 2-4 weeks, though some seeds may take longer, especially if they were particularly dormant.
☀️ Step 4: Provide Ideal Growing Conditions
Once the seedlings emerge, move them to a location with bright, indirect light for the first week to prevent shock. After that, gradually introduce them to full sun (at least 6 hours daily) to strengthen their stems. Touch Me Not plants thrive in temperatures between 60-75°F, so avoid placing them near drafts or heat sources.
Water the seedlings at the soil level to avoid disturbing their delicate stems—use a spray bottle or a small watering can with a fine rose attachment. Thin the seedlings to 1 plant per pot once they reach 2 inches tall, keeping the strongest, most vigorous seedling. This prevents overcrowding and ensures each plant gets enough nutrients to grow robustly.
🪴 Step 5: Transplant and Maintain for Blooms
After the last frost date, transplant the seedlings outdoors into a location with partial shade to full sun. Touch Me Not plants prefer well-draining soil with a slightly acidic to neutral pH. Space them 18-24 inches apart to allow for their bushy growth habit. Water deeply after transplanting to help the roots establish.
Once established, Touch Me Not plants are drought-tolerant but will produce more blooms with consistent moisture. Deadhead spent flowers to encourage continuous blooming throughout the growing season. With proper care, you’ll see those iconic explosive seed pods forming by mid-summer, ready to repeat the cycle.
Tips & tricks for perfect Touch Me Not seed pod sprouting
These little-known strategies will help you break dormancy and coax those stubborn Touch Me Not seeds into reliable germination.
Pod Selection Matters: In Step 1, when harvesting pods, focus on those that are completely brown and crispy—not just slightly dried. I’ve found that pods with a faint papery texture release seeds most easily. Avoid any that feel leathery or show signs of insect damage, as these seeds often fail to germinate. The crispier the pod, the better the seed viability.
Stratification Environment: For Step 2, the refrigerator’s crisper drawer is ideal because it maintains consistent 35-40°F temperatures while providing high humidity from the damp paper towel. If your fridge runs warmer, place the bag on a shelf near the back where it’s coolest. I’ve seen seeds fail to sprout when stored in warmer fridge sections—consistent cold is key for breaking dormancy.
Germination Timing: In Step 3, when planting stratified seeds, don’t rush the germination process. The 2-4 week window mentioned accounts for variations in seed dormancy. If your kitchen stays cooler than 60°F, germination may take the full 4 weeks. I’ve had batches take up to 6 weeks in cooler conditions—patience is crucial for these finicky seeds.
Light Transition Strategy: For Step 4, when moving seedlings to brighter light, do it gradually over 3-4 days rather than all at once. Sudden exposure to full sun can scorch delicate seedlings. I start with morning sun only, then gradually add afternoon sun over several days. This mimics natural spring conditions and prevents shock.
Pro Tips for Touch Me Not Seed Pods
- These little-known strategies will help you break dormancy and coax those stubborn Touch Me Not seeds into reliable germination.
- Pod Selection Matters: In Step 1, when harvesting pods, focus on those that are completely brown and crispy—not just slightly dried.
- Stratification Environment: For Step 2, the refrigerator’s crisper drawer is ideal because it maintains consistent 35-40°F temperatures while providing high humidity from the damp paper towel.
Frequently asked questions
Got questions about working with Touch-Me-Not seed pods? You’re not alone! Here are answers to the most common queries to help you master cold-stratified sprouting for those stunning year-round blooms.
How long does cold stratification take for Touch-Me-Not seed pods?
Cold stratification typically requires 4–8 weeks in the fridge. Place dampened pods in a sealed bag with moist peat moss or paper towels, then store them at 35–40°F (2–4°C). Pro tip: Check periodically to ensure they stay moist but not soggy—overwatering can cause mold!
Can I plant Touch-Me-Not seeds directly outdoors without cold stratification?
While possible, germination rates drop significantly without stratification. If you skip it, plant seeds in late fall (they’ll naturally stratify over winter) or soak them in warm water for 24 hours before sowing. For best results, though, cold stratification is key for reliable blooms!
Why aren’t my Touch-Me-Not seeds germinating after stratification?
Try these troubleshooting steps:
- Check moisture: Seeds need consistent dampness—like a wrung-out sponge.
- Verify temperature: Too warm? Move them to the fridge. Too cold? Use a seedling heat mat.
- Test viability: Slice open a pod—if the seed inside is firm and plump, it’s likely viable.
- Light exposure: Some varieties need light to germinate; others prefer darkness.
What’s the best time to transplant Touch-Me-Not seedlings?
Transplant seedlings once they’ve developed 2–3 true leaves (usually 6–8 weeks after germination). Choose a cool, overcast day to reduce stress, and space them 12–18 inches apart for full blooms. Harden them off gradually by exposing them to outdoor conditions for 1–2 hours daily before full transplant.
Will Touch-Me-Not seed pods grow back every year, or do I need to replant?
These plants are perennial in USDA zones 3–9, meaning they’ll return yearly if given proper care. However, their seed pods won’t regrow into new plants—you’ll need to replant seeds for fresh blooms. Deadhead spent pods to encourage more flowers, but save some for propagation!
Wrapping up and next steps
From cold-stratified seed pods to vibrant year-round blooms, Touch Me Not plants prove that a little patience and preparation can yield stunning results! 🌱 Whether you're a seasoned gardener or just starting out, this method ensures reliable growth and breathtaking displays. Ready to transform your lawn or garden?
🌿 Your Next Step:
- Gather your supplies—cold-stratified seed pods, gloves, and a sunny spot—and get ready to plant!
- Experiment with timing—try different stratification periods to see what works best for your climate.
- Share your progress—tag us in your garden photos and inspire others to grow!