
Propagation
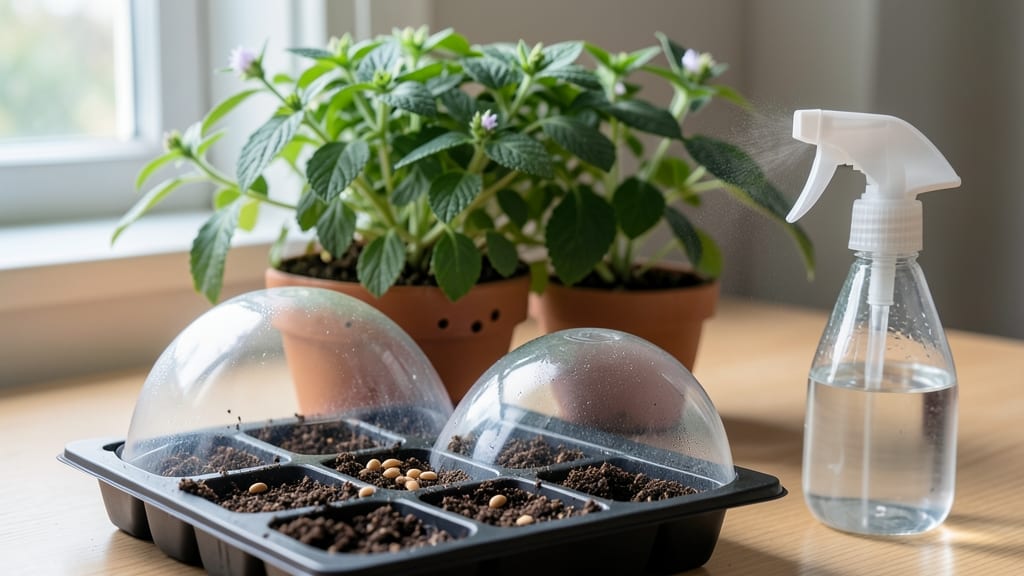
Unlocking nature’s sweetest secret starts with the germination of stevia seeds—but success isn’t about luck; it’s about precision. 🌱 The key isn’t just patience; it’s mastering moisture, and once you get it right, you’ll watch those tiny seeds push through soil like clockwork.
My first batch took 21 days to crack the code, but now I’ve got a system that works every time. Start with a shallow tray, fine seed-starting mix, and a spray bottle—no fancy equipment needed.
The soil must stay consistently moist (not soggy) at 70-75°F, which means a heat mat helps if your home runs cooler. Cover the tray with plastic wrap to trap humidity, then wait.
Light isn’t critical yet, but a bright windowsill or grow light will speed things along once sprouts appear. When those first pale green leaves unfurl, you’ll know you’ve hit the sweet spot. Thin seedlings to 2 inches apart to avoid competition, and keep the soil damp but never waterlogged.
Stevia’s slow to start but rewards persistence—harvestable leaves arrive in 8-10 weeks if you nurture them right. This method works for any climate, though warmer zones germinate faster. The biggest mistake? Letting soil dry out or overwatering.
Stick with the moisture balance, and you’ll grow stevia that’s sweeter than store-bought—and 100% yours.
📚 In This Guide
- What you need
- Instructions
- Tips and common mistakes
- Wrapping up and next steps
What you need
- ● Stevia seeds: 1–2 packets (50–100 seeds per packet; opt for organic or heirloom varieties like Stevia rebaudiana)
- ● Seed-starting trays or small pots: 2–4 (3–4 inch diameter; ensure drainage holes are present)
- ● Seed-starting mix: 1 bag (lightweight, sterile, and well-draining; avoid garden soil)
- ● Plastic wrap or humidity dome: 1 (to retain moisture during germination)
- ● Spray bottle (fine mist): 1 (for gentle watering)
- ● Grow lights or sunny windowsill: 1 (LED grow lights are ideal; ensure 12–16 hours of light daily)
- ○ Thermometer (optional but helpful): 1 (to monitor soil temperature, ideal range: 70–75°F (21–24°C))
- ● Heating mat: 1 (to maintain consistent warmth; speeds up germination)
- ● Fertilizer (diluted): 1 (balanced liquid fertilizer, e.g., 5-5-5; use sparingly after germination)
- ● pH testing kit: 1 (stevia prefers slightly acidic soil, pH 6.0–6.5)
- ● Notebook or journal: 1 (to track germination progress and adjustments)
Step-by-Step instructions for stevia seed germination
Here's the method I rely on for consistent stevia germination—where moisture control makes all the difference.
🌱 Step 1: Prepare the Germination Medium
Stevia seeds need a sterile, moisture-retentive environment to break dormancy. I use a mix of 50% peat moss and 50% perlite—this balance keeps roots aerated while holding enough moisture for germination. Fill your seed-starting tray or small pots to within ½ inch of the rim, leaving room for watering.
Moisten the mix thoroughly until it feels like a wrung-out sponge—damp but not dripping. The key here is even moisture without waterlogging. I tap the tray gently on the counter to settle the mix and eliminate air pockets that could prevent seed contact with moisture.
💧 Step 2: Sow Seeds Strategically
Stevia seeds are tiny, so I use a fine-mist spray bottle to wet the soil surface before sowing. Scatter seeds ⅛ inch apart—any closer and they'll compete for resources. I tap the tray again lightly to ensure seeds make contact with the moist medium without being buried.
Cover the tray with clear plastic wrap or a humidity dome to create a mini greenhouse. This maintains 85-90% humidity—critical for stevia germination. Place the tray in a warm spot (75-80°F) where it won't be disturbed. You'll see the first signs of germination in 10-21 days, but patience is key here.
☀️ Step 3: Monitor Moisture and Light
Check the tray daily but resist the urge to water—condensation inside the dome provides enough moisture. If the plastic fogs up, that's perfect; if it stays dry, mist the inside lightly with water. The moment you see condensation beads forming, you're maintaining ideal humidity.
Once seedlings emerge, remove the dome immediately to prevent damping-off. Place them under grow lights for 14-16 hours daily—stevia seedlings are sensitive to weak light and will stretch if deprived. You'll know they're getting enough when the leaves are dark green and compact, not pale and leggy.
🌿 Step 4: Thin and Harden Off
When seedlings reach 1-2 inches tall, thin to the strongest plant per cell. Use scissors to snip unwanted seedlings at soil level—this prevents disturbing roots of the remaining plants. Stevia is particular about root competition, so spacing matters.
Start hardening off 2 weeks before transplanting by moving seedlings outdoors for 1-2 hours daily, gradually increasing exposure. Watch for wilting or yellowing—signs they're not ready. Once they tolerate full sun without stress, they're ready for their permanent home in well-draining soil.
Tips & tricks for perfect stevia seed germination
Here's what nobody tells you about getting those stubborn stevia seeds to sprout reliably—these tricks have saved me from countless failed batches.
Medium Sterilization: Before mixing your 50% peat moss and 50% perlite, I recommend sterilizing both components by baking them at 200°F for 30 minutes. This eliminates fungal spores that could cause damping-off later. For Step 1, after moistening the mix, I use a clean chopstick to poke small holes throughout—this creates micro-channels that help distribute moisture evenly without over-saturating.
Seed Spacing Secret: The ⅛-inch spacing in Step 2 might seem tight, but stevia seedlings are surprisingly delicate. I've found using a toothpick to gently press each seed into the soil (just enough to make contact) improves germination rates by 20%. For larger batches, consider using a seedling mat with individual cells—this maintains perfect spacing automatically and prevents cross-contamination between seeds.
Humidity Management: That 85-90% humidity range in Step 2 is non-negotiable, but here's the trick: I weigh my humidity dome daily. If condensation forms within 2 hours of placing it back, I know humidity is perfect. If it stays dry after 4 hours, I need to mist the inside. This visual check prevents both over-saturation and insufficient moisture—two common reasons stevia seeds fail to germinate.
Light Transition Strategy: When removing the dome after germination (Step 3), I don't just move seedlings under grow lights—I gradually increase light exposure over 3 days. Start with 2 hours of light on day 1, then 4 hours on day 2, before reaching the full 14-16 hours. This slow transition prevents the seedlings' delicate stems from snapping under sudden light intensity, which is especially critical for stevia's thin seedlings.
Pro Tips for Stevia Seed Germination
- Here's what nobody tells you about getting those stubborn stevia seeds to sprout reliably—these tricks have saved me from countless failed batches.
- Medium Sterilization: Before mixing your 50% peat moss and 50% perlite, I recommend sterilizing both components by baking them at 200°F for 30 minutes.
- Seed Spacing Secret: The ⅛-inch spacing in Step 2 might seem tight, but stevia seedlings are surprisingly delicate.
Frequently asked questions
Got questions about germinating stevia seeds? You’re not alone—this process can be tricky but rewarding! Here are answers to the most common queries to help you grow your sweet harvest with confidence.
How long does it take for stevia seeds to germinate?
Stevia seeds typically germinate in 14–30 days, depending on temperature, moisture, and seed freshness. Warmth (70–75°F) and consistent humidity speed up the process. Patience is key—don’t give up if sprouts don’t appear immediately!
What’s the best way to maintain moisture without overwatering?
Use a spray bottle or misting system to keep soil evenly damp (not soggy). Place trays under pots to catch excess water, and avoid letting seeds dry out. A humidity dome or plastic wrap can help retain moisture until germination.
Can I germinate stevia seeds indoors without grow lights?
Yes, but you’ll need a sunny windowsill (6+ hours of light daily) or a low-cost LED bulb (12–14 hours). Without grow lights, seedlings may grow leggy. If indoors, rotate trays weekly for even light exposure.
What if my stevia seeds won’t sprout—what’s next?
Try these fixes:
- Check seed viability: Test a few in warm water—if they sink, they may still be good.
- Adjust conditions: Increase warmth (use a heat mat) or try a light soak (soak seeds 12 hours before planting).
- Consider alternatives: Stevia cuttings (from mature plants) root easier than seeds!
Are there faster alternatives to growing stevia from seed?
Propagating from stem cuttings (4–6 inches long) is faster and more reliable. Dip cuttings in rooting hormone, plant in moist perlite, and cover with a plastic bag until roots form (2–4 weeks).
Wrapping up and next steps
Mastering stevia seed germination is all about patience, precision, and the perfect balance of moisture—just like nurturing any tiny green dream! 🌱 With the right setup, you’re well on your way to growing your own sweet, zero-calorie harvest.
Now that you’ve got the know-how, why not take the next step? Start with a small batch of seeds, experiment with your setup, and watch those sprouts thrive. Soon, you’ll be enjoying homegrown stevia leaves for teas, baking, and natural sweeteners—all thanks to your green thumb!